Leave No Trace in the Alpine
By: Zack McGill
If you’re reading this, you hopefully already know some basic Leave no Trace (LNT) principles. If not, check out the Leave No Trace website to get an overview of the seven principles. This resource is meant to expand upon the basic principles and provide specific advice related to LNT principles for alpine climbing.
Why?! Alpine climbing is a bit more complex than just going for a hike, car camping, or backpacking. The environments climber’s travel (from glaciers and ice fields to craggy gendarmes) are unique with fragile ecosystems that are easily disturbed. Weight and space are also important consideration when you’re climbing with everything on your back.
So how do alpine climbers follow LNT principles while still maximizing weight savings and comfort? Let’s get into it. If you have a specific principle in mind you’d like to learn about, you can navigate to that principle with the links below:
Travel & Camp on Durable Surfaces
Plan Ahead & Prepare
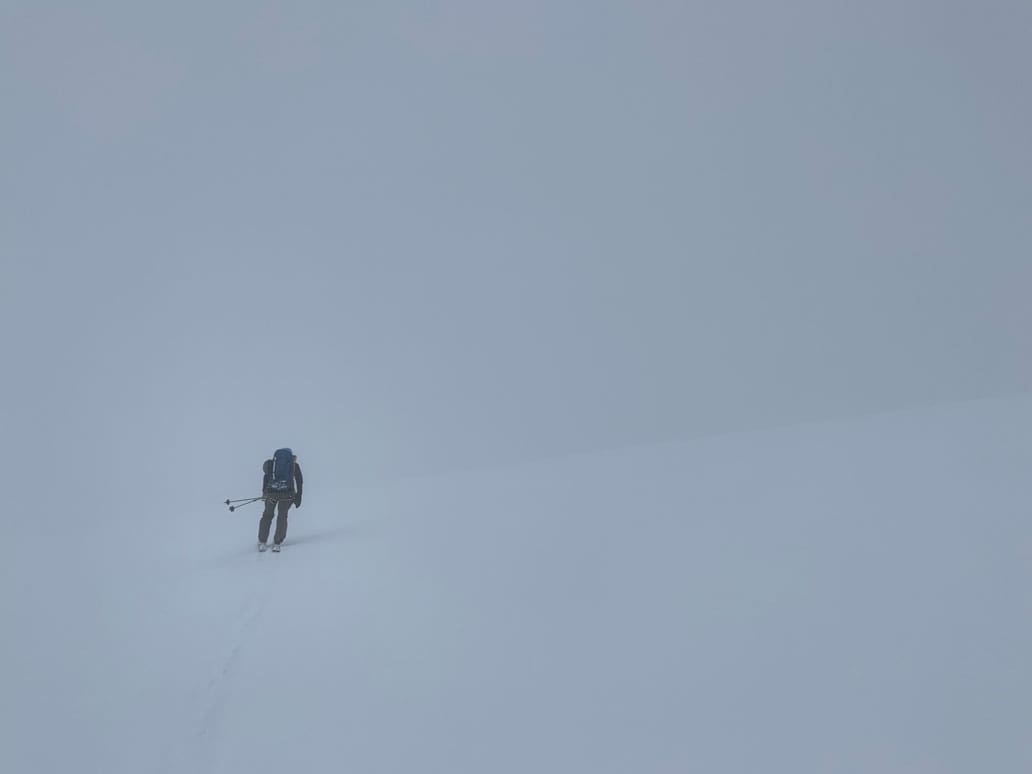
Many accidents alpine climbing as well as unintentional overnight shiver bivies could be avoided with proper trip planning. How often do you personally come up with a trip plan that includes bearings, waypoints, munter rates, and the like when you’re going to climb something new? Or does your trip planning consist of just downloading a GPX track to your phone and hoping to follow the blue dot? With so many online resources available to you, there’s no excuse for failing to complete a thorough trip plan every time you tackle a new and technical objective.

Proper Trip Plan Components
- Waypoints – Known terrain features that you’ll know when you hit them (summit, lake, road, ridge, saddle, etc.) UTMs or Lat/Long of each waypoint.
- Bearings – Compass bearing to next waypoint as well as back bearing.
- Distance – Linear distance (miles or kilometers) between waypoints (legs).
- Elevation – Difference in elevation (feet or meters) between waypoints.
- Time – How long will it take? Munter Rates: TIME = (DISTANCE [km] + (ELEVATION [m]/100)) / RATE. Rate is your rate of travel. In general, going uphill on a trail, in a boot pack, or on skis, your rate of travel is 4 units per hour. When you’re going downhill on skis, on average, the rate of travel is 10 units per hour.
If you do a good job collecting these pieces of information, you should have a pretty accurate idea of how long an alpine climbing objective will take you to complete. You’ll also have a white out navigation plan ready to go in case of inclement weather.

For specific thoughts on how to create and also use trip plans like the one pictured above, check out our white out navigation and basic backcountry navigation resources.
Other Elements to Consider
Beyond just a thorough trip plan, you’ll also need to consider other elements and potentially come up with alternative trip plans (or bail options) in case of the unexpected. Make sure to take into account:
- Weather – Thunderstorms? Windy? Hot or cold? Can a helicopter fly? We love Windy.
- Terrain – Avalanche hazard? Rock or Serac fall? Slick rock? Ice or snow?
- Regulations/Restrictions – Backcountry camping permit required? Seasonal closures for wildlife or road maintenance? Maximum group size?
- Evacuation Plan – Helicopter? Rappel? Where are good LZs?
- First Aid Kit – Proper first aid kit to handle whatever injuries you might sustain on route. For thoughts on what to carry, check out our Backcountry First Aid Kits Resource.
- Repair Kit – Repair kit to fix broken gear (broken tent pole, torn jacket, busted zipper, etc.)
- Communication – Radio? Satellite comms? Some way to communicate with the outside world in case of emergency.
Travel and Camp on Durable Surfaces
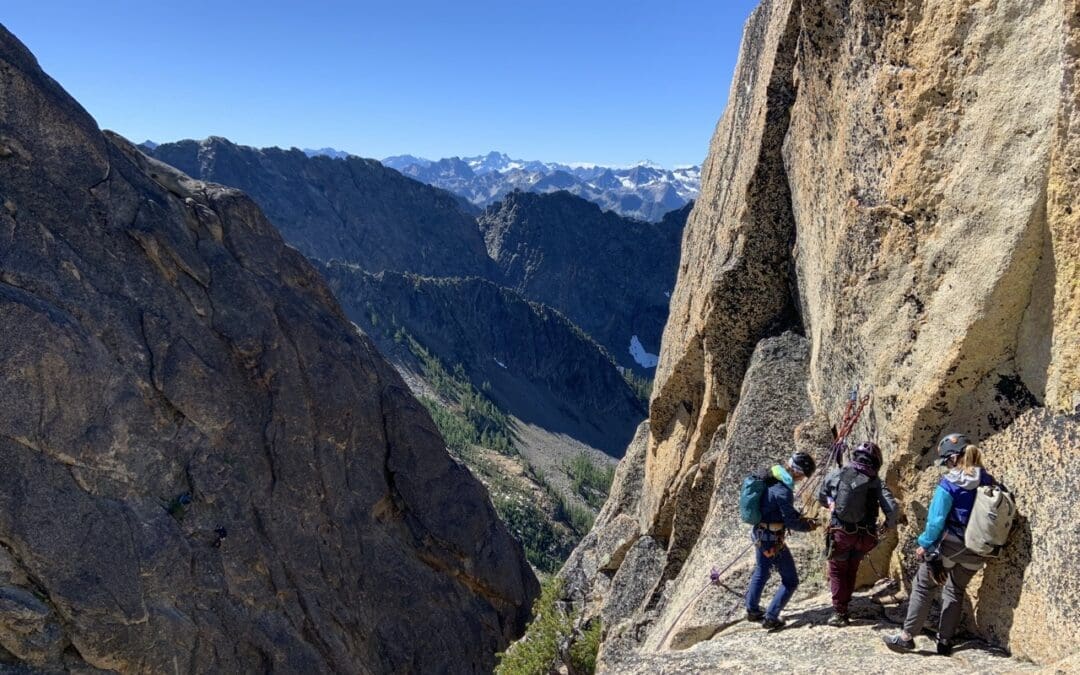
Alpine Climbing, for the most part, takes place off trail except for perhaps some of the approach and exit. The two main factors that increase how off-trail travel affects the land are:
- Durability of surfaces and vegetation – Refers to the ability of surfaces or vegetation to withstand wear or remain in a stable condition.
- Frequency of travel (or group size) – Frequency of use and large group size increase the likelihood that a small area will be trampled multiple times.
Surface DUrability
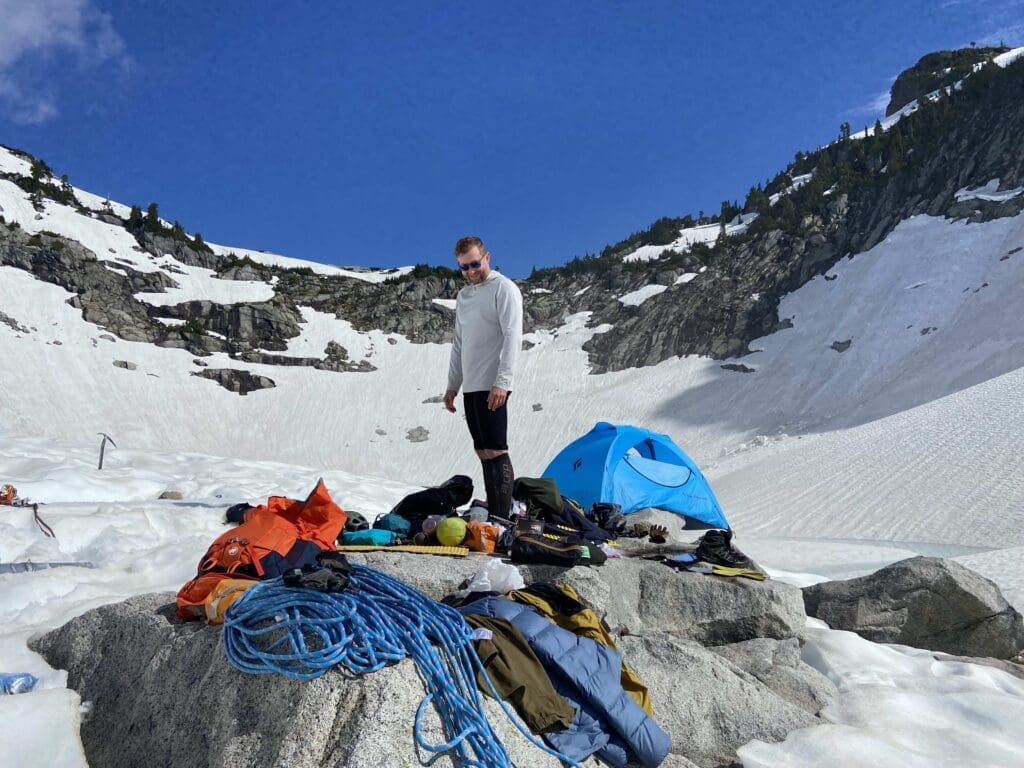
Different surfaces tolerate more or less wear and tear from climbers. Rocks (just avoid the lichens), sand, gravel, snow, and ice are all examples of durable surfaces. Vegetation and living soil, on the other hand, are much less durable.
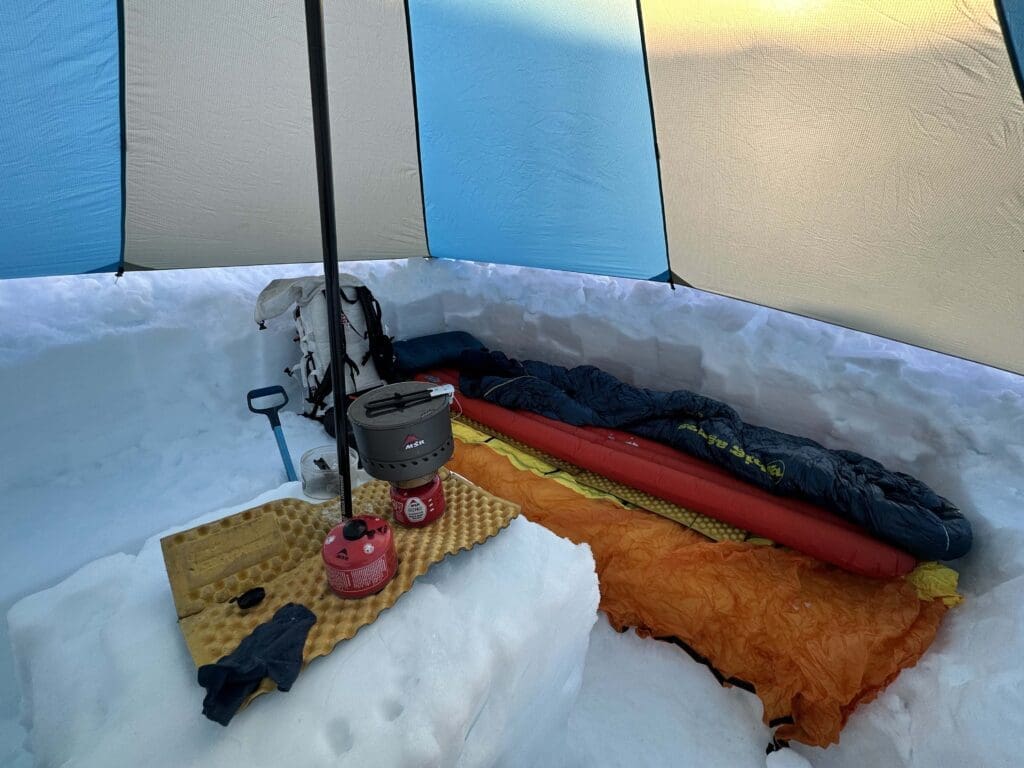
As much as possible we try to minimize our impact in pristine alpine environments by camping and traveling on durable surfaces. The most ideal medium for alpine climbing in this regard is snow, as long as there’s sufficient depth to prevent damage to any vegetation underneath. It’s a temporary medium, so your affect upon it is also temporary. You can also sculpt it to fit your needs. Want a kitchen table and a bench? Just dig it out.
Social Trails
If you’ve traveled much in the mountains, you’ve probably heard the term “social trails” before to describe unofficial trails created from the repeated trampling of vegetation and land by humans. Common social trails lead to common poop spots, water, and up to the base of routes (climber’s trails).
For alpine climbing, if a route is popular at all (and even if it isn’t) there’s typically some sign of the humans that climbed before you: Lichen brushed away on the rock, footsteps in the dirt, or mounds of rocks (cairnes). These things aren’t bad in and of themselves. You’ve got to get to the climb somehow!
The problems come when there are multiple social trails leading to the same place. Which one do you take? Or, the obvious social trail ends and you’re left to route find yourself, potentially creating a new social trail that may not go in the most efficient way. At these decision points, there are often tons of competing cairnes scattered about, but which pile of rocks is helpful and which is just a human made rock fall hazard?
Cairnes
Cairnes are excellent route finding tools if used intentionally and minimally. They create a hazard and eyesore if used too much or placed in precarious places. Piling a mound of rocks in a place that could easily topple over and cascade down the climbing route is all too common. It’s okay to forego a cairne and let folks route find on their own instead of placing a cairne in a location that could injure or kill somebody.
If there are dangerous cairnes on route, or just too dang many, it’s okay to safely dismantle them. This will hopefully avoid confusion and injury to other parties. In short, leave cairnes in the most important spots (like to mark the rappel or where you need to go over to the opposite side of a ridge). Lose the rest.
Anchors and Tat
It’s common in areas that don’t allow new bolting (like most US National Parks) and remote terrain to come across large rats nests of “tat” anchors. These anchors are boulders, trees, pitons, or pinches with numerous slings, cordage, and/or webbing threaded through or around them.
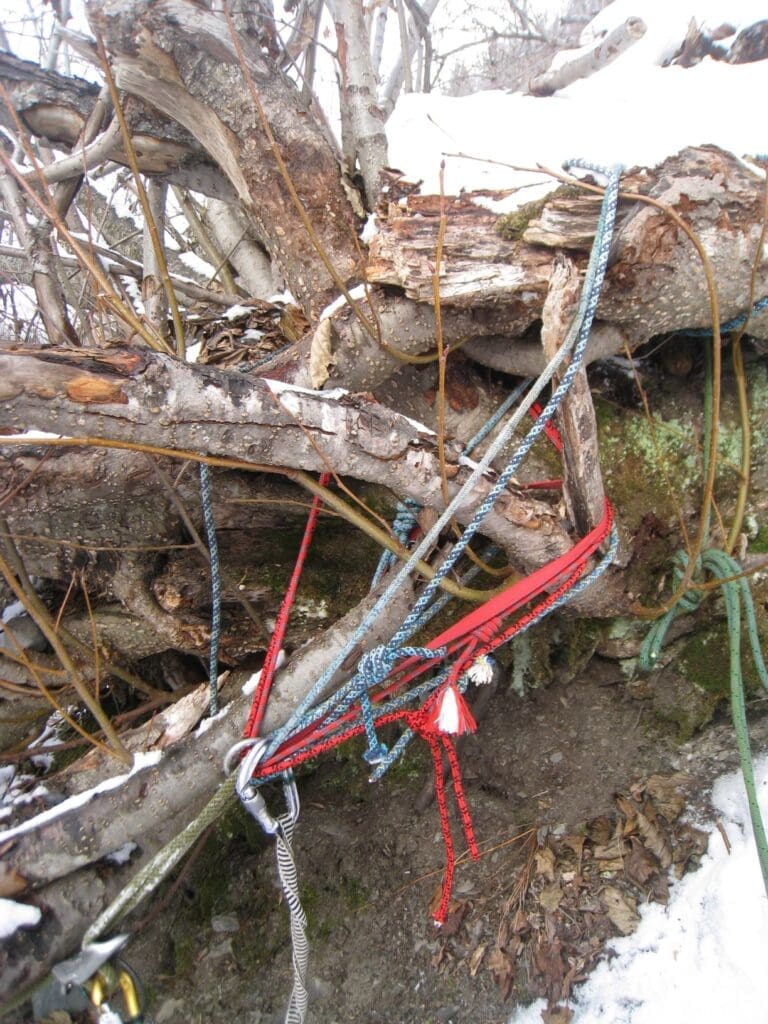
These “tat” monster anchors of various colors of material are created as climbers wishing to use the anchor don’t trust the existing material and then add their own to “back up” the existing anchor. Instead of adding another layer to the “tat” onion, it’s best practice to cut out “tat” that’s obviously old or worn and pack it out. Then, put on new material. If the materials is sun faded, stiff, has frays or rips in it, or otherwise looks suspect (or “suss” as the kids apparently say now), just take it out.
Obviously, it’s best if you don’t leave behind anything. That’s the true alpinist style. Utilizing SLCDs or stoppers you can take out after you use them rather than hammering in pitons has become the norm. Sometimes, however, you’ve got to bail or rappel down a route. Even if you’ve done a great job planning ahead, the mountains are a harsh environment and “shit happens.”
If you have to bail off of a climb and need to establish a new anchor, make it bomber and tidy, not just for your sake, but for others that may come after you.
Dispose of Waste Properly
Disposal of waste pertains to any garbage, trash, empty fuel canisters, wastewater, and human waste you create while out in the mountains. Packing out everything you carry in and any garbage you create is the gold standard of the alpinist ethic, but that’s not always possible or desirable. For instance, an anchor you build to bail off a climb (as talked about above) or your urine. You aren’t going to carry your pee out are you? Wait… are you?
Human Waste
Let’s tackle the elephant in the room first… human waste, or, more specifically, feces, urine, and disposal of hygiene products.
Cat Holes and Wag Bags
Unfortunately for alpine climbers, digging a cat hole to poop in is not acceptable in the alpine environment. There is just not enough organic soil to break it down. Or… you’re up on a glacier and if you just poop in a hole in the snow and cover it with snow… what do you think happens when the snow melts? Yeah, your poop is now on the surface. So gross. Some old timers swear by the “alpine smear” where you literally smear poop thinly on sunny rocks so that the sun breaks it down, but dear God… don’t ever do that. That’s just plain nasty.
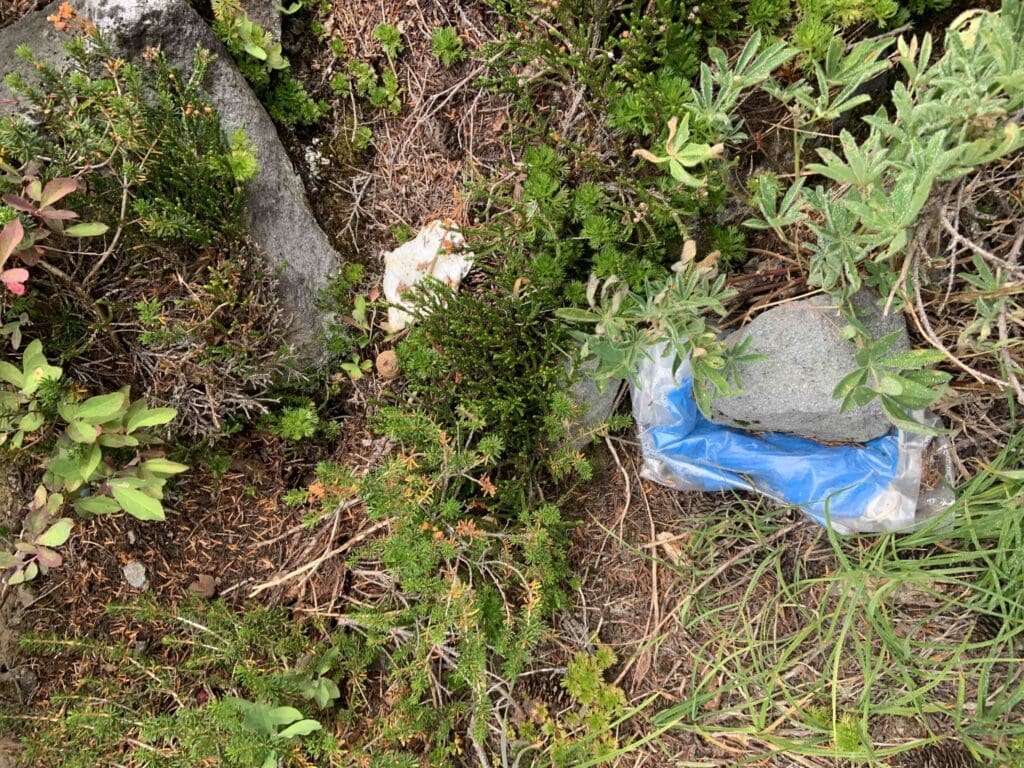
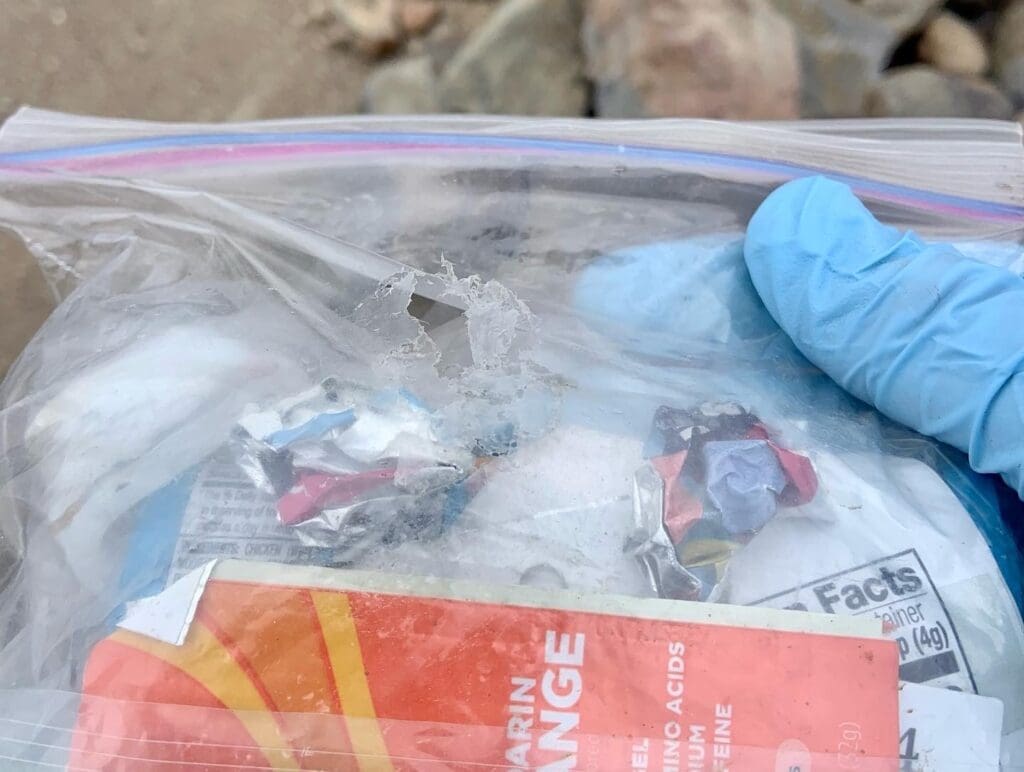
Instead, we’re left with the strange, but necessary option of pooping into a bag to carry it out of the mountains. There are several EPA-approved, commercially produced poop bags (Wag Bags) now. All work fine, but our recommendation is the Cleanwaste system. It’s good for multiple uses, big enough that you aren’t going to miss, and it’s got that magic pooh powder that turns even nasty poops solid. Just remember:
- Wag bags are direct deposit. It’s not like picking up after a dog, just go directly into the bag.
- Roll down the bag so you have a clean edge to hold on to.
- Anything that touches poop (toilet paper, wet wipes) goes in the bag.
- Store the bag where animals cannot get at it and in a place you won’t forget it.
Storage of Waste
It’s all too common for raven, mice, or other animals to find Wag Bags and tear them open. That’s a bummer for everyone involved. Or, folks hide them so well that they forget to pick them up when they leave. I’ve packed out more blue bags from other folks than I care to think about because they were left behind for someone else to deal with. Some storage techniques that work well:
- The simplest option that I employ most the time is to just place the used bag underneath my tent body outside the tent in a place that I’m not going to crush it (usually down at my feet). That way it’s protected from critters and you can’t forget it! As soon as you break down your tent… there it is!
- Carry up an empty paint can to store used Wag Bags for the team. Animals won’t be able to get at them and it will keep them contained in plain sight where you can’t forget them. This works well on climbs where you’re base camping… not so much if you’re climbing a big route and need to carry it all with you.
- Similarly, you can make yourself a “poop tube” out of PVC pipe to store used Wag Bags. This is a bit heavier, but fits more bags, and packs a bit better on the pack than the can. Great for longer missions on glaciers.
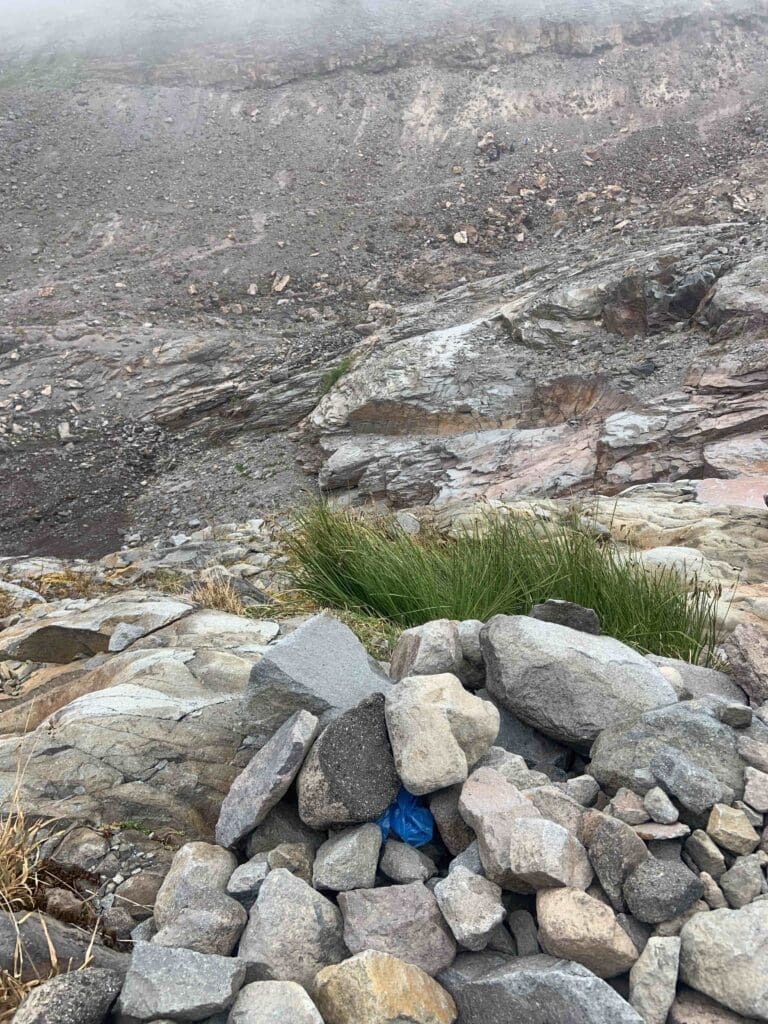
- Building a rock prison or cairne around your Wag Bag can sometimes work alright, but there are some considerations. First, you’ve got to be careful not to rip your bag with the rocks. Then you must make it covered enough even small critters like mice can’t get at them, but also not forget that it’s there! So many folks forget them because… out of sight out of mind, right? If you employ this strategy, make sure to place something on top of the cairne (like a trekking pole, water bottle, or other physical marker).
Urine and Hygiene Products
For Urine, do not pee in the Wag Bag! You don’t need to carry it out. That said, though it has little direct effect on vegetation or soil, it’s chock full of salt. If you’re in the alpine, many animals crave salt and will dig at anything you pee on. It’s best practice, therefore, to pee on rocks, pine needles, gravel or other more durable surfaces to avoid mountain goats, sheep, or other critters from defoliating plants and digging up soil.
Lastly, similar to toilet paper and wet wipes, tampons must also be placed in bags and packed out. They shouldn’t be buried because they don’t decompose readily and animals may dig them up.
Other Waste
Any other waste you create out there should also be packed out. This includes leftover food, wrappers, used fuel canisters, and… well everything! Wastewater is the exception, but larger particulate/food matter should be strained out and packed out before scattering the wastewater on a durable surface (similar to pee). Don’t want critters trying to dig up your Mac and cheese water.
Also, similar to used Wag Bags, trash bags need to be stored correctly so that animals can’t get at them. Keeping garbage contained in plastic bags and then inside ursacks or bear barrels works well.
Leave What You Find
This is an interesting one for alpine climbing. The thought behind this principle is that others should be allowed the same “sense of discovery” by leaving rocks, plants, archaeological artifacts and other objects of interest as you find them. This means not taking that cool rock to memorialize your climb or carving your initials into that tree. Remember that guy who wrote in sharpie every time he soloed the First Flatiron in Boulder, CO? I do. Not cool guy.
However, rather than leaving everything exactly how you found it, in alpine climbing, it’s sometimes a good thing to dislodge and remove rocks or other features that are ready to fall down in order to make routes safer for you and others. In addition, to bring up the cairne topic again, it’s sometimes alright to stack some rocks up at a key location so that you and others can navigate to that spot more easily. Yes, this removes some of that “sense of discovery”, but safety trumps that in my book.
That said, in the alpine climbing world, old pitons and jagged bits of metal still smashed into the rock from first ascents of years past are considered historical artifacts and let be. In many areas, drilling new, more modern, and inarguably safer bolts are not allowed. There are numerous accident reports here in the Cascades on peaks like Forbidden where instead of a bolted rappel line that is different than the climbing route, climbers are forced to maintain disintegrating “tat” anchors in loose gulleys.
Hopefully safety trumps NPS dedication to this romantic idealism. I am a proponent of folks (with logical limits) to bolt high use routes for safer descents. A couple bolts are way less of an eyesore than years of tat and way safer than rappelling on whatever those before you left you to find. The debate rages on…
Minimize Campfire Impacts
This one is pretty simple for alpine climbing because you’re typically camping above tree line and building a fire is a moot point. That said, sometimes you get the luxury of base camping lower and climbing higher, or you badly need to warm up in an emergency situation.
Here’s a few considerations:
- Should you even build a fire to begin with? What is the fire danger? Current restrictions? Is there already an established fire ring, or would you damage the area creating one?
- If you decide it’s appropriate to build a fire, use existing fire rings rather than building your own if they’re available.
- Use dead and down wood already broken off of trees. Even dead trees (still standing or down) are homes to all sorts of critters, increase water holding capacity of the soil, and recycle nutrients back into the environment as they decompose.
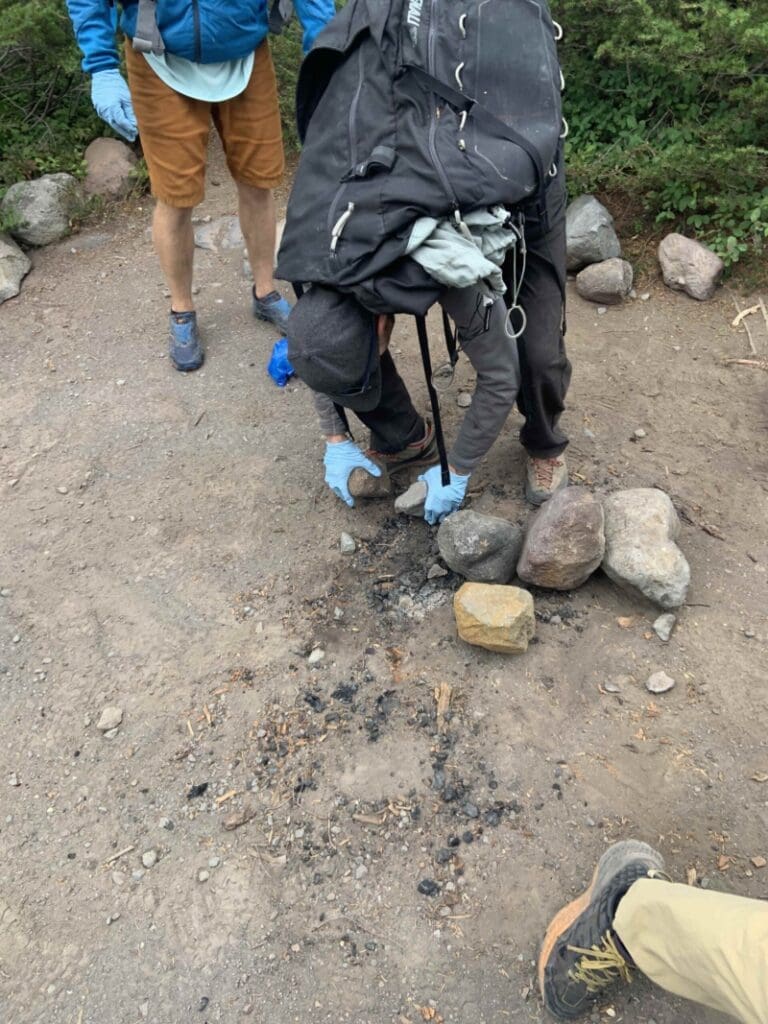
- If you created the fire ring, break it down when you’re done and scatter the ash over a large area away from camp. Scatter unused wood to keep the area looking natural.
- Never leave a fire unattended and thoroughly extinguish it before you leave.
Respect Wildlife
Wildlife in the alpine environment is worthy of respect not just because of what you can do to disturb or harm them, but also what they can do to disturb or harm you. Bears, mountain lions, wolves, wolverines, elk, moose, mountain goats, pika, marmot, pine martin, fox, cayote, ice worms… the list of animals that frequent the alpine is long. Below are some considerations for respecting wildlife.
Distance
Keep your distance from wildlife. Startling animals can cause them to react unpredictably. Climbers have even been killed by aggressive mountain goats in consequential terrain. Washington Pass here in Washington has many goats that share the same cliffs climbers frequent. I’ve had to yield completely to mountain goats making their way along the same narrow ridges as myself in order to not be knocked off. In general:
- Avoid quick movements.
- Avoid loud noises (these are stressful to animals). Exceptions to this are in bear country where you don’t want to startle a bear by sneaking up on it. Grizzly bears in Alaska will travel all the way up onto glaciers and ice fields high in the alpine.
- Do not touch animals. Beyond them potentially biting, pecking, trampling, or scratching you, they could also give you rabies or other diseases. Touching young animals could also cause their parents to reject them, leading them to die like that young buffalo in Yellowstone.
Food Storage
Human food can harm the health of wildlife, change their habits, and lead to future human-wildlife conflict. As mentioned before, proper food and scented items (toothpaste, toiletries, meds, etc.) storage will ensure that animals cannot access those items.
In the alpine, you typically are above tree line. This makes critter or bear hangs impossible. Instead, ursacks are the go to since they are lighter weight and more packable than bear barrels. If packed and closed correctly, they offer similar protection, except that bears can certainly crush the contents inside if they want.
Water Sources
Yes, it makes for a pretty neat picture or video for the tik tik or instagrams (that’s how you say that stuff, right?) to camp right next to water sources like an alpine lake. Unfortunately, that doesn’t allow animals free access to that water source. Typically, camps should be 200′ or more away from water sources to maintain this buffer space.
In addition, any washing or human waste should take place well away from any water sources to ensure that water does not become polluted. Swimming in cold, alpine lakes or streams is fine from a contamination perspective, but it’s best to leave scarce water holes undisturbed.
Respect Other Users
The final LNT Principle is to respect other users (humans) out there and their experience. Many different user groups utilize the same land for different purposes. On approaches to climbing objectives, you could encounter hikers, hunters, backpackers, trail runners, horse packers, mountain bikers, or other climbers. All user groups have just as much a right to utilize the land for their purposes as you.
General Guidelines
Here are some general guidelines for backcountry travel:
- For narrow trails, uphill traffic has the right of way.
- Hikers yield to equestrians. Move off trail to the downhill side and speak quietly.
- Bicycles yield to hikers and equestrians.
- Limit excessive noise like music or yelling.
- Keep control of pets/service animals and clean up after them (pack out that poo!). Also, some areas don’t allow pets of any kind.
- Take breaks on durable surfaces OFF the designated trail.
- Wear earth toned colors for clothing and for tents to limit your visual impact. *(see below)*
Alpine Climbing Specific Guidelines
In the alpine climbing context, there’s some more specific considerations that fall in this category:
- Wear bright colored outerwear so you are highly visible and can be seen. Unlike the general guideline above of limiting your visual impact, in alpine climbing, you want to be easily seen. In case of an emergency or body recovery (bleak, I know) you want to make it as easy on searchers as possible to find you. It’s also great for other climbers to know where other people are around them
- Help others in need of medical aid or rescue. Your own ambitions to summit or send a route are unimportant if a party near you needs help. Often in alpine climbing you are away from medical care and resources are limited. If you were injured and in need of assistance, you’d want others to help, right?
- Pass on the downhill side and don’t cross over another team’s rope. If you’re going to pass another party in consequential terrain (like rope teams on a glacier) communicate first to ensure that the other party is comfortable with the pass. Then, pass on the downhill side so, if your team falls, you do not floss the other team off the mountain.
- Don’t blindly throw your ropes at rappels if other users are below you. Instead, saddle bag the ropes and only release them once you’re sure they won’t cause any harm to other climbers. If you’re in terrain with lots of loose rocks or it’s windy, saddle bag your ropes anyway to avoid accidentally causing rockfall that could injure others or get your rope(s) stuck, which is a bummer for everyone.
- Provide conditions and route beta if asked. At the end of the day, the goal is for everyone to make it home unharmed and alive. If you have some specific beta on hazards to avoid that would help others stay our of harm’s way, share that information, but don’t be pushy if folks don’t want to listen. People have different risk tolerance levels and it’s their prerogative to make their own decisions out there.
- Stay organized. Whether at breaks on the trail, in camp, or at the belay, avoid being a junk show. Keep your scene dialed and tight so others can easily pass if needed and you’re not such an eyesore taking up space.
- Respect all rules and regulations. This requires you to know the rules for National Parks, BLM, and/or the U.S. Forest Service and follow them! Climbing on public lands is a privilege that shouldn’t be taken for granted. Losing access because of carelessness or laziness would be devastating to the climbing community.
Final THoughts
As you can see, a lot is wrapped into leave no trace principles for alpine climbing, and this list is hardly exhaustive. If you have thoughts on this topic or things to add, feel free to reach out! We’d love to hear from you. As always, if you’re curious about other topics in this same vein, check out our Alpine Climbing Guide.