The Alpine Climbing Guide
By: Zack McGill
Alpine climbing, though centuries old, is a sport in constant flux as the tools, ethics, and environment itself change. It’s a tough arena to claim mastery over since the mountains themselves are the gatekeepers to our successes or failures. Time and time again we are reminded of our own fragile existence when another “master” dies in the mountains from avalanche, rock/ice fall, or some lapse in judgement that proves that even masters make mistakes. The mountains don’t care if you’re perfect. You can do everything “right” and still end up leaving behind a wave of grief for those that survive you.
As with every sport, however, there are rules to follow, techniques to employ, and strategies to improve your margin of safety. At the end of the day, one can also just choose simpler objectives with less objective risk. Let’s be clear… you can never get rid of ALL risk in alpine climbing, but you can certainly get close. We’ve created The Alpine Climbing Guide to help you on that journey.
At Cascade Mountain Ascents, we believe that open communication, collaboration, and education are the keys to enjoying the outdoors responsibly and safely. This Alpine Climbing Guide will:
- Provide a path to build the expertise required to enjoy alpine climbing and increase safety margins.
- Be a resource for experienced climbers to brush up on the latest and greatest.
- Be a living document that will constantly update as things progress in the industry.
We hope reviewing this resource at the start of each climbing season becomes a part of your ritual.
How to Use The ALPINE CLIMBING GUIDE
This resource is broken down into five sections:
- Types of Alpine Climbing (What is possible?)
- Gear (What do I need?)
- Skills/Techniques (How do I do it?)
- Planning Resources (When and Where do I go?)
- Continuing Education (How do I get better?)
In each section, a summary greets you with some of the most important components of what is being discussed and a link to a more in-depth resource on each topic. All of us at CMA come from outdoor education backgrounds, so the information is not only useful… but hopefully engaging. In each resource we provide links to articles, videos, and blogs if you really want to tumble down the rabbit hole of learning.
How you navigate The Alpine Climbing Guide is up to you and your learning process. You want the easy to digest summary because you’re new to alpine climbing? You’ll likely not stray far from this resource. If you are versed in anchor systems and have years of experience sending hard routes in big terrain, you probably stopped reading this at the sections links and are on to whatever specific thing you came here to look up. You do you Boo-Boo.
Oh, and if you don’t see something in this resource that you want to learn more about, please let us know. We’re psyched to answer your questions. For real… email us. Please. Please do it.
Much love,
The Collective at Cascade Mountain Ascents
Types of Alpine Climbing
(What is possible?)
“The best alpinists are the ones with the worst memories.”
– Jimmy Chin

what’s Makes it Alpine?
First off, let’s differentiate alpine climbing from rock climbing. Alpine climbing sometimes involves rock climbing, but the primary aim is often to reach the summit of a mountain. Mountains in and of themselves create a plethora of objective hazards that pure rock climbs don’t necessarily deal with. Often, alpine climbs have some sort of ice, snow, or glaciated component that increases complexity as you’ll need tools and the expertise to deal with frozen water in its various forms. Crampons, ice axe or ice tools, and snow/ice protection along with avalanche safety equipment (beacon, shovel, probe) can become heavy additions to your kit. Many alpine objectives can take several days, weeks, or months to complete as well, necessitating expertise in campcraft and expedition living.
In general, we can break alpine climbing into four categories: Glacier Mountaineering, Alpine Rock Climbing, Ice Climbing, and Mixed Climbing. Some alpine climbing objectives can have just one of these elements, but others all four.
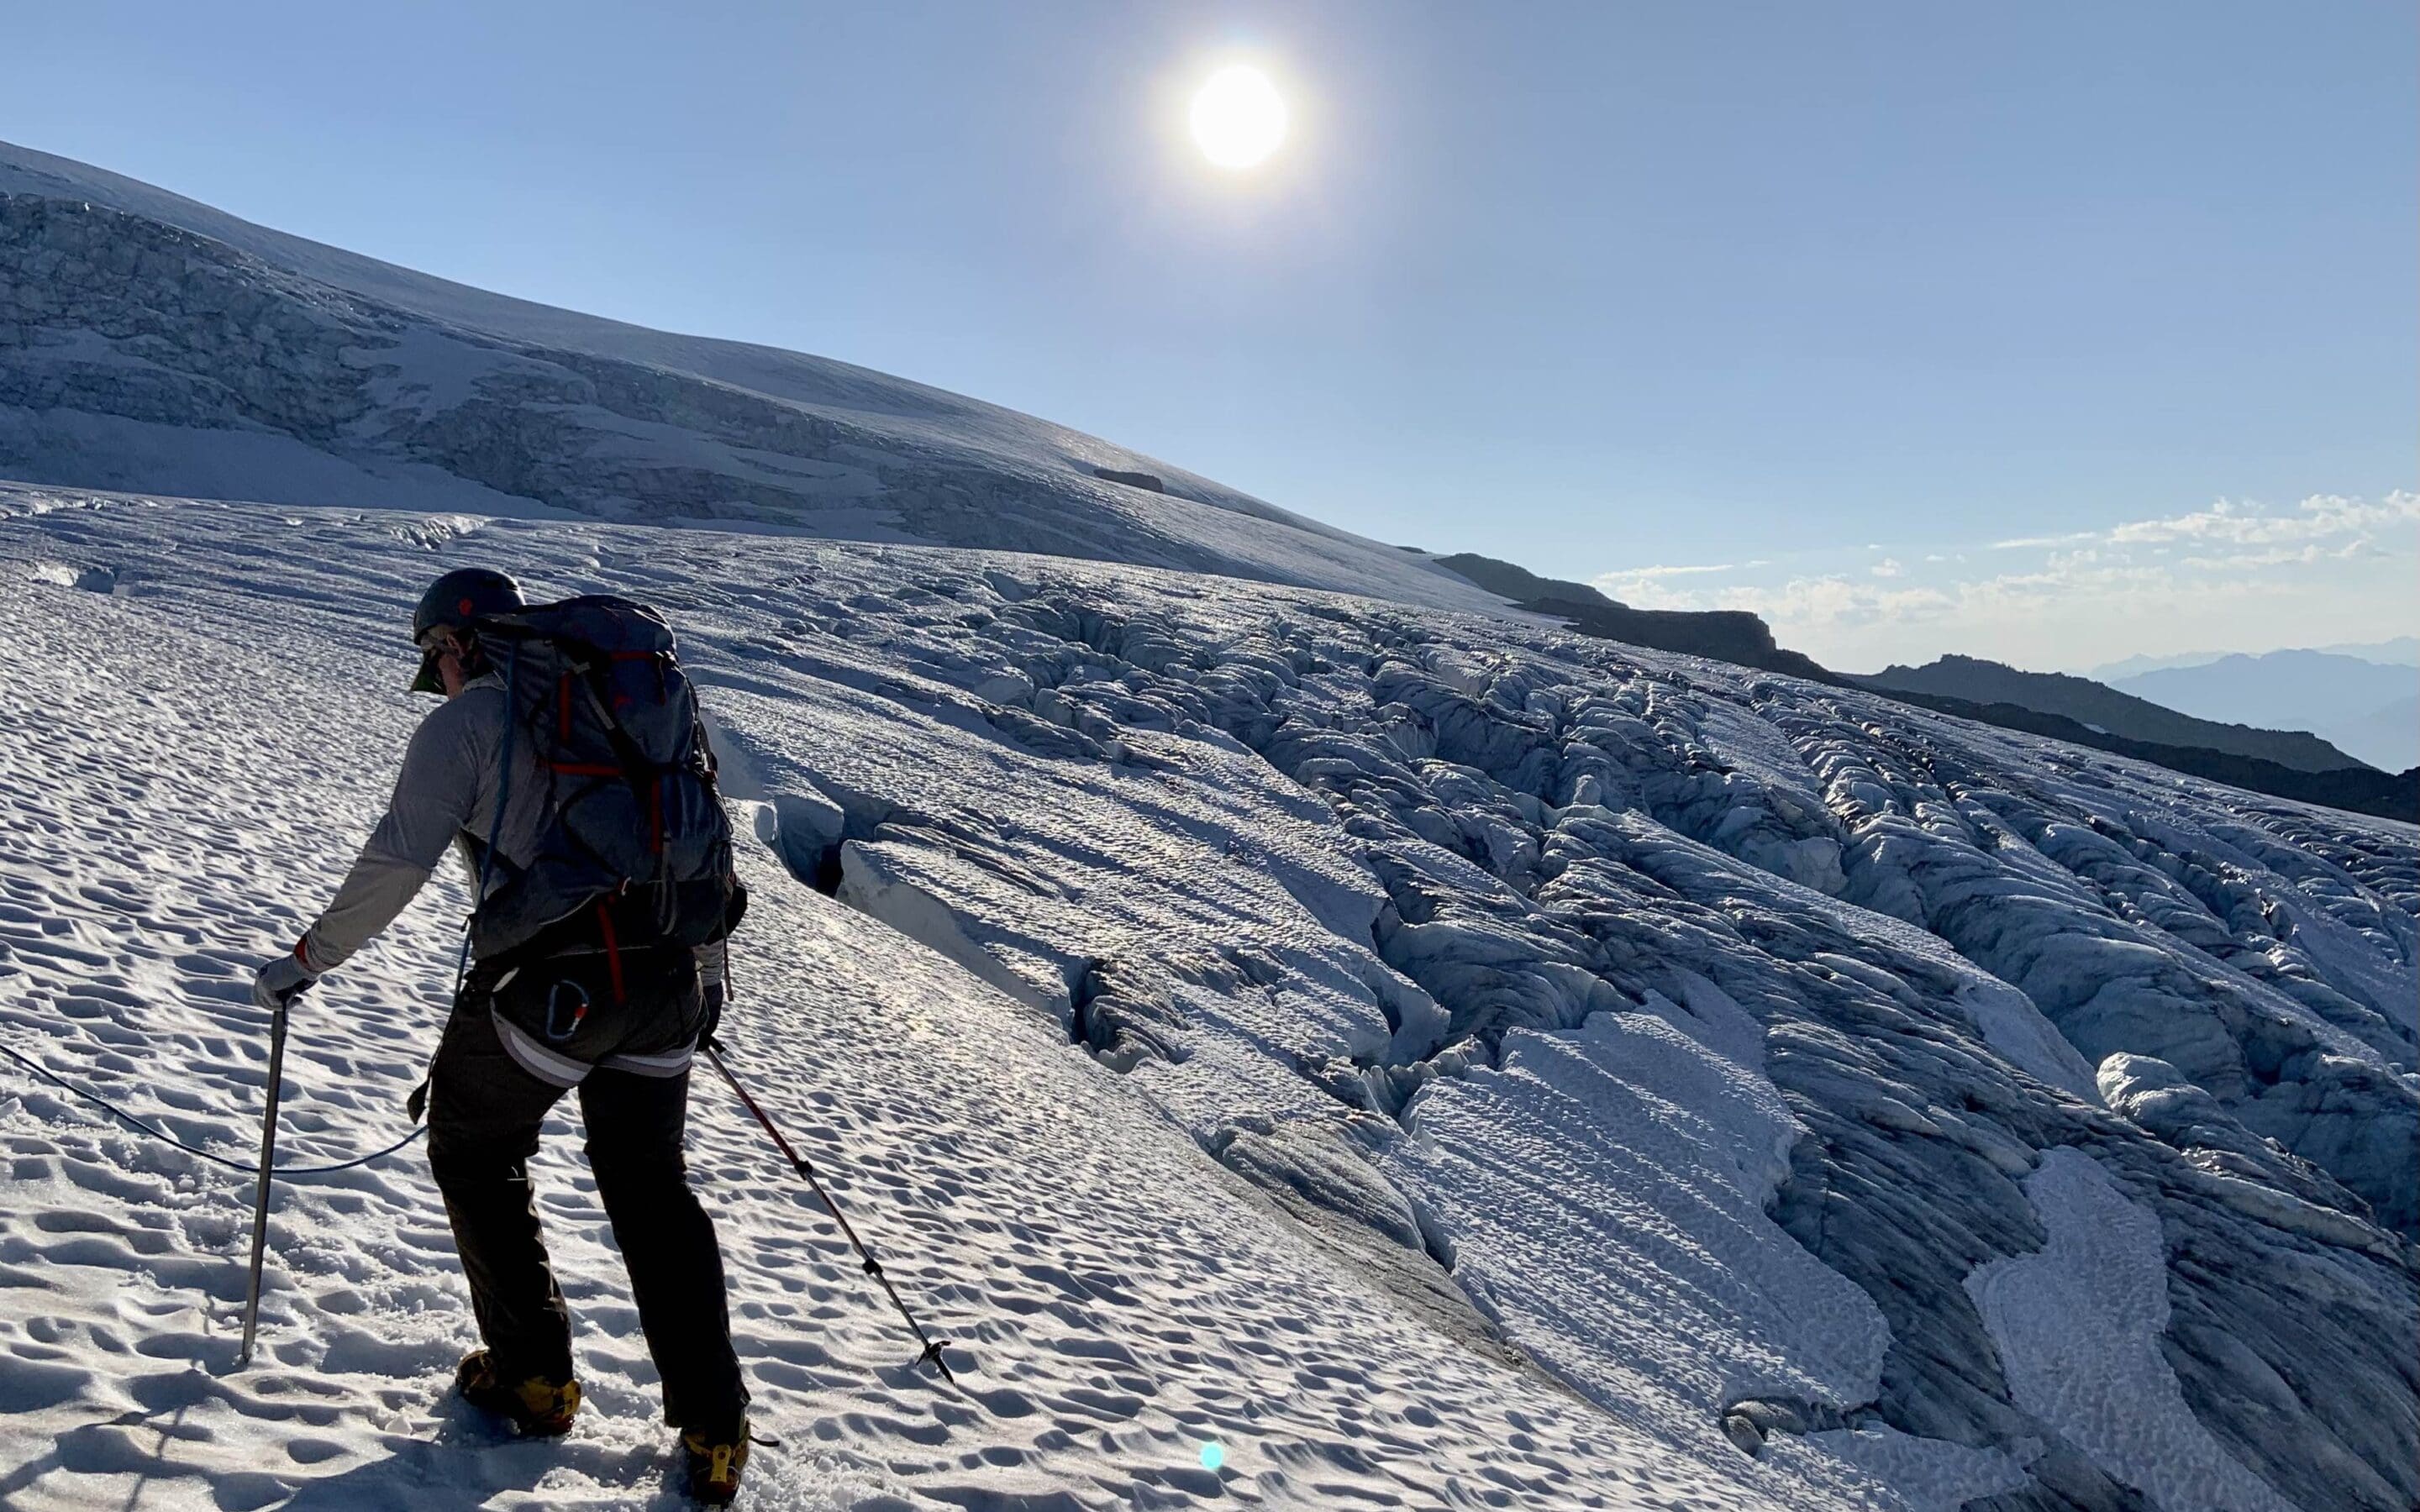
Glacier Mountaineering
Glacier Mountaineering is one of the most popular forms of alpine climbing in that it typically doesn’t involve the need for advanced movement techniques or a high level of upper body strength. That is unless you’re a badass para-athlete like Vasu Sojitra or Anna Soens who tri-cep dip their way up high peaks and then ski down. Respect! For all you able bodied humans, as long as you’re reasonably fit and avoid falling in a crevasse, glacier mountaineering is relatively straightforward on the physical side of things. Just strap on some crampons and keep walking uphill.
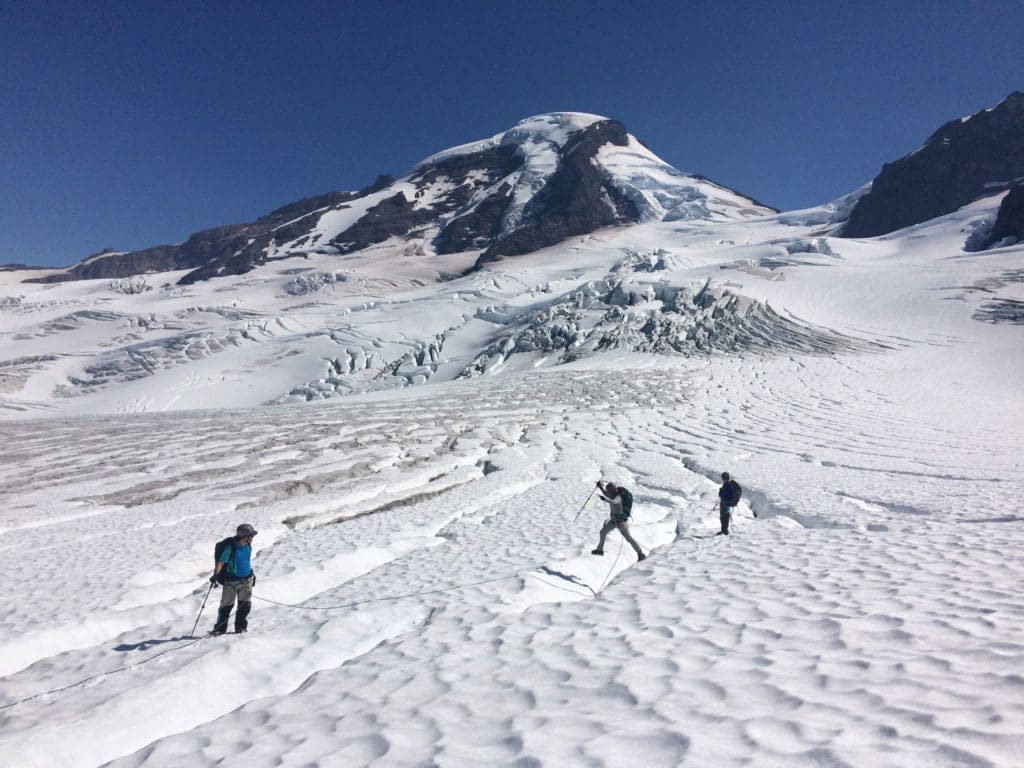
The complexity of glacier mountaineering comes from the terrain itself. Crevasses, seracs, and ice falls are objective hazards that create uncertainty around route choice. Navigating on a glacier (especially in a whiteout or late season) can be a tough puzzle to solve! To deal with this uncertainty and increase safety margins, humans developed a variety of tools and rope systems to ensure that the team doesn’t fall into or off the mountain. If someone does fall into the mountain (crevasse) we then have rescue techniques to pull them back out. More on that later.
Alpine Rock Climbing
Alpine rock climbing, as stated before, is most simply rock climbing in the alpine environment often with the goal of summiting a mountain. By being in the more complex mountain environment, however, more objective hazard and terrain complexity exists than with your standard rock climb. Approaches and the routes themselves for alpine rock climbs are often longer and more variable, higher in elevation, and involve more complex ascents and descents in regard to terrain configuration. Where most rock climbs start at the bottom of a cliff or face and then climb to the top or fixed anchor where one can then walk back down, rappel, or lower, alpine rock climbs often traverse ridges and/or climb up and down gendarmes. Sometimes you even reverse the route the way you climbed up, leading you to climb up what you maybe rappelled down earlier in the day. In short, the routes are less straightforward, and one needs advanced, navigation, rope, and belay techniques to move through the terrain efficiently.
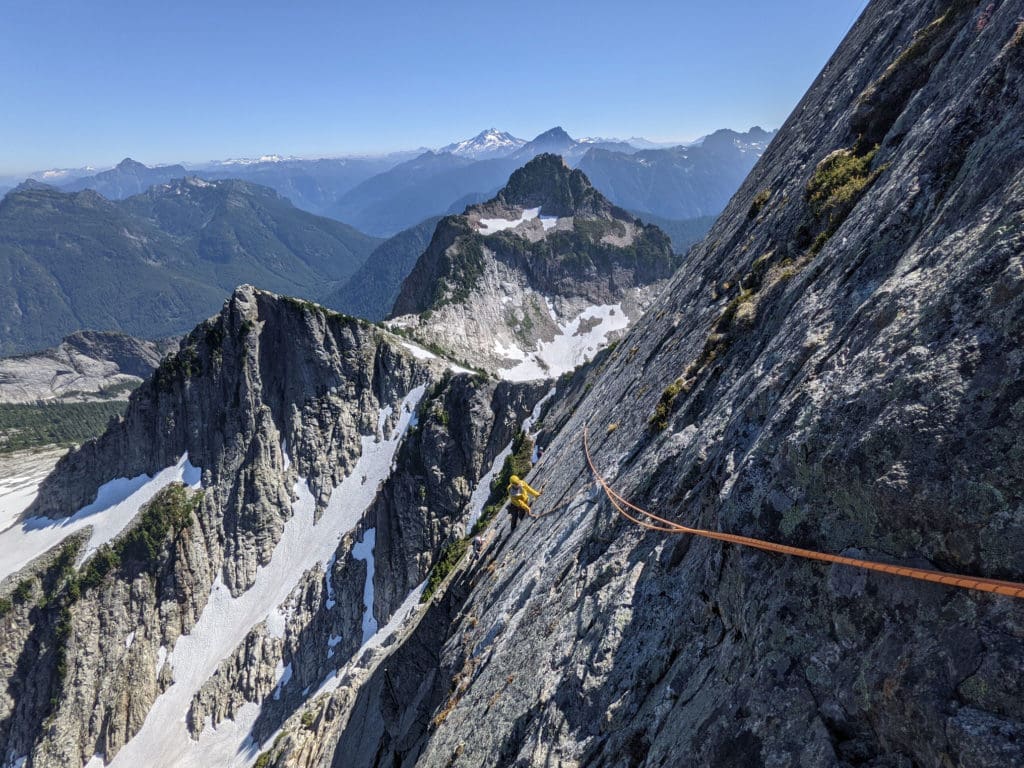
Alpine rock climbing nowadays is often done “free.” This means that individuals climb without the assistance of devices such as pegs placed in the rock (via ferrata) or pulling or standing on gear (aid climbing) and make upward progress under their own strength with ropes and gear only there to catch them if they fall. This is completely different from “free soloing” where individuals climb un-roped with no margins for error. When free soloing, a fall means death or very serious injury. Very few humans do this, but ,thanks to Alex Honnold, there’s a lot of worried parental units out there that think their climber kid is INSANE. That said, alpine rock climbing can of course be done free solo or by the use of pulling on gear (aid). It all depends on the level of ethics/risk you prescribe to.
For instance, although pitons or other fixed gear are sometimes used, nowadays the alpine style and ethic dictates that you try not to leave anything behind in the mountains. All gear placed by the leader is picked up by the members of the team that follow. Exceptions to this are, of course, made for safety reasons. If a lightning storm is bearing down on you, it’s okay to pull on some gear (aid climb) if that will speed up your ascent, or bail (rappel) on an anchor that you must leave behind. Hopefully the next folks up the route will retrieve the gear for you. At the least, they’ll likely take it out of the mountains and absorb the items into their own rack. Booty for the bold.
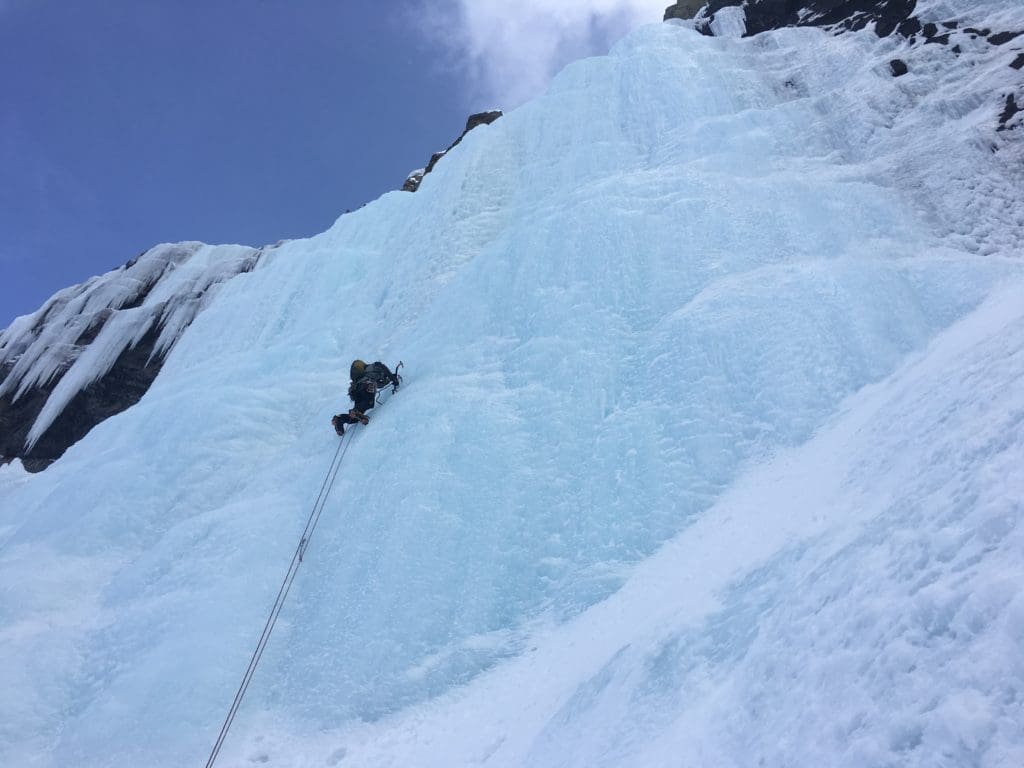
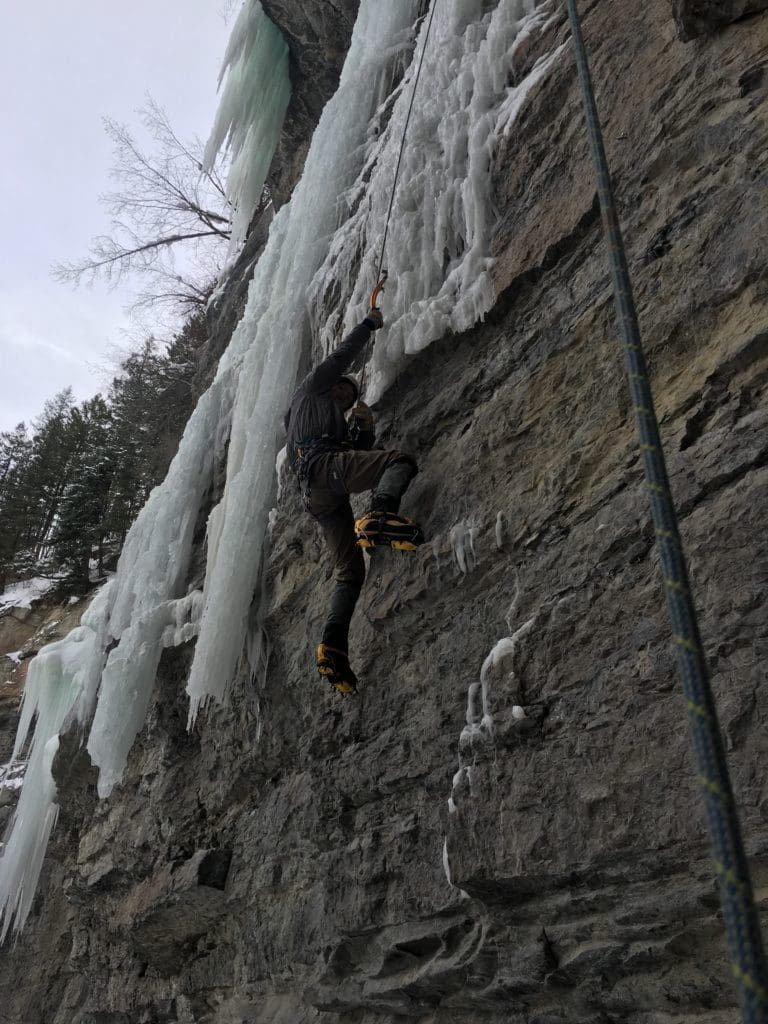
Ice Climbing
Ice climbing is the ascent of frozen, ice formations. It is broadly divided into two camps: alpine ice and water ice. In the realm of Alpine Climbing, we’re usually talking about alpine ice (frozen precipitation) since it is found in the mountains where avalanches are a thing, has an approach to reach, and is often climbed in order to summit a mountain. Water ice, on the other hand, is the frozen liquid flow of water and is usually found on a cliff or other outcropping where water typically flows. There can certainly be water ice in the alpine, though. The North Ridge on Mount Baker is a classic alpine climbing route of the PNW with two short water ice pitches in the middle of a massive alpine ice route.
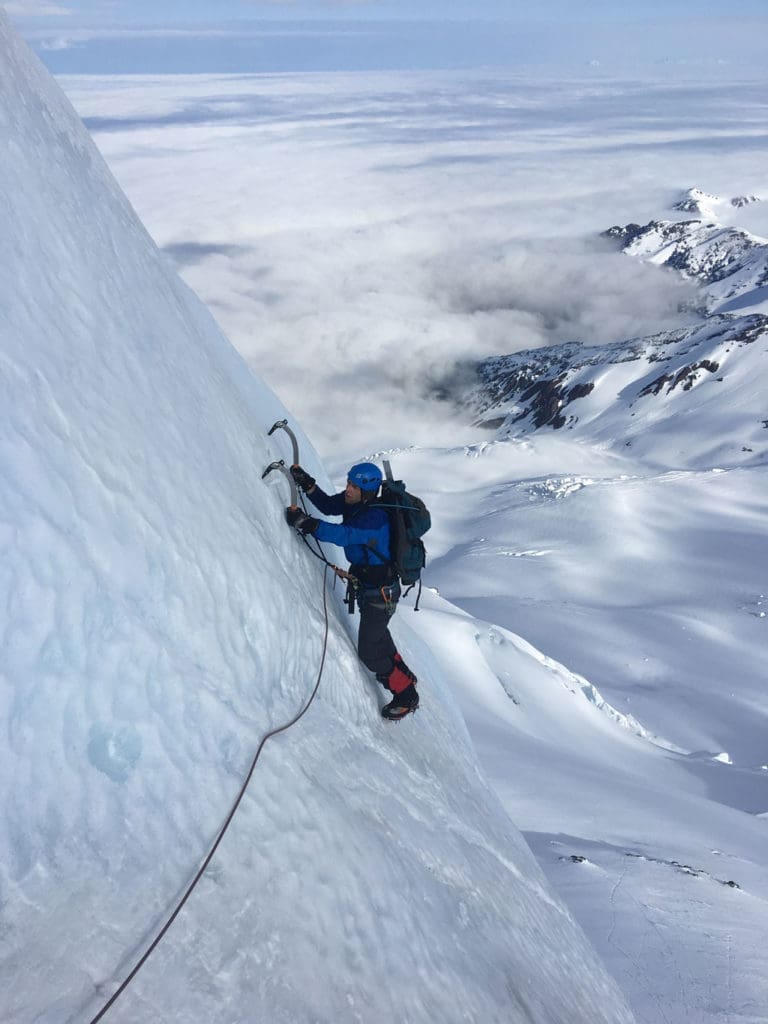
Ice as a medium is more finnicky than rock. It can be brittle at very cold temperatures or soft when it’s warmer, thin or delaminated in some areas, or just plain hard. An ice flow that you climb in the morning on a solar aspect can come crashing down hours later when it gets hit by the sun. Though mass wasting events on climbing routes are becoming more common, you typically don’t have to worry about the rock wall falling down on you while you ascend. When the ice is good, however, it’s incredibly strong.
Water Ice (WI) and Alpine Ice (AI) climbs are rated on scale. You can substitute WI for AI if it’s there year-round. AI climbs are often easier than their corresponding WI grade.
WI-1: No tools required to climb. You can just walk up in crampons.
WI-2: Good protection, tools required in some areas.
WI-3: Sustained climbing with good rests and protection.
WI-4: Continuous steep or vertical ice broken up by occasional rests.
WI-5: Long, vertical, strenuous ice offering few good rests.
WI-6: Highly technical, long, and vertical (sustained near 90 degree ice), with no rests.
WI-7: Long, technical, and on bad, thin, poorly bonded ice. Protection is impossible or very difficult to place. 5.15 would be a comparable rock grade.
WI-8+: No idea… Consistent, over-hanging climbing on incredibly bad ice? Only a handful of humans are climbing here. No thanks!
These grades give you a rough idea of what the climbing will be like on certain formations. They do this by comparing the ice quality, steepness, length of route, rests available, technical movement skills needed, and the availability of protection.
Ice, being the finnicky thing that it is, can change throughout the season or even on a daily basis. Climbs that were WI-3 can become much harder with certain weather conditions come into play. Because of this, climbers need to be able to scope a route from below and recognize how hard it is before jumping on lead. In rock climbing, taking falls on gear is just a part of the game. For ice climbing, the leader shouldn’t fall. Ever. With sharp crampons attached to your feet and tools in your hands, the consequences are just too great.
Mixed Climbing
Perhaps the apex of alpine climbing, mixed climbing involves both ice climbing AND rock climbing techniques. Ice isn’t a necessity of mixed climbing, but it’s usually involved. If you’re climbing a route that transitions from rock to ice and back again, you’re not going to take the time or energy to take your crampons off. Often that would be impossible anyway. The rock itself is likely wet and dirty, so sharp edges to hook on small features actually become more useful than a pair of rock shoes or bare hands anyway.
Mixed climbing requires considerable amounts of dry tooling (using ice tools on bare rock). The rating system for mixed grades is as follows:
M1-3: Easy, low angle, with usually no tools needed to ascend.
M4: Slabby to vertical with some technical dry tooling.
M5: Some sustained vertical dry tooling.
M6: Vertical to overhanging with difficult dry tooling.
M7: Overhanging, powerful, and technical dry tooling. Less than 10m of hard climbing.
M8: Some nearly horizontal overhangs requiring very powerful and technical dry tooling. Bouldery or longer cruxes than 10m.
M9: Either continuously vertical or slightly overhanging with marginal or technical holds, or a juggy roof of 2-3 body lengths.
M10: At least 10 meters of horizontal rock or 30 meters of overhanging dry tooling with powerful moves and no rests.
M11: A ropelength of overhanging gymnastic climbing, or up to 15 meters of roof.
M12: M11 with boulder, dynamic moves and tenuous technical holds. Think 5.14 rock climbing with sharp bits attached to you. So scary.
Gear for Alpine Climbing
(What do I need?)
“Tell me what I want, what I really, really want”
– Spice Girls
Essential Gear
The gear and price tag involved in alpine climbing can be daunting. The good news is that you don’t need every possible piece of equipment to handle every type of alpine climbing right off the bat. This section teaches you about each piece of gear to help you establish priorities for the most essential gear purchases depending on what type of alpine climbing you’re most interested in pursuing.
Footwear | Harness | Helmet | Crampons | Ice Axe and Technical Tools | Rope | Rock Protection | Snow/Ice Protection
Footwear
The most important piece of gear you can purchase if you need to prioritize is comfortable footwear. You can rent or borrow all other items but having footwear that are yours is essential to your happiness. Yes, rental footwear will get you through a short trip, but are the blisters and pain they’ll likely cause you worth it?
Mountaineering boots
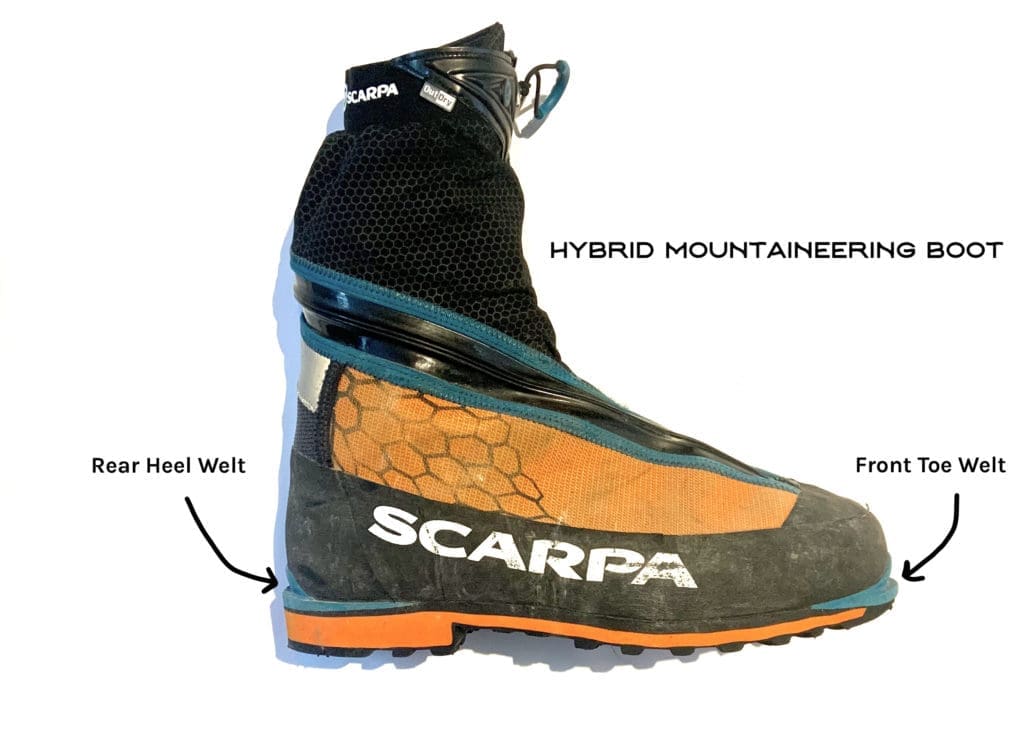
For glacier and general mountaineering on snow or ice, you’ll want waterproof, stiff, mountaineering boots that are compatible with at least a Hybrid crampon (have a protruding shelf (welt) on the heel where the clip lever of the crampon can snap over). Though walking on a trail isn’t as fun with stiffer soles, they’re needed on glacier or steep snow to keep the boot from flexing and kicking off your crampon.
Consider getting an even stiffer, full shank, mountaineering boot that has a toe welt in addition to a heel welt to take a Step-in crampon if you’ll enter any steeper terrain where sustained use of the crampon’s front points is required. If you’re ice or mixed climbing, you’ll want boots that can take a step-in crampon.
The other consideration for what particular mountain boot you want comes down to warmth. If you’re climbing high altitude, incredibly cold, peaks like Cho Oyu or Denali, you’ll want Triple Boots. These are constructed with an inner, usually removable boot, shell, and a waterproof and abrasion resistant “super gaiter” on the outside.
The next step down in warmth are Double Plastics that have a double-boot with a shell and a removable liner boot. These can also be upgraded with an over boot to be made like a triple boot. These things are also for high altitude, incredibly cold objectives (6,000m).
Hybrid Boots are the most adaptable of mountaineering boots and can handle a wide array of conditions and climbs. They are a double or even triple boot, but the outer layer is not solid plastic. This makes the boot much more dexterous and comfortable while maintaining good warmth properties. These are great for objectives like Mount Rainier, Elbrus, or Aconcagua as well as lower elevation climbs like Mount Baker.
4-Season Boots are the most popular general mountaineering boots because of their comfort compared to the other types of boots above. You can wear them on a hiking trail and do just fine. For the vast majority of alpine climbing adventures, these are adequate to get the job done. The drawback with these boots is that they are not very warm, not as waterproof, and not the ideal tool for more technical climbs.
The newest mountaineering boots out there are Ultralight Boots. These seek to combine comfort with climbing performance in high alpine terrain. These boots have a stiff, but not fully rigid sole that can take a semi-automatic crampon. Though not recommended for steep, technical, cold objectives, they are fantastic for shorter objectives that require travel over snow and low angle ice where the use of crampons is necessary. They also handle trails and rugged more variable terrain like talus and scree well and with much more comfort than the other types of mountaineering boots.
For any mountaineering boot you choose, make sure that you have adequate space between your toes and the front of the boot. If you’re kicking steps in firmer snow, walking downhill, or ice climbing, you need some defensible space between toe and boot or else you can say goodbye to your big toenails. Boot bang is real, and it’s not comfortable.
Pro tip: Kick a concrete or brick wall with the toes of the boots to confirm that your toes don’t bang. To ensure that the boots aren’t too big, walk up and down some stairs. If your heels lift and you feel a hot spot starting to form, try tightening your boots. If this doesn’t solve it, you’ll likely want to size down or try a different brand of boot.
Approach Shoes
Approach shoes are never the ideal footwear for anything. When climbing on rock, rock shoes are best. When walking on a trail, trail runners or hiking boots are better. Need to walk across some snow? Even with micro spikes or strap on crampons, they’re crap at it. That said, much of alpine climbing is figuring out how to carry less things. Especially as you get older, your back and knees hurt and carrying an extra set of boots for a short section of snow isn’t in the wheelhouse anymore. if you want a single piece of footwear that will get you through many an objective, these are it.
With sticky rubber on the soles, they’re proficient enough climbers that handle up to 5.7 or 5.8 in difficulty. If the majority of a climb is easy with only a short section of steeper climbing, then maybe you choose to leave the rock shoes at home and just make do with the approach shoes.
The Twin Sisters southwest of Mount Baker are a great example of where approach shoes (at least later in the summer) work relatively well. Most the climbing is scrambly 4th class with some short sections of low 5th, so rock shoes aren’t necessary. There is also a short section of low angle glacier you must traverse on to get from North Twin to South Twin. Rather than bring a pair of heavier mountaineering boots for that short section, it’s much lighter to throw in some lightweight aluminum crampons and just make do.
Again, approach shoes are not the ideal tool for anything, but they’re pretty okay at a lot of things. That makes them a useful tool for your footwear kit.
Rock Shoes
As is in the name, rock shoes are designed for the singular purpose of rock climbing. They are incredibly uncomfortable for hiking or walking of any kind and, in rock shoes designed for scaling steeper walls, just plain uncomfortable all the time.
Modern shoes are carefully constructed to conform as closely as possible to your feet. Unlike mountaineering boots or other footwear where you don’t want your toes touching the front of your boots, climbing shoes are the opposite. Make them snug! You literally want them to be uncomfortable. If they’re comfortable to wear around, they’re likely too big. Leather is the most common material used to achieve this purpose, but they can also be made of fabric or synthetics.
The reasoning behind seeking as snug a fit as possible is so a climber’s foot is supported to use small footholds effectively. Unless you’re using gross rental shoes, you’ll likely climb without socks in order to achieve the most precise fit.
That said, some rock shoes are certainly more comfortable than others. If you mainly want to spend all day climbing a long, moderate rock route, you don’t need to subject yourself to the hateful foot bondage of an aggressive shoe. Even with a less aggressive shoe, you’ll still likely want to take it off at belays to let the feet breath a little.
Harness
Harness technology these days is out of control. Alpine climbing style harnesses are lighter and more packable than traditional rock climbing harnesses or what you’d take to a gym. In general though, the harnesses used in alpine climbing fall into three categories: Ultralight, Ice/Mixed Climbing, and Alpine Rock.
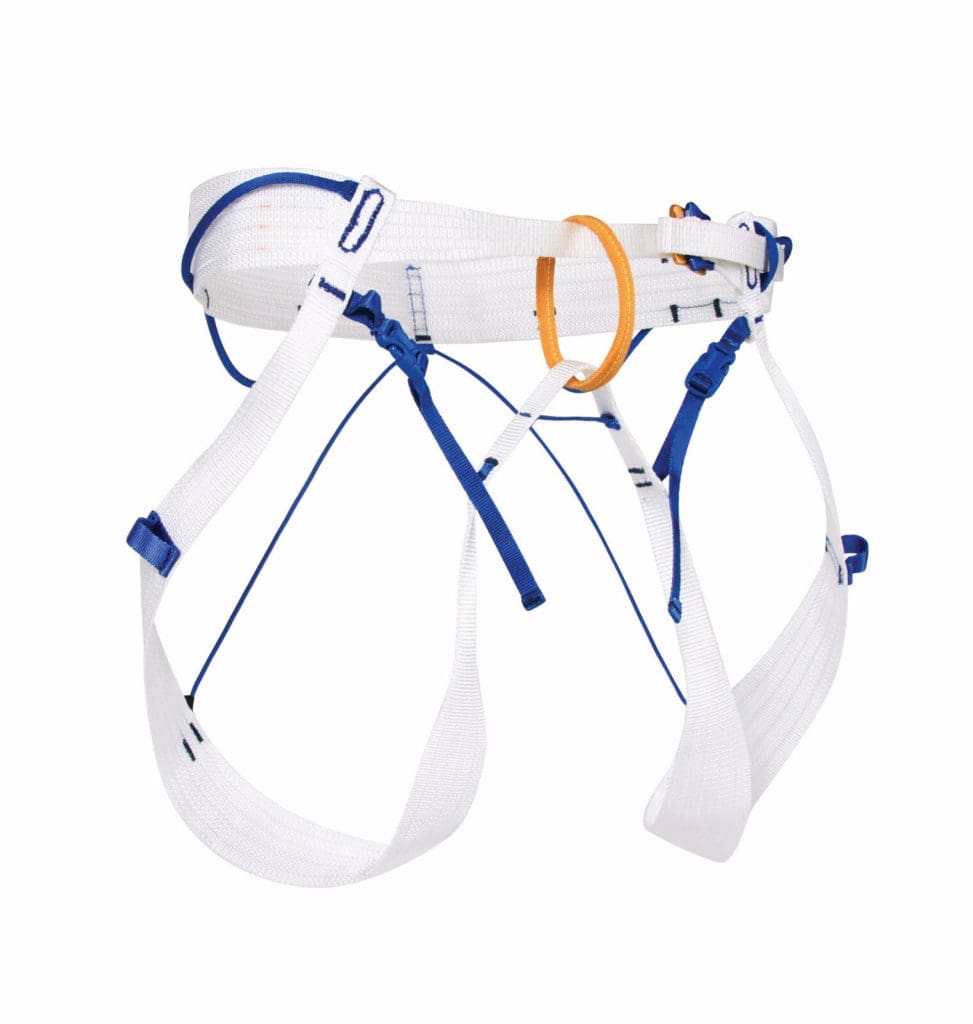
Ultralight (Diaper Style) Harness
These harnesses are ridiculously light and packable weighing as little as 150 grams (5.2 oz). Though not as durable or comfortable to hang in, they’re ideal for many alpine climbing objectives (especially glacier mountaineering) where taking repeated lead falls hopefully isn’t ever a thing. If you’re climbing or walking around with it on, you’ll likely forget it’s even there. As soon as you need to hang in it, you’ll remember though. Ouch. Most are made to easily take on and off without having to remove crampons or skis. Such a nice touch. We carry the Blue Ice Choucas harness as our go to harness in our rental fleet.
Ice/Mixed Climbing Harness
These harnesses are specific for routes where you’ll be needing ice screws readily accessible and will likely be clipping tools into the harness at some point. The main difference in these harnesses is that they have slots in the waist belt where ice clippers can live in between your gear loops. Ice clippers make it fast and easy to rack and un-rack ice screws/tools.
Alpine Rock Harness
Harnesses for use in the realm of alpine rock could easily be either of the two harnesses listed above. Since ice/mixed climbing harnesses can have the ice clippers removed, it’s easy for that harness to transform to rock specefic. Additionally, if the terrain you’re moving through is more moderate and does not require hanging belays or excessive rappels, the ultralight harness could be all that’s needed. No need to necessarily purchase two different harnesses.
That said, if you’re going to be tackling steeper grades in the alpine rock realm and know that you’ll likely be hanging out in a harness, it ‘s great to have some more padding around the waist and leg loops to keep circulation going.
Helmet
Helmet technology has also come a long way since the leather caps of old. Even still, most climbing helmets are only made to withstand top impacts (things falling on your head) and not the sides. Every now and again we’ll see folks out in the mountains in bike helmets with the logic that they are rated for side impacts and top impacts. The problem here is that most all bike helmets do not provide adequate protection from large/sharp objects impacting the helmet from above. Plus, you look silly.
It’s better to get a helmet that’s made for the job you need it to do. Nowadays, there’s a ridiculous amount of options out there for helmets. Some are even rated for multi-sport use (rock climbing and skiing). All have pros and cons that should be understood, so let’s break it down.
UIAA
First off, let’s talk about the UIAA (Union Internationale Des Associations D’Alpinisme). They’ve developed safety standards since 1960 for climbing equipment from ropes, to helmets, harnesses, and crampons. If a piece of equipment is attributed a UIAA Safety Label, you know that it is of the highest international standard for safety. You can check out the full list of UIAA Standards HERE.
Material
There are two main choices for material when choosing climbing helmets: foam or hard-shell with some hybrid helmets featuring both. Generally, foam helmets are more lightweight, comfortable, and breathable than their hard-shell counterparts but less durable and more expensive. They’re designed to take a single impact and protect you by fracturing. Once they take that impact, they’re done and need to be retired.
On the flip side, the Black Diamond Half Dome is super inexpensive (costing half a foam helmet) and extremely durable with hard ABS plastic for the shell, but heavy (12.7 ounces) and has less ventilation. You’ll definitely know it’s on your head.
The Petzl Sirocco is an example of a hybrid helmet, which seeks to combine the best of both worlds. It is incredibly light ( 6.1 oz). You’ll forget you even have the thing on. The EPS foam and polycarbonate piece on the crown of the head provides ample protection from falling objects and the EPP (softer, lighter and more malleable than EPS) foam on the sides protects for some side impacts. But, since it is not completely covered in polycarbonate or a harder plastic, users must be careful not to damage it while packing it inside or outside packs.
Rock Climbing Helmet
As mentioned before, there are different certifications for every sport. For rock climbing, the official standard is EN 12492 (UIAA 106). This states that “The force transmitted to the head form as a result of the impact of the falling mass shall not exceed 8 kN for the vertical impact test, for the side impact test, for the front impact test, and the rear impact test.”
Some climbing helmets aren’t rated to this standard and are primarily designed to protect the skull against falling debris (top impact). In rock climbing, you can fall all sorts of ways on lead that would result in side or back impacts, so it’s important to have a helmet rated to take those impacts. For instance, if someone on lead allows the rope to wrap behind the ankle, a fall can invert the leader such that the back of their head can impact the wall. Falling “correctly” can certainly help mitigate this risk, but in the mountains… stuff happens that’s outside your control.
Some climbing helmets, like the Black Diamond Vision MIPS, are now featuring the MIPS (Multi-direcitonal Impact Protection System) harness on the inside (technology that is now standard in both bike and ski helmets). This helps reduce the chances of concussion by deflecting certain impacts and reducing impact forces. This system adds some weight and price, but hey… it’s your head. Protect your money maker. These helmets still weigh less than the BD Half Dome or other full shell helmets.
Ice Climbing Helmet
Own a rock-climbing helmet? You’re all set! For real, falling ice isn’t that different from falling rock if it hits you. That said, a consideration here is warmth. Whereas it’s quite nice on a hot summer day to have a helmet that is lightweight and breathable, if you’re stuck at an icy belay ledge for an hour trying not to vomit from the cold, a helmet with less vents that is marketed as more ice specific isn’t a bad idea.
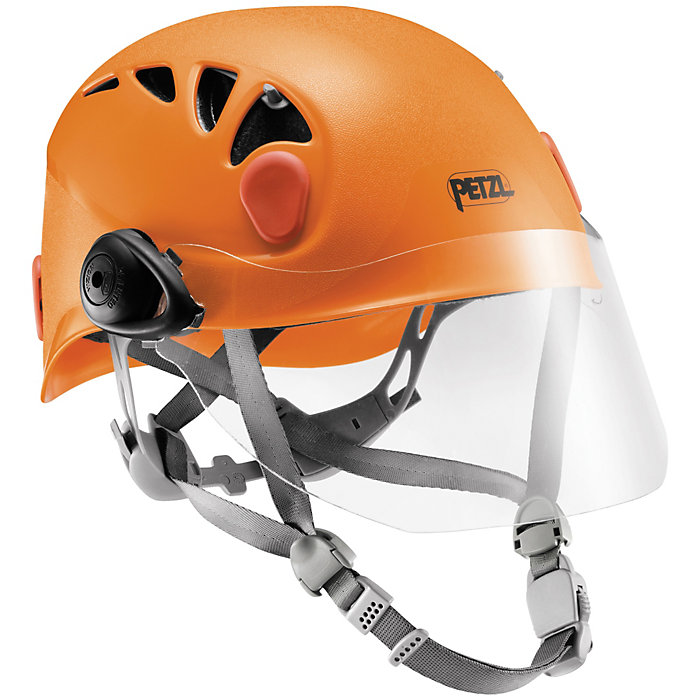
Another consideration is face protection. Unlike in rock climbing, in ice climbing you expect ice to come down on you and small shards to smack you in the face as you swing into the ice. Many companies, like Petzl and Grivel, make clear plastic face shields that mount to helmets to protect you from shattered ice and spindrift. These face shields have an anti-scratch coating on the outside and anti-fog on the inside like ski goggles. They also can flip up and out of the way flat against the helmet when not in use. So although you don’t need an ice climbing specific helmet, if that’s where you plan to spend most your time, it’s pretty nice.
Ski and Snowboard Helmet
The UIAA standard for ski and snowboard helmets, dictates that peak acceleration imparted to the head form cannot exceed 250 Gs. There are also many design requirements, such as field of vision, clearance between head and shell, and total area of coverage. Class A helmets protect a larger area and offer a higher degree of penetration protection, while Class B offers better hearing and ventilation with slightly less protection. You can read more about these things HERE. Since we’re here to talk about alpine climbing, we’ll leave it at that.
Multi-Sport Helmet
The approach shoe of the helmet world. Jack of at least two trades, master of none. Since speed is often safety in the alpine climbing world, lightweight options are coveted. That’s one of the major downsides of most multi-sport helmets – the bulk. In order to pass certification requirements, they require more material. Generally, they have fewer vents, more padding, and additional foam for protection. This results in reduced breathability and a sweat factory on your head on warm climbing days. On the flip side, multi-sport helmets that have more vents are too chilly on colder ski days.
That said, the weight range is quite wide. The lightest, most vented multi-sport helmets come in around 7 ounces (200 grams), while more ski-oriented helmets are almost double that. The added material, testing and fees to gain dual certification, and more R&D time also usually comes with a significant price tag increase over standard climbing helmets too.
All that said, if you are looking for a single helmet for climbing and skiing, get a helmet that is certified for both. Climbing helmets while skiing are better than no helmet at all, but they won’t protect you in a collision (the most common type of skiing accident).
Crampons
Unless you’re doing solely alpine rock objectives with no chance of travel on snow/ice, you’ll need a set of crampons… or six. Not every crampon is best or even recommended for every type of alpine climbing activity, so you’ll likely end up with a variety of different crampons if you get into this game long enough. Though most crampons today are semi-rigid, you can still find hinged and rigid crampons out there. We recommend the semi-rigid design for the majority of objectives since it offers the best performance in the broadest conditions. If has sufficient flex to make walking not heinous and is rigid enough for moderate ice climbing.
Material
Crampons are generally made of either Steel or Aluminum. Steel crampons are the standard because they’re more durable than aluminum, but that comes with the price of a heavier crampon on your foot. Aluminum is vastly lighter weight but can bend or wear out quickly if kicking into hard ice or walking on rock. If you’re mainly using crampons to walk around on snow, aluminum crampons are more than adequate, and you’ll be much happier lugging them around over steel. Stainless-steel crampons offer corrosion resistance on top of the other benefits of steel crampons.
Attachment
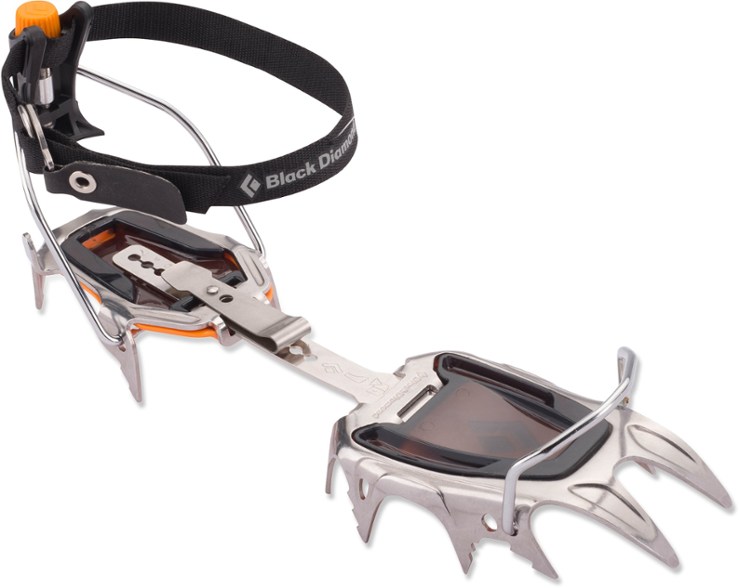
Crampons come with three different attachment types: Strap-on, Hybrid, or Step-in. Strap on attachment systems are great for putting crampons on boots or shoes that don’t have a protruding shelf (welt) on the heel or toe where the clip lever of a crampon can snap over. They are the least secure attachment system, however, and prone to loosening throughout the day (requiring constant attention).
Hybrid crampons, as mentioned in the mountaineering boots section above, are made to attach to boots with heel welts. They are much more secure than strap on crampons, but not as secure as step-in crampons. Step-in crampons require boots that have both heel and toe welts, however. An example of a step-in crampon is below.
Points
Crampons come with different numbers and orientations of sharp points. These are where the crampon gets traction. In general, fewer points correspond to more mellow terrain whereas more points correspond to more vertical, technical terrain. For instance, crampons made for walking on snow or general mountaineering often have just 8 or 10 points total. Crampons for more technical alpine climbing objectives on waterfall ice or mixed climbing have 12-14 points or more.
The front points of crampons are particularly different in orientation between general mountaineering and technical ice or mixed climbing.
- Horizontal Points are dual front points (typically fixed) that are the standard for almost any alpine climbing or ice/snow climbing.
- Vertical Points are dual points that are preferred for water ice and mixed climbing. They fit easily into cracks and are adjustable and replaceable.
- Monopoints offer a single point at the front of the crampon for very specific technical waterfall and mixed alpine climbing routes.
Front points are either modular (adjustable) or non-modular (fixed). As mentioned above, modular front points are replaceable, and you can reconfigure them to tackle whatever walking or climbing you have planned. It’s also much cheaper to buy new front points than an entire new set of crampons.
Non-modular front points are forged from one piece of material. Having no moving parts, you don’t need to worry about screws coming loose and they’re often lighter. You can also sharpen them as they get more worn, but if you use them enough, they’ll eventually need to be replaced as they get shorter with wear.
Anti-balling Plates
Anti-balling plates are standard, but some are better than others. These plastic plates prevent snow from sticking to the bottom of the crampon (or are at least supposed to). Without them, sticky snow conditions cause snow to build up underneath boots, causing the points of crampons to have less penetration or render them utterly useless. Grivel’s anti-balling system has plastic bubbles under forefoot and heel that compress when weighted and then spring outward when unweighted to help push snow off. Pretty neat and tends to work better than any other anti-balling plates out there.
Storage
One last thing that’s important to note is cleaning and storage of your crampons to maximize their lifespan. If you’ve been tromping around in dirt or glacial silt, rinse the crampons to get all that grit and grime off. Then ensure that they are totally dry before storing. If they’ll be sitting around for a while, coat them in a little oil or WD-40.
Ice Axe and Technical Tools
If you’re doing any alpine climbing that involves moderate snow or ice, you’ll likely need an ice axe. These tools are used on both the ascent and descent of routes as a hiking, climbing, and belay tool. Its most simple role is that of a glorified walking stick. More complex uses include self-arrest and use as a snow anchor.
Ice axes come in two classifications: Basic (B/Type 1) and Technical (T/Type 2). Basic axes are for general mountaineering and are adequate for basic support (walking stick) and self-arrest. Technical axes are stronger, heavier, and slightly curved to be used in steep or more vertical terrain and as belays. Technical tools are a more extreme version of technical axes with more curve, removable steel picks, adze, and/or hammers, and designed for vertical ice.
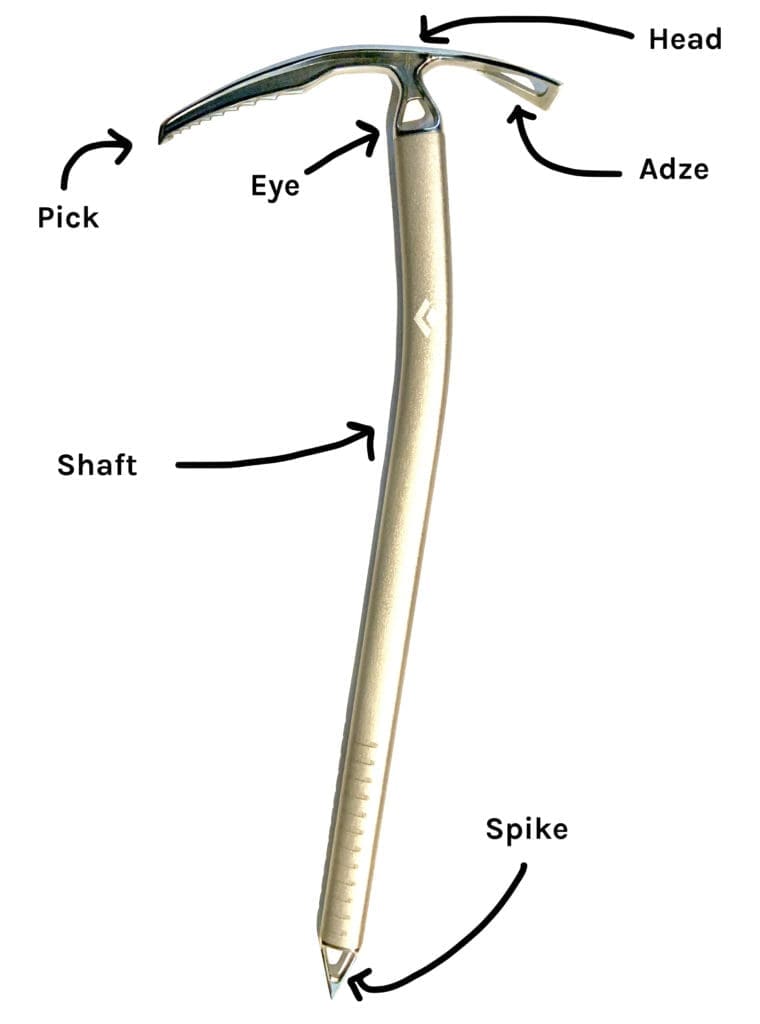
Anatomy
Ice axes consist of at least five major components:
- Head: Usually made of steel with a pick on one side and adze (or hammer) on the other. A hole in the center of the head (the eye) is provided for clipping a carabiner or cordage through. Used for pounding in snow or rock protection (like pickets or pitons) if an adze is chosen over a hammer.
- Pick: The toothed, pointed, curved end of the head. Essential for self-arrest or higher angle climbing or descending techniques.
- Adze: The flat end of the head shaped like a very small shovel. Used for chopping steps, clearing hard snow or ice, or digging snow anchors.
- Hammer: An alternative to the adze is the hammer. If you’ll be pounding in a lot of protection, it’s nice to have a hammer.
- Shaft: Straight or slightly angled. Typically made of lighter weight materials like aluminum or titanium or composites like carbon, fiberglass, or Kevlar.
- Spike: Point at the base of the shaft (usually made of steel) that can be plunged into snow for balance when the axe is held by the head.
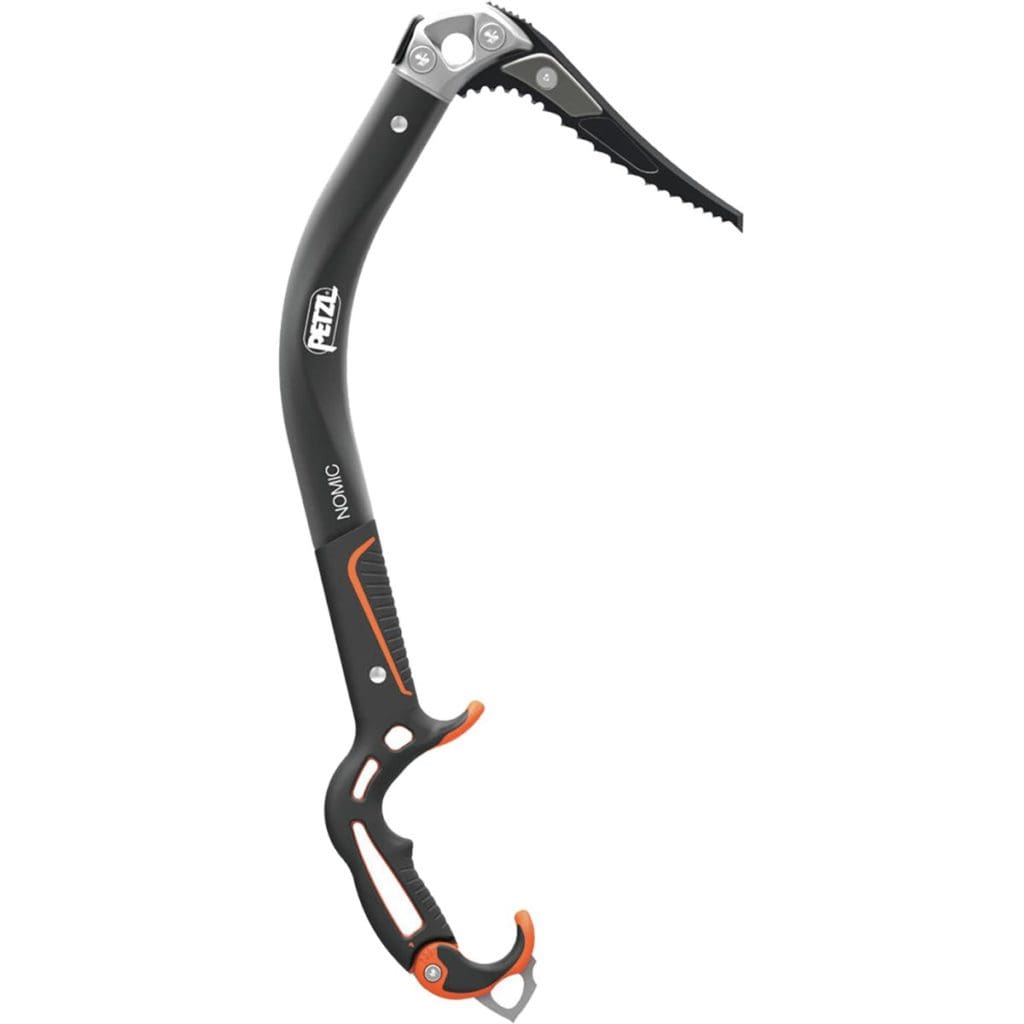
Technical Tools, as mentioned before, have a bigger curve than ice axes, removeable picks, and even the option to not have an adze or hammer on the other end of the head. The reasoning for this beyond the weight savings is so you’re less likely to hit yourself in the face if you’re swinging into vertical ice.
Size
What size of ice axe you choose depends greatly on the activity and your height. Most ice axes come between 50-90cm in length from spike to head. If you’re mainly using the ice axe for glacier mountaineering or mellow snow climbs, you’ll want a longer axe that if held loosely at the side can almost reach the ground with the spike. The alpenstock (ice axe of old) was close to 150cm (5 ft) long so that folks could use them as walking sticks, but they weren’t the best tool when getting into steeper terrain. Similarly, if you’re using an ice axe or tool for steeper climbing, or vertical ice shorter is better. Nowadays, most folks prefer a shorter axe. It’s lighter, easier to handle, and more packable than larger axes. Though they aren’t useful on mellow terrain, the addition of a trekking pole to the equation in conjunction with the ice axe solves the problem.
Shape
As mentioned, ice axes are typically straight shafted. If you plan on needing to use the pick to swing into a steeper slope, you’ll want a curve in the shaft. This aids in the swing. For ice climbing, you’ll certainly want a curved technical tool.
Leashes
To leash or not to leash? Most of the time, ice axes or tools should not be leashed to you either by the wrist or clipped to the harness. The reasons for this is simple. What’s the purpose of leashing an ice axe to you? So you don’t lose it, right? Well, if you’re holding an ice axe or tool correctly and plunging it into snow or ice with spike or pick when not in use, you aren’t going to lose it. What’s more dangerous than dropping your ice axe or tool on most alpine climbing objectives is falling and having the sharp thing come with you. If you fall, let go of your ice axe, and have it leashed to you, you’re now careening down a slope with a sharp object attached to you. You’ll likely be impaled by the very tool meant to help you arrest the fall. It’s much better if you lose control of your axe to be able to jettison it rather than take a pick or spike to the face, torso, or leg.
Similarly, think about falling in vertical terrain with ice tools leashed to you. First off, falling ice climbing is never a good idea, but if you take a fall where normally your tools would stay in the ice above you, now they would get ripped down on top of you and an already scary fall is now made incredibly worse.
Dropping an ice axe or tool in a place where (if dropped) it would go bye-bye forever, and the consequence of not having it outweighs the risk of impalement from a leashed fall is the only time to consider leashing. It’s like locking out the toe pieces on your tech bindings for you skiers out there. It should be done minimally and intentionally.
If you are going to leash, attach the leash to your belay loop rather than a wrist. If you’re switching hands a lot, you don’t want to have to take the wrist leash off and on every time.
Climbing Rope
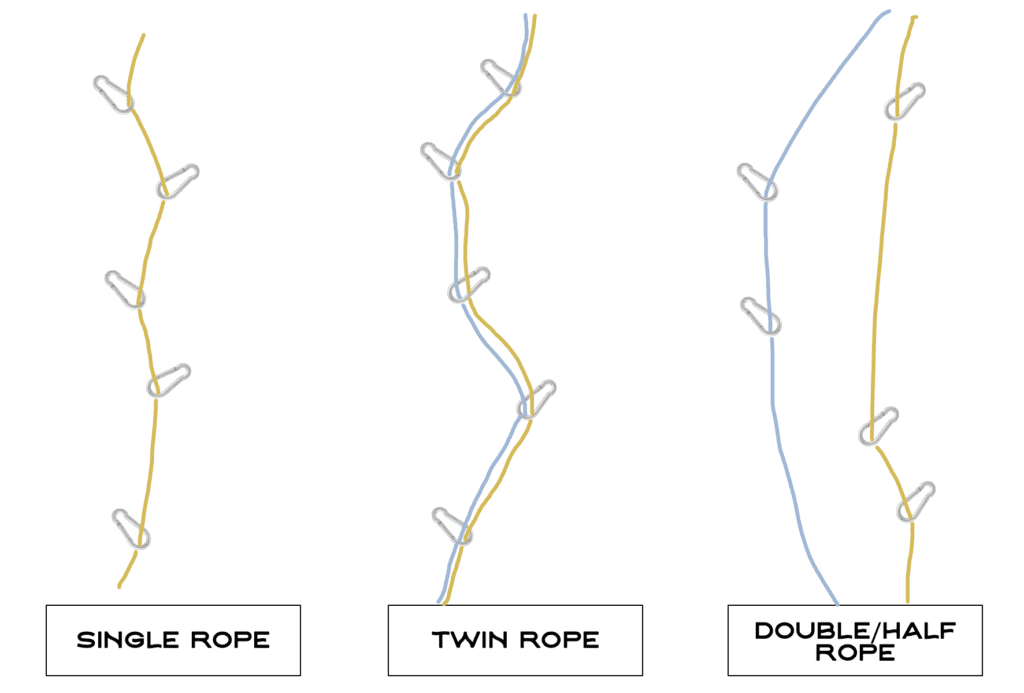
Ropes for alpine climbing objectives come in many different lengths, diameters, and constructions. They are one of the most critical parts of your chain of protective equipment. Modern ropes get most of their strength from a nylon or other synthetic material intertwined in a special way to create a core. This core is then surrounded by a separate sheath woven over it. Generally, climbing ropes are put into three main categories: Single, Twin, and Double/Half ropes.
Length
Ropes range in length from as short as you want to cut them, (usually 30 meters) to 70 meters or greater. The length you choose will depend greatly on the context of what you’re using it for. If you’re top roping a long pitch, you’ll likely go for a 70m. If you’re only using the rope in case you need to do a rescue from a crevasse, maybe you’re only carrying a 30m RAD Line. The standard size rope for climbing objectives is 60m.
Width
Ropes are getting smaller and smaller in diameter in the realm of alpine climbing, and for good reason. Hauling heavy ropes around that are 8-9 pounds and heavier if wet is no fun. Plus, pulling larger diameter ropes through belay devices is tough on the joints and muscles. Sure, if you’re walking five minutes in your flip flops to the base of a crag where you’re going to top rope all day and take big lead whips, taking a fat 10mm dynamic rope is great. If you’re doing long days in the alpine, 8.0-8.7mm single ropes or even thinner diameter Double or Twin ropes are the move.
Smaller diameter ropes are still quite strong, just not as durable in the long run. RAD Lines are quickly becoming a standard tool for skiers in glaciated terrain. At a mere 6mm, these hyperstatic and flexible ropes are ultra-light and incredibly compact. Sure they aren’t made to take a lead fall, but for executing crevasse rescue, rappelling, or roping up to traverse a crevasse zone, they do a find job for minimal suffering.
Static Rope
These ropes are specifically designed to have little to no stretch. As such, they can’t absorb large shocks and should never be used to protect a climber against a dynamic fall. They are particularly strong and resilient under static load, however, so they do well in fixed ropes, rescue haul systems, rappel lines, and zip lines.
Single Rope
These are designed to be used on their own. When the protection and anchor points are well-aligned along a route, a single rope is more than adequate to protect you in a fall. The major pro to single ropes is simplicity. You only have to deal with one rope. If a route meanders, however, rope drag can be terrible when using a single rope, even once pieces are extended with longer slings.
Twin Ropes
Twin ropes are used in the same way that single ropes are used, with both ropes clipped into the same piece of protection. Think conjoined twins that are inseparable. Climbing on two ropes rather than one adds redundancy in case one were compromised and having two ropes enables full length rappels.
The main pros to these ropes besides redundancy and full length rappels is that they are very small in diameter: 6.9-8mm, so light and easy to handle, and can withstand more falls than single ropes. In UIAA testing, twin ropes must withstand at least twelve falls of 80 kg (176lbs) mass with an impact force of 12kN (MASSIVE – don’t know how you’d replicate this in the real world).
The downside of these ropes is that they are harder to manage than a single rope and still don’t offer good protection or less rope drag if the route meanders. Also, by being so small, they are not as durable as single ropes and should never be used as individual strands. That is not what they were designed or tested for.
Double/Half Ropes
More commonly referred to as double ropes, they sometimes are called half ropes because the label for them is ½. If you do a lot of ice climbing or meandering trad routes, you’ll likely want to get familiar with these ropes. They are designed to be used as a pair and offer more security than a single rope when the medium you’re climbing on is marginal. Being 8-9mm, they stretch A LOT. This means that the amount of force applied to pieces of protection is reduced. Something that becomes incredibly important in alpine climbing it the gear is marginal.
They also do well to protect meandering routes where rope drag would be terrible. You accomplish this by clipping each rope into different pieces on your way up the climb. One rope will clip into all pieces on the climber’s left side for instance and the other will clip into everything on the climber’s right side. By clipping separate pieces, the lead climber will hopefully experience less rope drag and have better protection during a fall since two separate anchor points will prevent the lead climber from taking huge swings.
The video below, though dated, does a great job of demonstrating this:
The downside of these ropes is that they are tougher to manage for the belayer and climber as compared to single or twin ropes. Dealing with two things going at different speeds instead of one adds more complexity!
Dual or Triple Certification
Many ropes now gain certification in two or all three rope categories. This means that if your rope is triple certified, you can use it as a single, twin, and double/half rope. These ropes are often more expensive, but you know that they’ve been rigorously tested and found to be up to the highest standards in the climbing industry.
Dry Treatment
A more expensive but nice option on some ropes is a dry treatment. This not only keeps the core of the rope dry if you’re traveling in wet conditions but makes it more resistant to abrasion.
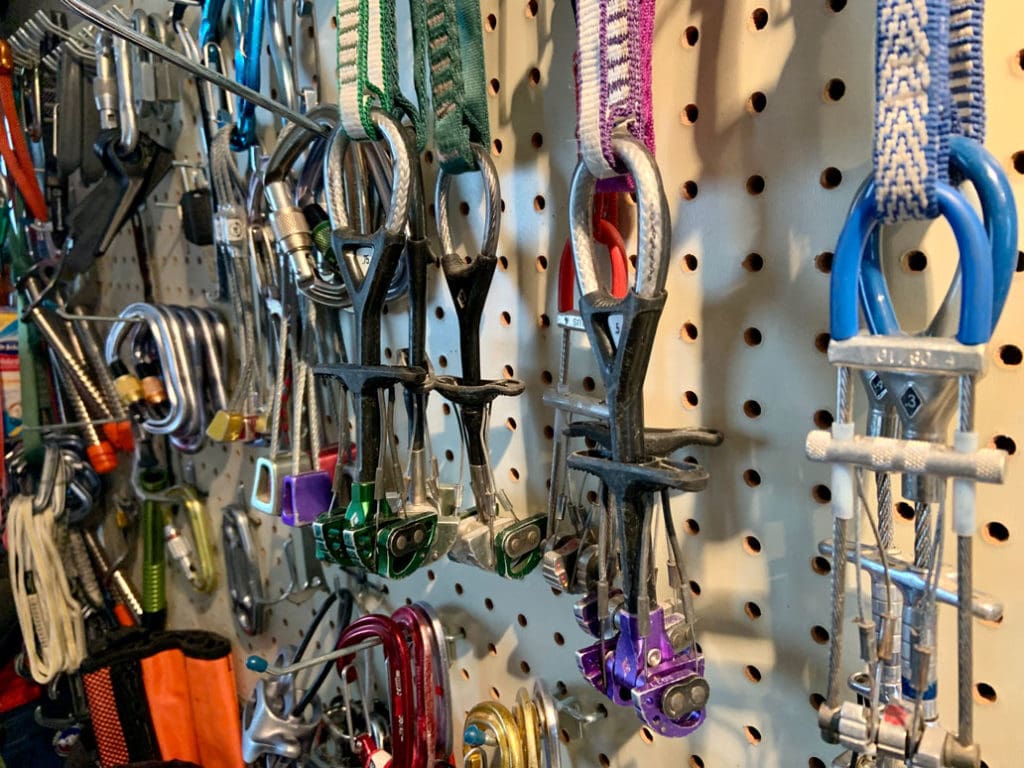
Rock Protection
If you’re traveling in the realm or alpine rock, you’ll likely need a rack with rock pro. Below are the most common forms of rock pro for you to consider.
Spring-Loaded Camming Devices (SLCDs)
These beauties radically transformed rock climbing into what it is today. They can be placed and removed easily and quickly even in cracks with no constrictions. This is nice for both followers cleaning the route and those leading where every second spent placing gear is energy they wish they still had. Commonly referred to as “cams,” SLCDs use 2-4 lobes shaped as logarithmic spirals (same spiral naturally found in seashells, flower heads, and even Galaxies) to provide holding power when weighted. The beauty of the shape is that no matter where the cam contacts the rock, the lobes contact it at the same angle – providing the necessary friction to keep the SLCD in equilibrium. Thanks nature!
These lobes are mounted on an axle (or two adjacent axles) so that when the axle is pulled upon, the lobes are forced further apart. The outward force distributed by the cam lobes is twice that of the downward force, so it is incredibly important that cams are ONLY placed in solid rock. Placing a SLCD behind a thin flake is just asking for trouble. In addition, they don’t tend to do well in icy, dirty, soft, or wet rock.
Though these devices are commonly called “cams”, a “cam” is any tool that transforms linear motion (a fall) into rotary motion (rotation of protection into place). So tricams and hexes placed in a particular orientation are technically “cams.” More on that later.
The father of modern SLCDs is Ray Jardine. A trained aerospace engineer inspired by Greg Lowes commercially unsuccessful Cam Nut in 1972, Jardine created his first prototypes (called Friends) by spring of 1974. Formerly difficult to protect climbs were now easily managed (at least from a gear perspective… 5.13s are still really hard). When they first came on the scene, many climbers thought them unethical and made climbing “too easy.” Nowadays, most folks don’t think twice about using them. Climbing… always changing.
Nowadays, SLCDs also have flexible stems (thanks Metolius), can have offset lobes (different sizes for flaring cracks where the outside is wider than the inside) and range from incredibly small to massive (spanning 12” wide cracks). The size and type of SLCD and number you take with you on a climb is directly correlated to what you’ll need specific to that climb. When in doubt, it’s nice to have a few extra pieces with you rather than be run-out in a scary place.
Nuts (Stoppers)
The most common protection you’ll see on racks is nuts. Often, folks refer to all nuts as stoppers because stoppers are one of the oldest designs of nut around. It’s a lot like calling all facial tissue paper “Kleenex.”
Unlike SLCDs that are active protection (actively expand), stoppers are passive protection (don’t press any force, use springs, or apply any mechanical advantage). To stay in place, nuts simply slot into a crack that constricts smaller than the nut being placed. If the nut is sized correctly, pulled in the correct direction, and the crack doesn’t break, the nut will hold. This does require that there is a constriction though. Nuts, unlike SLCDs, will not hold in parallel-sided cracks with no constriction.
Cleaning nuts is most often done by pulling force upward with a “nut tool” to get them back where the crack is wider (the opposite motion of how you slotted it in). Problems arise when the lead climbs above the placed nut and accidentally pulls the nut out of the crack with the rope. Using a sling to extend the clip in rather than just clipping a nut directly into the rope with a carabiner usually works to eliminate this possibility.
When rock quality is suspect, nuts are a much safer bet than SLCDs. Remember, “cams” exert twice as much force outward into the rock as they take from being loaded. Not so with nuts.
What particular size, shape, and material of nut you choose to go with (as always) is dependent on what route you are wanting to protect. This fantastic resource written by IFMGA Mountain Guide Ian Nicholson and Chris McNamara for Outdoor Gear Lab does a much better job of walking you through the latest in nut technology than we could ever do) if you want to get nerdy with it.
Tricams
Though some folks will tell you that tricams are a thing of the past, they still have their place in alpine climbing. They’re much lighter than carrying a SLCD but can be placed actively (like an SLCD) or passively (like a nut) depending on the application. When a tricam is weighted in its active mode, the downward force is brought outward into the sides of the crack the same as a cam. However, whereas SLCDs don’t do well in soft, wet, dirty, or icy rock when weighted, tricams have a sharp point for a fulcrum, making it bite well in these conditions. Soft, wet, dirty, and icy rock sound like conditions you’ll find alpine climbing? You bet.
If the rock is also suspect in quality, tricams can also be placed passively in constrictions the same as a nut. The main difference being that they fit better in sharper angled slots. Just as with nuts, make sure to pull down firmly when placing tricams passively and extend the clip in with a sling.
Hexes
These really are more a tool of the past since the advent of SLCDs, though some folks still love to carry around the “cow bells.” They are much less expensive and lighter weight than cams of a similar size. They also, like tricams, work better in dirty, wet, or icy cracks where SLCDs might slide out as they have more surface area. Also, like tricams, they can be placed passively like nuts. One important safety piece with hexes, is unlike SLCDs that can be placed in parallel cracks, hexes will slide right out! They need a constriction in order to hold.
If you do choose to carry them, you’ll likely only take one or two of a particular size. They’ve mainly gone out of style because they’re so dang bulky and annoying to deal with (especially for more novice folks). Removing hexes placed actively is a lot tougher than pulling the trigger on a SLCD.
Piton
A piton (also called a pin) is a metal spike driven into cracks in rock by a hammer to be used as an anchor point to protect against falls or assist upward progress in aid climbing. Given that repeated hammering and extraction of pitons damages rock, most climbers nowadays avoid their use as much as possible. In the alpine climbing realm, they still have their uses in locations where nuts or camming devices won’t work and there is no alternative.
Pitons are made to fit a wide variety of different crack sizes. There are many types, but four are still commonly used. Knifeblades (Bugaboos) are thin, straight pitons that do well in thin, deep cracks. Lost Arrow pitons are a tapered piton that does well in medium-sized cracks. Angle pitons are made of steel sheet bent into a “V”, “U”, or “Z” shape that do well in large cracks. The steel deforms as the piton is placed for more holding power. Beaks are hooking pitons that can be placed without a hammer.
Snow/Ice Protection
Snow Picket
If snow is your anchor medium, then you should get acquainted with snow pickets. They are one of the quickest and lightest anchoring options you have in solid snow conditions. Classic snow pickets are T-shaped and made of lightweight aluminum. They come in different lengths (50-90cm) and have holes punched at regular intervals through the metal for clipping of carabiners or slinging of material.
To place pickets, climbers can either drive them in vertically (nail) or cut a trench and place the picket horizontally in the snow (deadman). Though horizontal placements can be stronger, they take more time to build. Vertically placed pickets are the quickest placements, making them ideal in crevasse rescue scenarios or any situation where time is a key factor.
In recent years, fixed cable pickets have grown in popularity. These pickets have a piece of cable pre-fixed at the center of the picket. Pickets fail easily with any upward pull. By pulling from the center of the picket rather than the top, the risk of leveraging the picket up and out is significantly reduced.
Ice Screw
If ice is your medium, then ice screws are your anchor tool. Made of either lightweight aluminum or chromoly steel, these threaded tubular screws come in a range of sizes typically from 10-21cm depending on the thickness and quality of ice. In good ice, screws themselves can hold 9-22kN (even the smallest screws).
For placing an ice screw, climbers should ensure they are choosing ice that is solid. This means avoiding thin, de-laminating, aerated, or otherwise rotten ice. Climbers also need to choose the appropriate length of screw. If the ice is thin, and a climber tries to drive in too large a screw that can’t be driven all the way to the hanger, they risk bending or breaking the screw in a fall.
Screws should most often be placed perpendicular (0 degrees). In good ice, studies show that the tip driven into the ice slightly up (so that the ice screw itself tilts down in the direction of pull – positive angle) has higher strength since the threads themselves help hold the screw in place. In poor ice, however, perpendicular placements hold best. Since it is tough to judge ice quality (especially as a novice) defaulting to perpendicular placements is best practice. Tilting the ice screw up (negative angle) actually is shown to be drastically less strong than perpendicular or positive angle placements in solid ice.
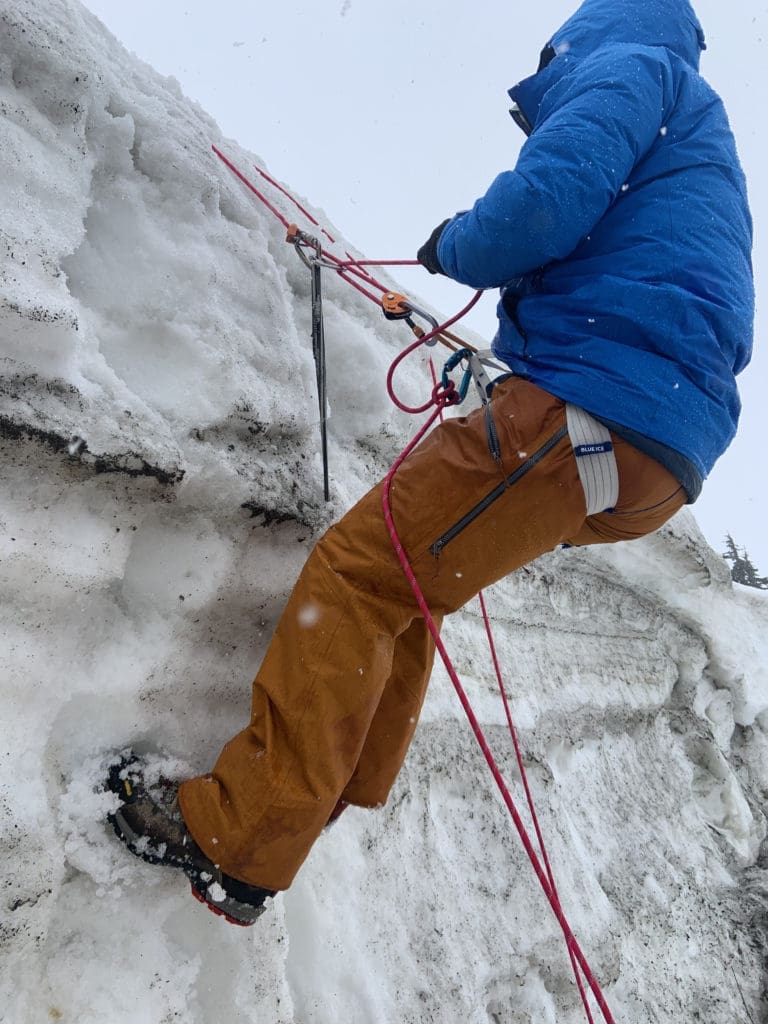
Longer ice screws, besides being anchor points themselves, are used to create V-threads or 0-Threads. By making two holes intersect, a piece of cordage (V-thread) or climbing rope (0-Thread) can then by threaded through with the assistance of a thread tool. Most often, V-threads are a great option for an ice anchor when screws are in short supply and 0-threads are best practice for rappelling an ice route so that no cordage or ice screws are left behind to become trash later.
Whether using a V-thread or 0-thread, the rope should be backed up with an ice screw at least until the thread has been significantly tested. The video below demonstrates how to accomplish these two techniques.
Alpine CLimbing Skills/Techniques
(How do I do it?)
“You don’t have to speak just seek. And peep the technique.”
– Eric B. & Rakim
Practice makes Progress
As stated before… it takes a while to get good at this game. Below are some resources to help you along your educational journey!
Packing A Pack
Learning how to pack for multi-day mountaineering objectives can seem daunting at first, but have no fear! Our How to Pack for Mountaineering resources walks you through a simple pack packing system to ensure you are dialed in before you reach the trailhead.
Packing effectively is as easy as ABCD:
- Accessibility
- Balance
- Compression
- Danger/Danglies
Navigation
Basic Backcountry Navigation
Navigating in the backcountry has changed a lot over the years with easy and affordable access to technology. Anyone can now turn their cell phone into a stand-alone GPS unit that puts a blue dot wherever you are in terrain. The basics, however, haven’t changed. To truly use your navigation tools (even the fancy ones) you must first understand the basics of navigation:
- The parts of a compass
- How to read Topographical (Topo) Maps
- And how to use a map and compass together to take and follow a bearing
It’s important to not become too overly reliant on technology for navigation because what happens if the battery runs out? Do you have the skills to get back home without a blue dot or track to show you the way? Check out our Basic Backcountry Navigation resource to brush up on your navigation skills.
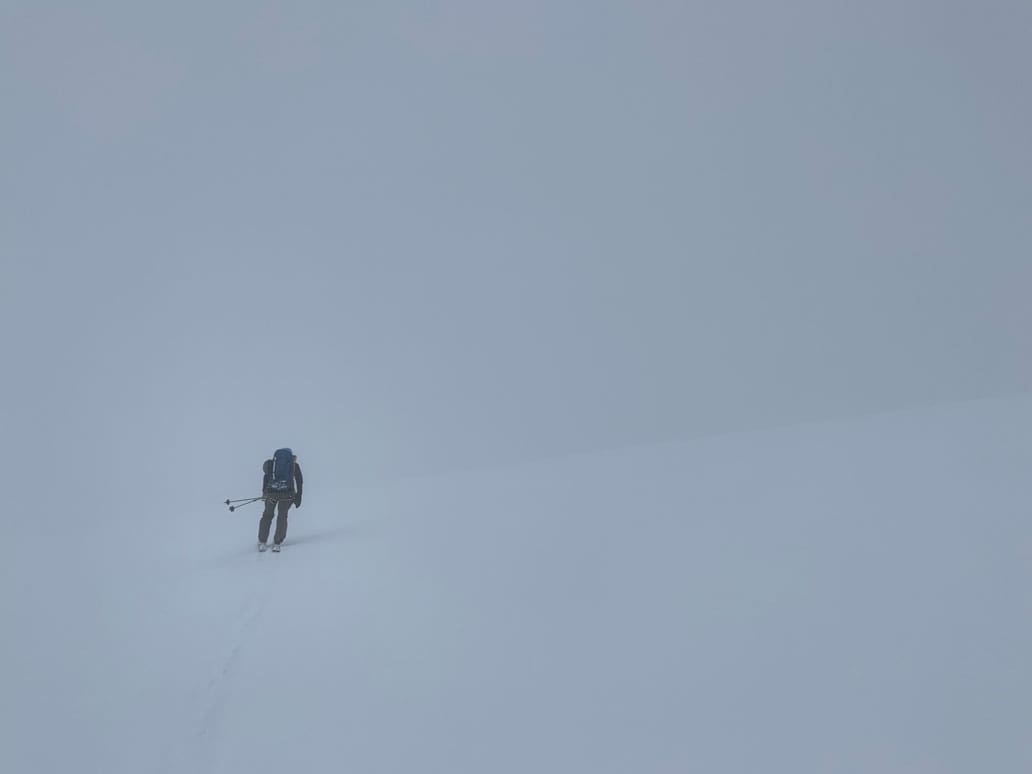
Whiteout Navigation
If you’ll be spending any time in the mountains, but especially in glaciated terrain, learning the basics of whiteout navigation is essential for off-trail travel in the mountains. This resource presents tools, strategies, and techniques to keep in your quiver for those low visibility days.
Essential Knots and Hitches
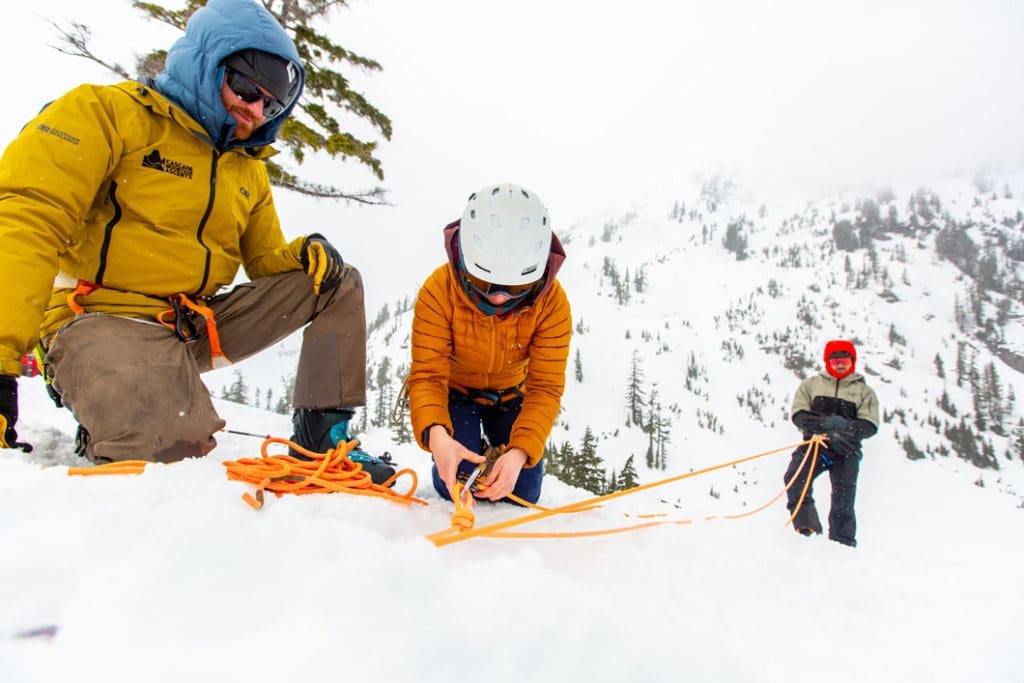
Rope stuff! One of the more important foundations all climbers should have is a working knowledge of the essential knots and hitches. Without this solid base of understanding, things like crevasse rescue, rigging for glacier travel, and anchor systems are impossible or at the least downright frustrating.
Rigging for Glacier Travel
Staying safe in glaciated terrain is all about being proactive. Rigging the rope and team for glacier travel is a big part of that. Depending on the sizes of crevasses you expect to encounter, time in the season, number and experience level of humans on your team, and other factors, you’ll choose to set up your rope in different ways. Check out our rigging for glacier travel resource if you plan to travel in glaciated terrain.
Rescue
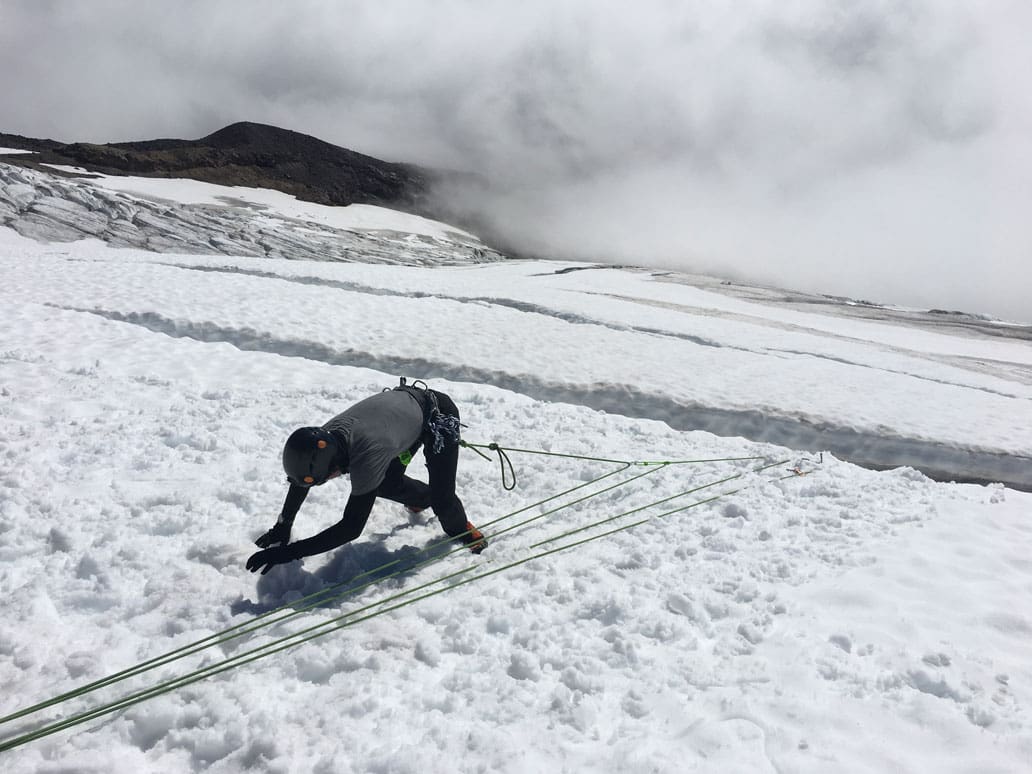
Crevasse Rescue
You’ll certainly need to get out and physically practice this skill to get good at it. The good news is, you don’t need a crevasse or even snow to practice the more technical parts of crevasse rescue. Take a look at the videos and diagrams in our crevasse rescue resource to help guide you in practicing crevasse rescue techniques.
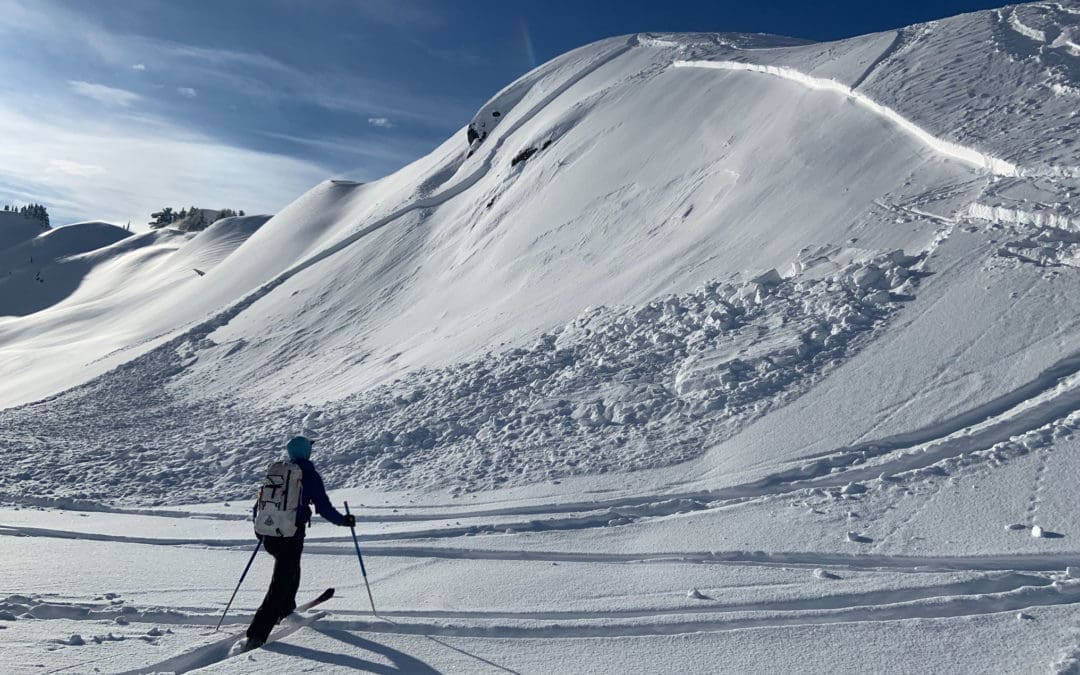
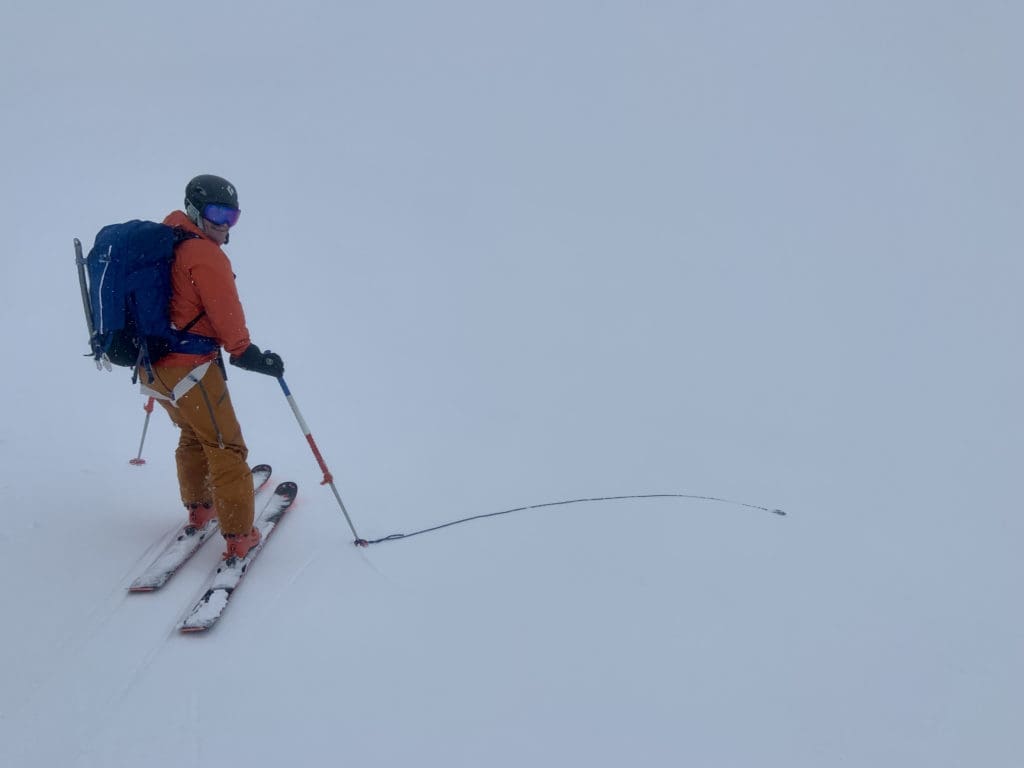
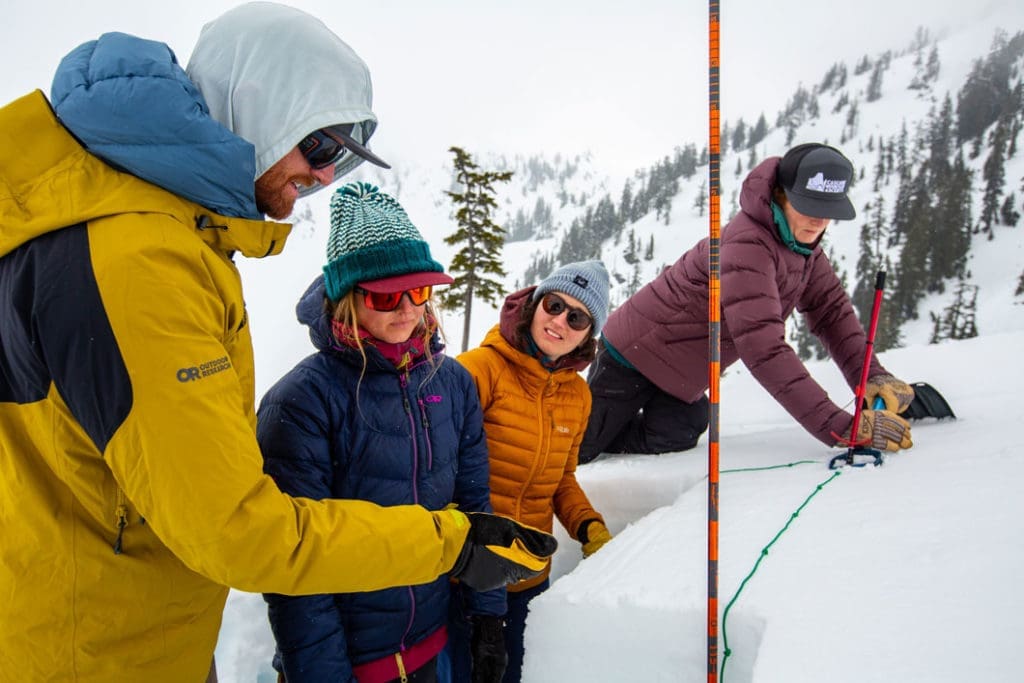
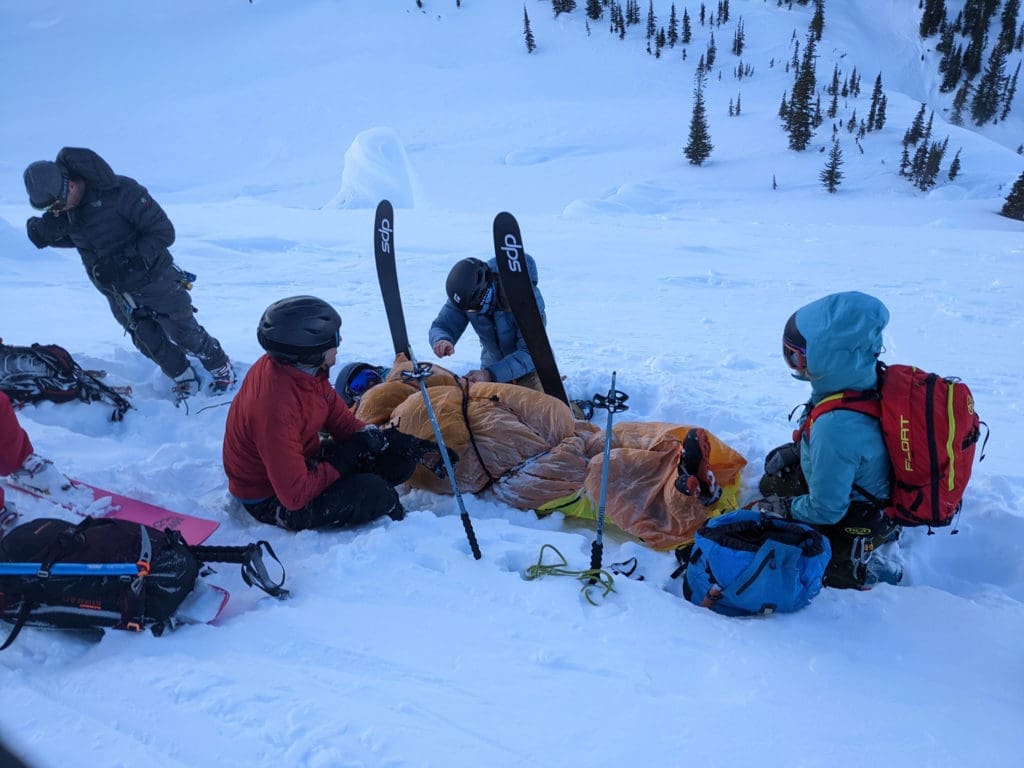
Avalanche Rescue
If you’re climbing in a snowy environment, avalanches should be on your radar. Understanding how to perform a rescue on someone buried in an avalanche effectively, takes practice. Learn the basics in our avalanche rescue resource.
LNT Principles for Alpine Climbing
Alpine climbing is a bit more complex than just going for a hike, car camping, or backpacking. The environments climber’s travel (from glaciers and ice fields to craggy gendarmes) are unique with fragile ecosystems that are easily disturbed. Weight and space are also important consideration when you’re climbing with everything on your back.
So how do alpine climbers follow LNT principles while still maximizing weight savings and comfort? Our LNT Principles for Alpine Climbing resource goes into just that.
Back to Top | Back to Techniques
Planning Resources for Alpine Climbing
(When and Where do I go?)
“A goal without a plan is just a wish”
– Antoine de Saint-Exupery

Your Avalanche Center
In the United State, you can find your local Avalanche Center by going to Avalanche.org. Here you can connect to avalanche information and education for the zone you’re traveling in. As you can tell by the map below, not every place has an avalanche center providing a forecast, but the vast majority of the more well traveled zones do.
They are partnered with the American Avalanche Association (A3) and the US Forest Service National Avalanche Center (NAC). The site consolidates data from professional forecast centers to provide real-time avalanche information. In Canada, you can go to Avalanche Canada for information on avalanches.
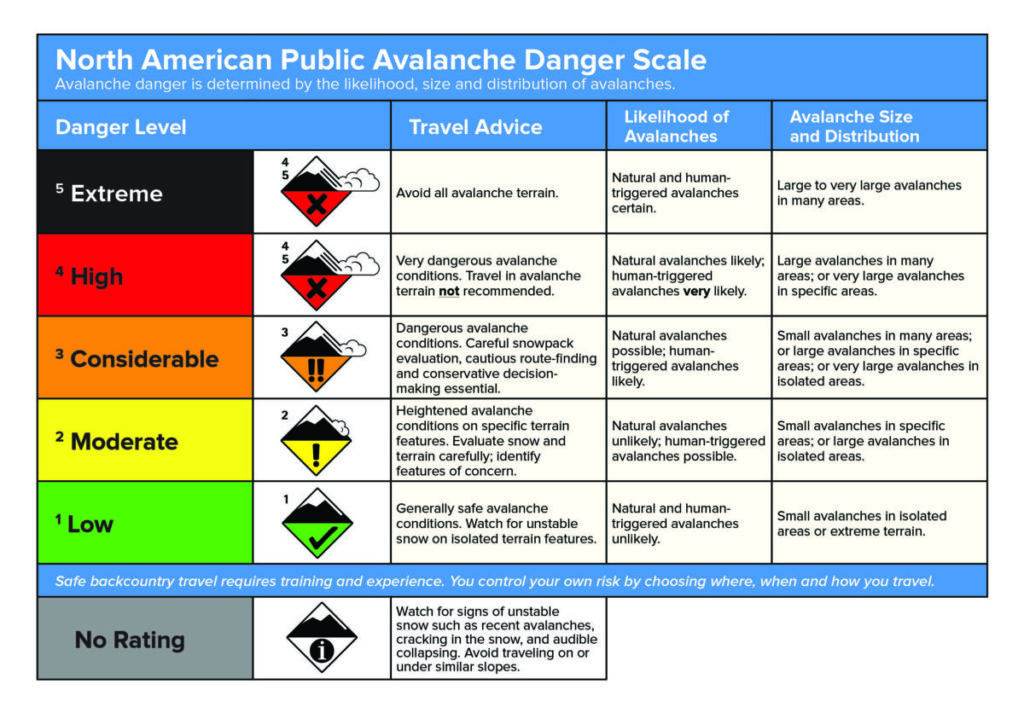
Avalanche Danger Scale
The North American Avalanche Danger Scale is a tool used by avalanche forecasters to communicate the potential for avalanches to cause harm or injury to backcountry travelers.
Avalanche Problems
99 Problems and 9 of them are avalanches. For real. In order to communicate the distinct personalities of avalanches, experts identified nine distinct problem types you could encounter on any given day in the backcountry. These are:
- Wind Slab
- Storm Slab
- Loose Dry
- Loose Wet
- Wet Slab
- Persistent Slab
- Deep Slab
- Cornice Fall
- Glide Avalanche

To learn about the different types of avalanche problems, check out our Avalanche Problems resource.
Back to Top | Back to Resources
Mapping/Navigation Resources
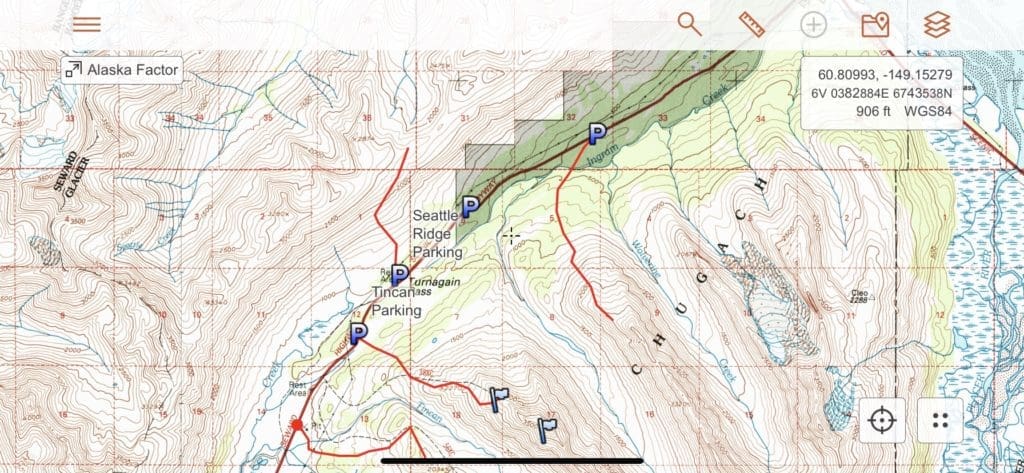
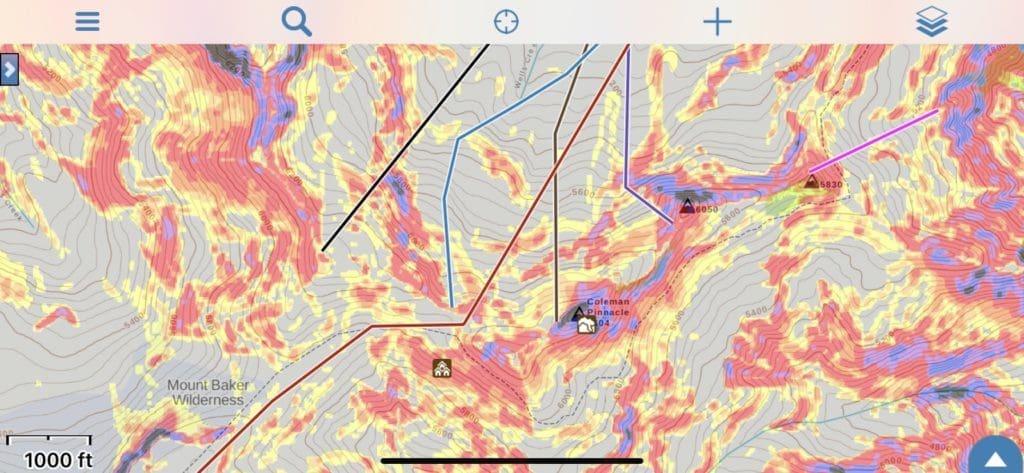
CalTopo allows you to build your own routes and run lists with multiple overlays from slope angle shading to sun exposure. You can also get all the terrain statistics from your routes including elevation change and loss, ground cover, total distance, and more. Then, you can make PDFs of your maps, print them, or upload tracks to your phone or GPS via their app. Some of the pro features and overlays cost money, but the base application and package is free!
Gaia is quite similar to CalTopo, but is a yearly subscription. It’s track or route building is not as refined as CalTopo, but it’s tracking features in their phone application is fantastic for turning your smart phone into a GPS. Also, there are tons of community tracks you can explore to see where folks are climbing and how they are accessing certain terrain. If the tracks are public, you can download them and save them to your own devices, saving you the trouble of creating the track yourself! Gaia also allows you to upload photos and tag their exact locations for more detailed trip reports.
Weather Resources
Windy is a fantastic tool for weather forecast visualization. This fast, intuitive, detailed accurate weather app is the most up-to-date weather forecast around. It brings you all the world’s leading weather forecasting models: global ECMWF and GFS, plus local NEMS, AROME and ICON (for Europe) and NAM (for the USA) so you can compare forecasts. 40 weather maps from wind, rain, temperature and pressure to swell or CAPE index.
NOAA provides weather, water, and climate forecasts and warnings for the United States, its territories, adjacent waters and ocean areas, for the protection of life and property and the enhancement of the national economy. These services include Forecasts and Observations, Warnings, Impact-based Decision Support Services, and Education in an effort to build a Weather-Ready Nation. The ultimate goal is to have a society that is prepared for and responds to weather, water, and climate events.
Back to Top | Back to Resources
Guide Books
Guide books, in our opinion, are still the best way to learn about areas and climbing routes that you may want to attempt. What books you choose will depend greatly on where you’re looking to climb. For the Cascades, the four books below are essential reads.
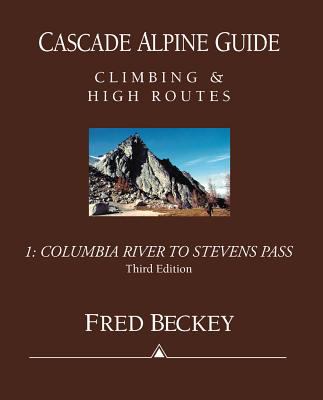
Cascade Alpine Guide – Climbing & High Routes – Section 1 Columbia River to Stevens Pass. Fred Beckey.
Cascade Alpine Guide – Climbing & High Routes – Section 2 Stevens Pass to Rainy Pass. Fred Beckey.

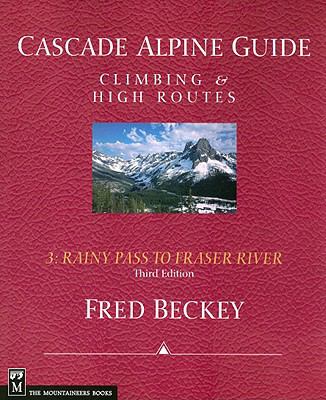
Cascade Alpine Guide – Climbing & High Routes – Section 3 Rainy Pass to Fraser River. Fred Beckey.
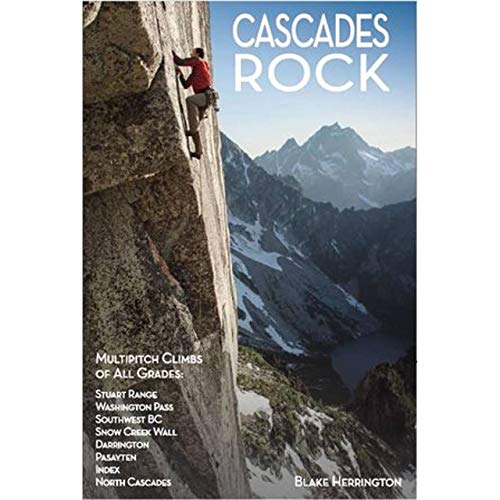
Cascades Rock. Blake Herrington.
Back to Top | Back to Resources
Continuing Education
(How do I get better?)
“Education is a progressive discovery of our own ignorance”
– Will Durant
Read a Book… or Four
Beyond online resources like this one, printed books are still a fantastic way to learn about these topics. The four books below if you read nothing else about alpine climbing will get you through.
Glacier Mountaineering – An Illustrated Guide to Glacier Travel and Crevasse Rescue. Andy Tyson and Mike Clelland.

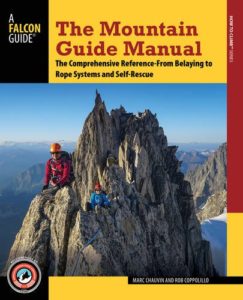
The Mountain Guide Manual – The Comprehensive Reference – From Belaying to Rope Systems and Self-Rescue. Marc Chauvin and Rob Coppolillo.
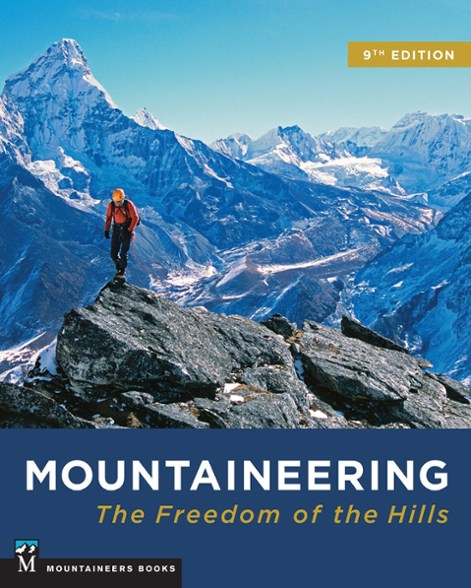
Mountaineering The Freedom of the Hills – 9th Edition. The Mountaineers.
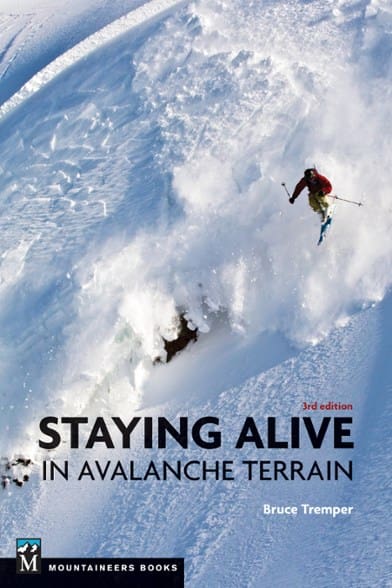
Staying Alive in Avalanche Terrain. Bruce Tremper.
Back to Top | Back to Education
The Mountains Don’t Care
There’s no replacement for hands-on experience with certified professionals for getting better at anything. If you’re learning to fly a plane, you don’t just read a book about being a pilot, play flight simulator on the computer a few times and then jump in a real plane, confident that you can fly. If you tried this, you might get away with it, but odds are you’d crash at some point.
Instead, you go up with a certified flight instructor who can teach and mentor you as well as be a safety net if things go wrong. In any activity where your life is potentially forfeit for a wrong decision, you should try to stack the odds in your favor as much as possible. Like it or not, the majority of alpine climbing takes place in hazardous mountain environments prone to avalanches and ice/rock fall. The mountains don’t care if you’re highly ignorant or highly skilled. They just are. Knowing where hazards exist in terrain, how to avoid or mitigate them, as well as how to respond in case of an emergency is essential. So here’s a list of courses available to you to continue your education and make sure you’re set up for success.
Avalanche Courses
AIARE Rec Level 1 Avalanche Course
The AIARE Level 1 Avalanche Course is designed to provide you with a foundational understanding of avalanches, observational and decision-making techniques, avalanche terrain assessment, and companion rescue. Along with learning the science and theory behind the avalanche phenomenon, you will be challenged to apply your new skills in the backcountry.
AIARE Rec Level 2 Avalanche Course
The AIARE Level 2 Avalanche Course is designed for experienced backcountry skiers and snowboarders looking to improve their evaluation of critical avalanche hazard assessment factors. The 3-day curriculum focuses on advanced observational techniques and prepares you to lead backcountry tours in more complicated terrain and snow conditions.
Avalanche Rescue Course
The AIARE Avalanche Rescue Course is a pre-requisite for both the AIARE Level 2 Avalanche Course, and the AIARE Pro 1 Avalanche Course. Students can expect to learn fundamental avalanche rescue skills for both single and multiple burials. Instructors will facilitate realistic practice scenarios, and provide mentorship and feedback.
Back to Top | Back to Education
Alpine Climbing Courses
At Cascade Mountain Ascents, all our alpine climbing courses are taught by AMGA trained Rock and/or Alpine Guides with strong backgrounds in educational pedagogy.

Our courses are designed to provide specific technical knowledge in a short amount of time. These courses are designed to be taken in any order as long as you meet the prerequisites.
Our technical courses are for recreationists seeking a concise and affordable approach to learning technical alpine climbing skills. These courses range from anchor building to crevasse rescue and glacier mountaineering techniques. Despite the short course format, our instructors set participants up for success by not only demonstrating and practicing skills in the field but providing folks with a strong list of resources and a plan for continued development at the end of course. One of those resources is us! Once you take a course with us, we are a resource to you for any questions for years and years to come. We’re happy to help.
Our three Alpine Climbing Courses are: Anchor Building | Crevasse Rescue | Glacier Mountaineering
Back to Top | Back to Education
Wilderness First Aid/Responder
If you are a part of a group traveling in big alpine terrain, you should have the skills to provide medical assistance to an injured human. Since you will likely not have quick access to emergency care out there, you are the first responder to any emergency. Thus, the Wilderness First Aid (WFA) and Wilderness First Responder (WFR- people say “woofer”) courses.
There are many providers of these two different courses. NOLS Wilderness Medicine is the most recognized and known for quality in the business, so we’ve linked them here, but Desert Mountain Medicine and Remote Medical Training also deliver a really high-quality course, so check them out as well. As a small guide service, we like supporting fellow small businesses.
Wilderness First Aid
The Wilderness First Aid course is an introduction to wilderness medicine, taught over two or two and a half days. It’s great for some base knowledge if you recreate outdoors where EMS response can be expected in a timely manner (fewer than eight hours). “You’ll learn the Patient Assessment System, how to provide effective first aid treatments for injuries and illnesses common in the outdoors, and how to make appropriate evacuation decisions.” (NOLS WMI) The course consists of indoor and outdoor components and is a lot of experiential learning through the use of scenarios. If you really want to feel more confident handling a variety of circumstances, take the WFR course.
Wilderness First Responder
The Wilderness First Responder Courses are the industry standard for professional guides, trip leaders, search and rescue team members, outdoor recreationists, and international travelers, but they are fantastic knowledge for anyone that plans to travel to more remote locations where access to care is greater than eight hours. After the 9-10 day course, “you will be able to conduct a thorough physical exam, obtain a patient history, assess vital signs, provide emergency care in the wilderness, and make crucial evacuation decisions.” (NOLS WMI)