By: Zack McGill
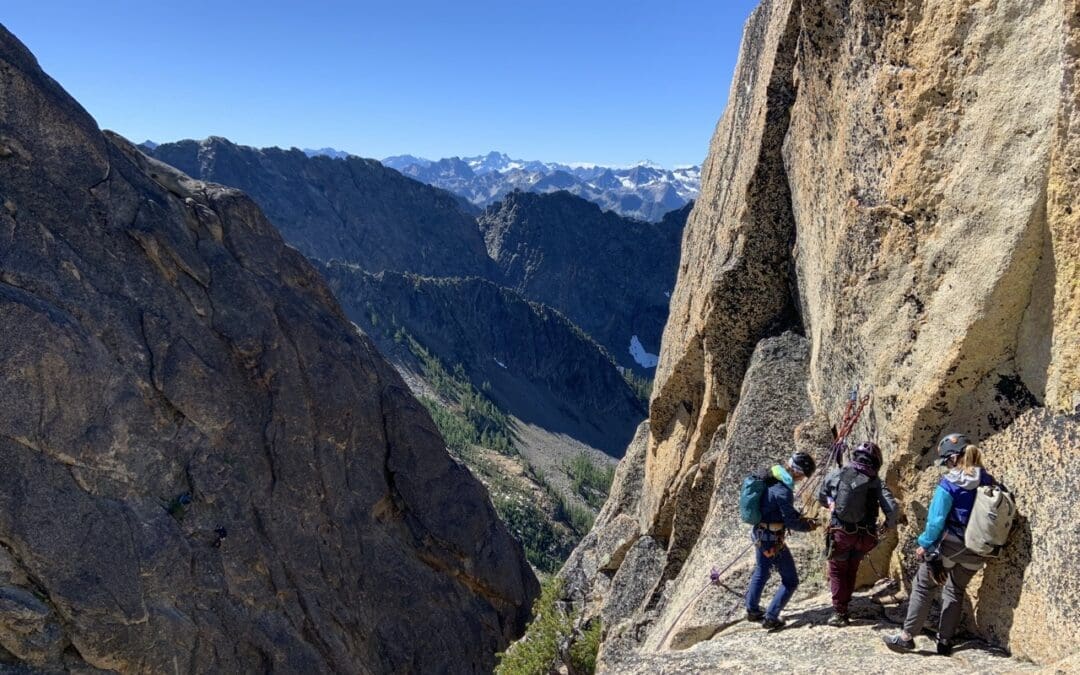
Roped travel on glaciers
There are many considerations when determining how to set up your rope team for glacier travel. How big of crevasses are you likely to encounter? What time of season is it? What is the experience level of folks on your team? This resource will help you navigate the important points and questions you should answer for knowing how to rig your rope for glacier travel.
Glaciers
First off, let’s talk about glaciers. The best way to avoid having to rely on your rope and rescue skills is to not fall in a crevasse in the first place. Although crevasses can often be difficult to spot visually, glaciers flow and crack in predictable ways that help us understand where crevasses are likely to be even without visual clues. Thanks physics!
Think of glaciers as rivers of ice. They constantly travel downhill with gravity, molding and sculpting the terrain they move. This is due to the sheer mass of Glaciers. After the accumulation of ice gets to about 100’ thick, the ice has no choice but to flow with gravity. Some glaciers (like in the PNW) are as small as a football field and relatively thin (hundreds of feet) whereas others (like in Antarctica) are miles across and hundreds of miles long and can be thousands of feet thick. Either way, understanding the insides of glaciers is essential to avoiding their dangers.
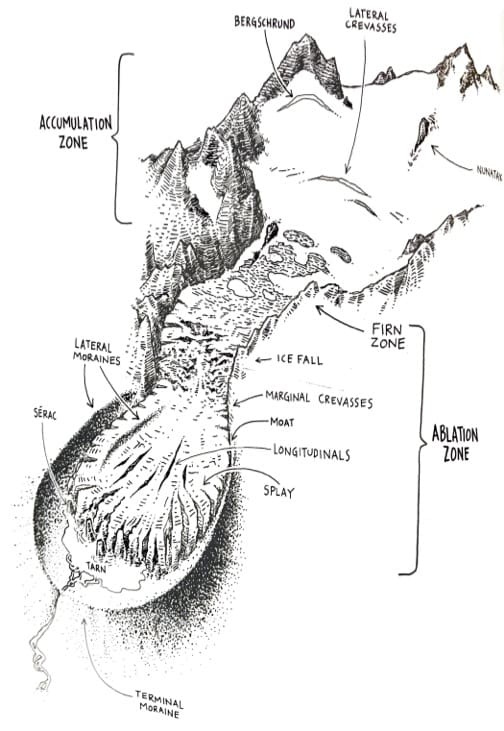
Firn Line
Firn line is the boundary between the accumulation zone (where more snow falls than melts each year) and ablation zone (where more snow melts than falls). This line changes year to year depending on how much snow falls and temperatures. Colder temperatures and more snow mean lower firn Line and visa versa.
Below the firn line in the ablation zone crevasses are exposed. Without snow to cover them, the likelihood of accidentally falling into a crevasse is low because crevasses and other hazards are easy to see. You’ll often travel un-roped here. Above the firn line, snow can bridge even the largest crevasses, making them difficult to avoid. Thus, the rope is used to keep the team from accidentally falling into the mountain.
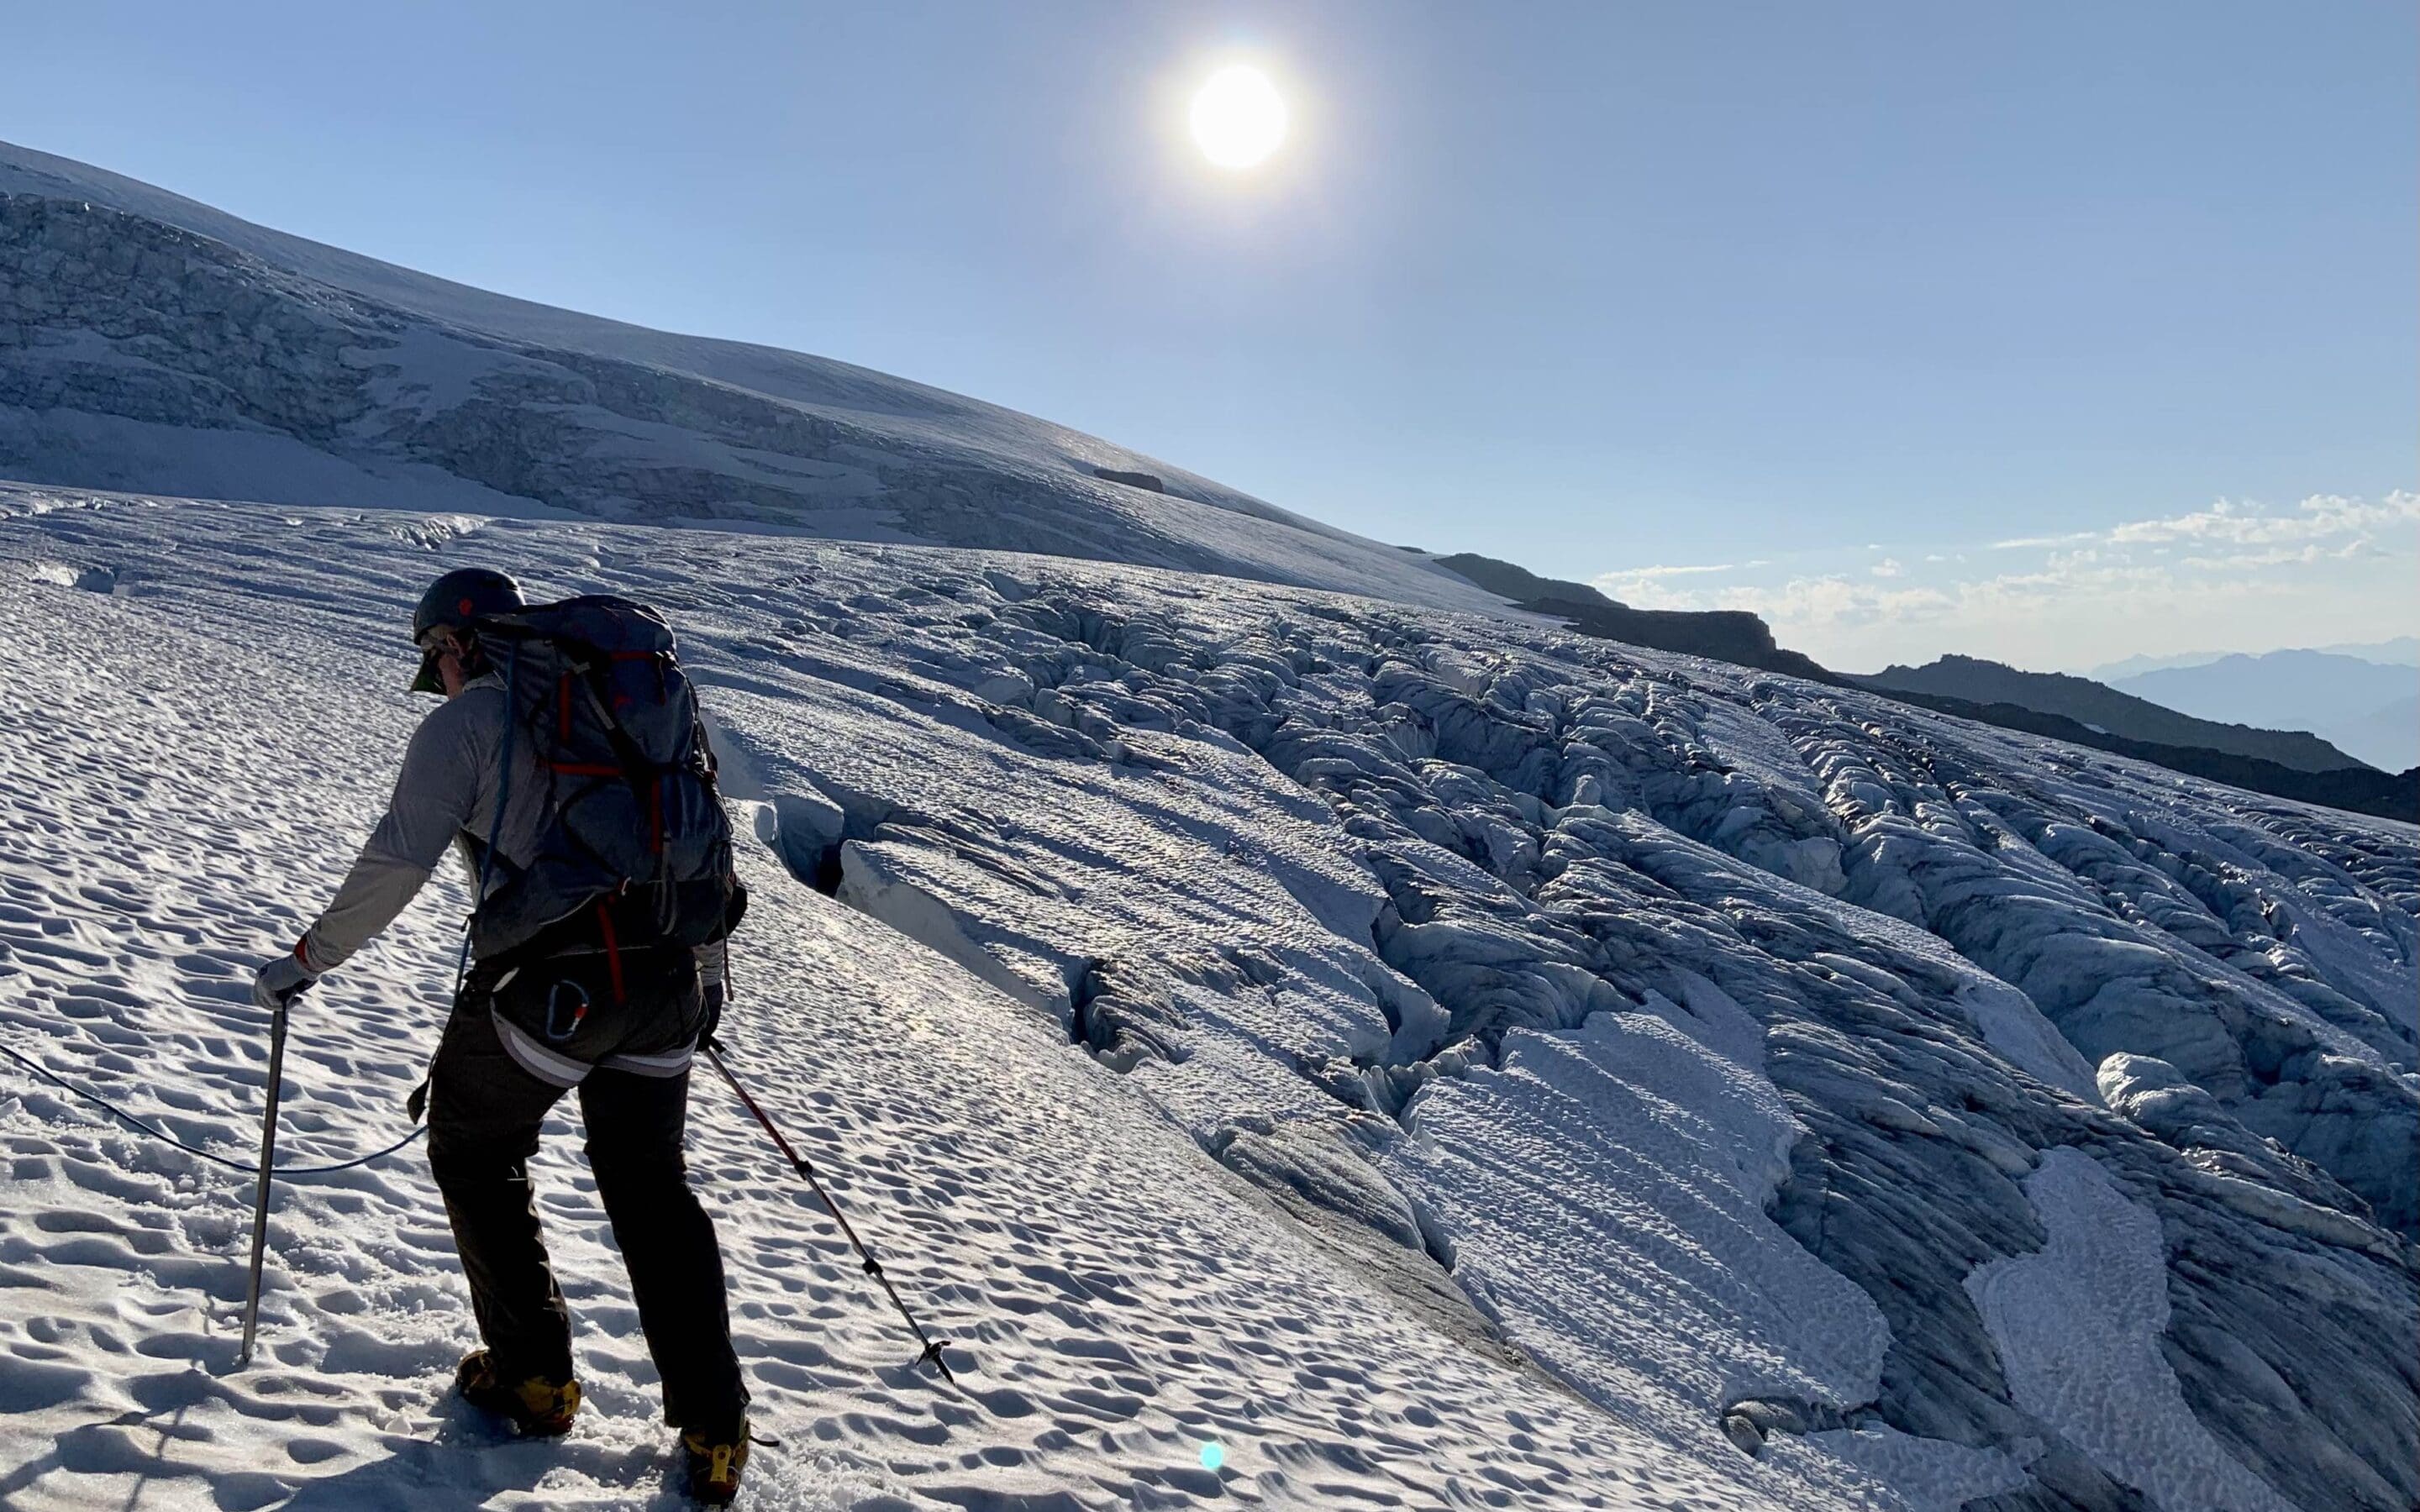
Crevasses
Just as a river gets more turbulent around obstacles (like rocks or cliffs) crevasses act as the glacier’s waves. They can be 150-200’ deep, making them one of the most significant hazards you’ll come across in glaciated terrain. Thankfully, they tend to fracture in predictable patterns at narrow channels, drops over cliff features, on the outside edge of large bends, over icefalls, and at the end of the glacier as it widens into a valley. These areas are referred to as “zones of tension” or “tension zones” as the glacier is under tremendous stress here.If you’ve taken an avalanche course, you know that convexities are trigger points where avalanches are more likely to initiate. Because gravity. Similarly, convexities on glaciers are places where the glacier is pulling apart and the surface is under a lot of tension. Crevasses form here, so travelers should be especially wary of convexities in glaciated terrain.
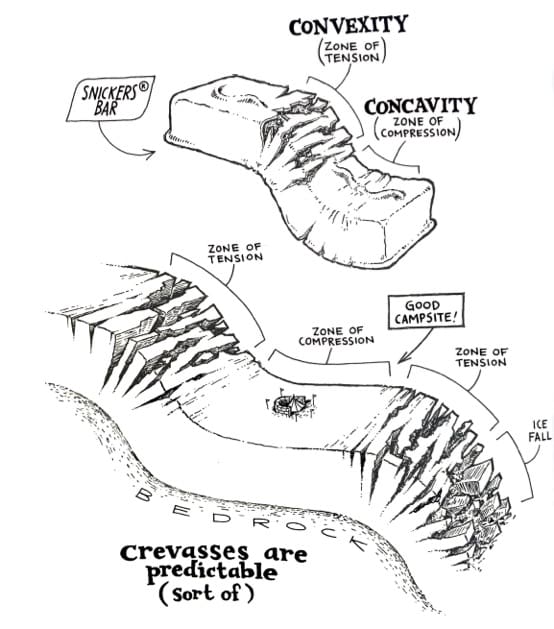
Concavities, on the other hand, are places where the surface is under compression. These compression zones are less likely to have big crevasses. To visualize this, think of bending a room temperature snickers bar in half. At the convexity, cracks appear. Travel through glaciated terrain, therefore, is best achieved by linking together compression zones as much as possible. That said, glaciers can be unpredictable, and crevasses can form in seemingly benign terrain if the glacier flows over an unseen object, so be prepared for the unexpected!
Snow Bridges
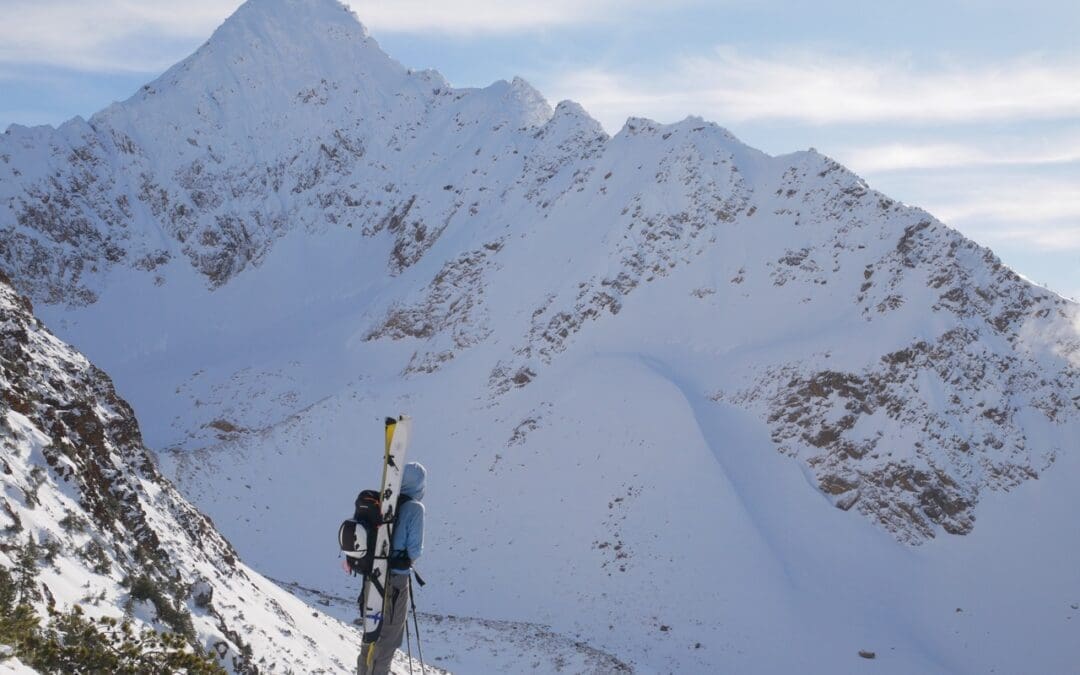
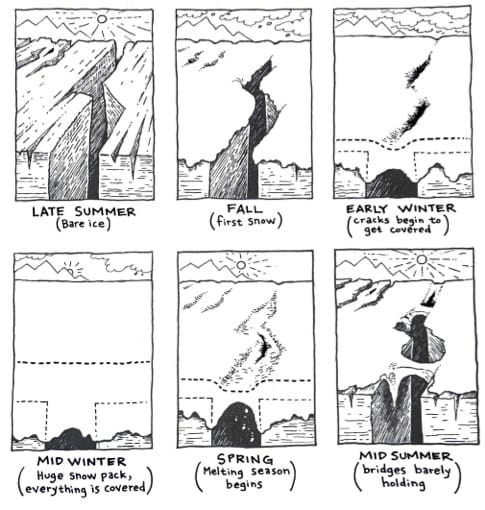
Most glacier mountaineering occurs in the spring/early summer when weather is more predictable. This is also the time when snow bridges are hopefully the strongest. Snow bridges form over crevasses during the winter as snow falls on either side of a crevasse and eventually bridges over the gap between the crevasse sides. Think of cornices on either side of the crevasse that kiss together in the middle.
Early on, these bridges are thin, scary, and weak. Over time, however, they get to be big and sturdy enough to support weight. Finding reliable snow bridges to cross is what glacier mountaineering is all about. Being able to assess the strength of snow bridges takes real life experience beyond just reading about it here, but this will give you some general guidelines.
First off, snow bridges are generally stronger based on the season. Late summer, into fall there may be no bridges at all (meaning that without a ladder or pulling off a jump like in Vertical Limit, it’s better to just go mountain biking or for a paddle. Early winter, these cracks are just barely bridged and the snow bridges weak. Mid-winter and early spring, the crevasses will be at their strongest.
Snow bridges are also strongest in the early hours of the morning after a hard freeze. As temperatures rise in the spring and summer, snow bridges (even saggy ones) that were safe to cross while frozen in the morning, become uncrossable later. To decide if they’re still passable takes good evaluation on the leader’s part by probing the bridge to gauge thickness and firmness and/or getting to the side if possible, to visually inspect it.
Why we rope up with others on a glacier is in case you choose your route poorly and collapse a snow bridge. Without the safety of the rope, you’ll fall until you hit a snow plug, where the crevasse gets too narrow for you to fit, you wedge in to a constriction, or you hit bottom. None of these scenarios is a good time.
There’s a ton more to talk about with glaciers (moraines, seracs, moulins, moats, and bergschrunds to name just a few). If you’re curious about these features, we recommend you pick up a copy of Glacier Mountaineering – An Illustrated Guide to Glacier Travel and Crevasse Rescue by Andy Tyson and Mike Clelland. It’s the most user-friendly resource on the topic and the artistic depictions (many of them used on this page) are fabulous. For now, let’s get into how to rig your rope for glacier travel.
RIgging The Rope For Glacier Travel
Let’s start off with the basics – gear.
Gear
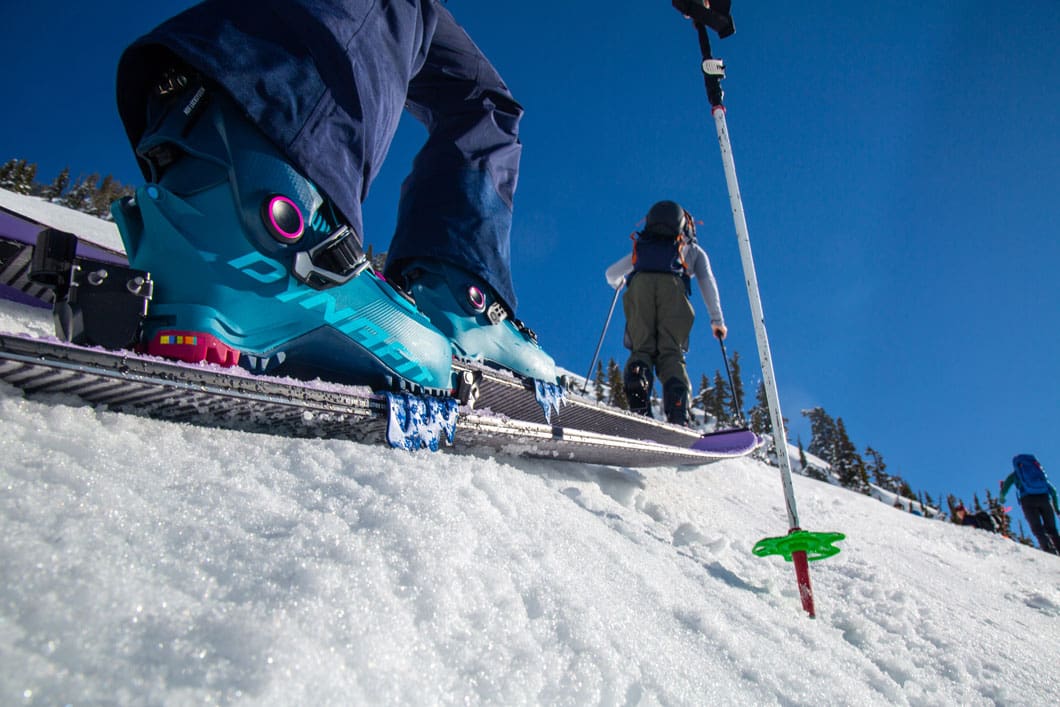
At the least, everyone on the team should have on a helmet to protect the money maker, have an ice axe, and a harness (we recommend a diaper style harness that can be taken on and off without having to remove crampons or ski equipment).
For hardware, if everyone is versed in crevasse rescue, a kit includes:
- 4x locking carabiners (HMS shaped, one preferably triple action)
- 4x non-locking carabiners (mainly for wracking equipment)
- 1x micro traxion pulley (or other progress capture device)
- 1x Tibloc (or prussik)
- 1x 6mm cordalette (20’ long)
- 1-2x double to quad length sling(s)
- 1 ATC (Alpine if you’re using smaller diameter ropes)
The final and most crucial element is the rope. What diameter and style of rope you want will depend on your objective and how much security you desire. Obviously, larger diameter, beefier ropes are going to be stronger and be less likely to cut, but they also weigh a ton and are going to cause you a lot of back pain carrying it around.
Nowadays, ropes are getting smaller and lighter while still maintaining their strength (as long as they don’t get cut). Smaller ropes are still more susceptible to cutting than their larger diameter counterparts. Thankfully, the winter environment is typically one with fewer sharp edges for the rope to run across (at least in the natural world). Your crampons, ski edges, and axes are all things to be aware of when traveling with a rope. You can learn more about ropes in our Alpine Climbing Guide.
For length, a 60m rope is standard. But you’ll want a rope that allows for all members of the team to be able to clip in with adequate spacing and still have enough rope on either end to perform a rescue if needed. If you’re traveling on skis or split board, you’ll need to carry at least two ropes. Why? Well, you’re most likely skiing/riding downhill unroped and if you only have one rope, what happens if the person who’s carrying it is the one who goes in? Yeah… bummer. Now with 6mm glacier cord like the Petzl RAD line being readily available, carrying two ropes isn’t that big of a deal. Carrying two 30-40m RAD lines ends up weighing less and being less bulky than a single 60m single rope anyway AND you get to split that weight between two people. If you’re not planning on using the rope(s) for anything but glacier travel and rescue, the 6mm glacier cord is an expensive but awesome tool. Your back will thank you.
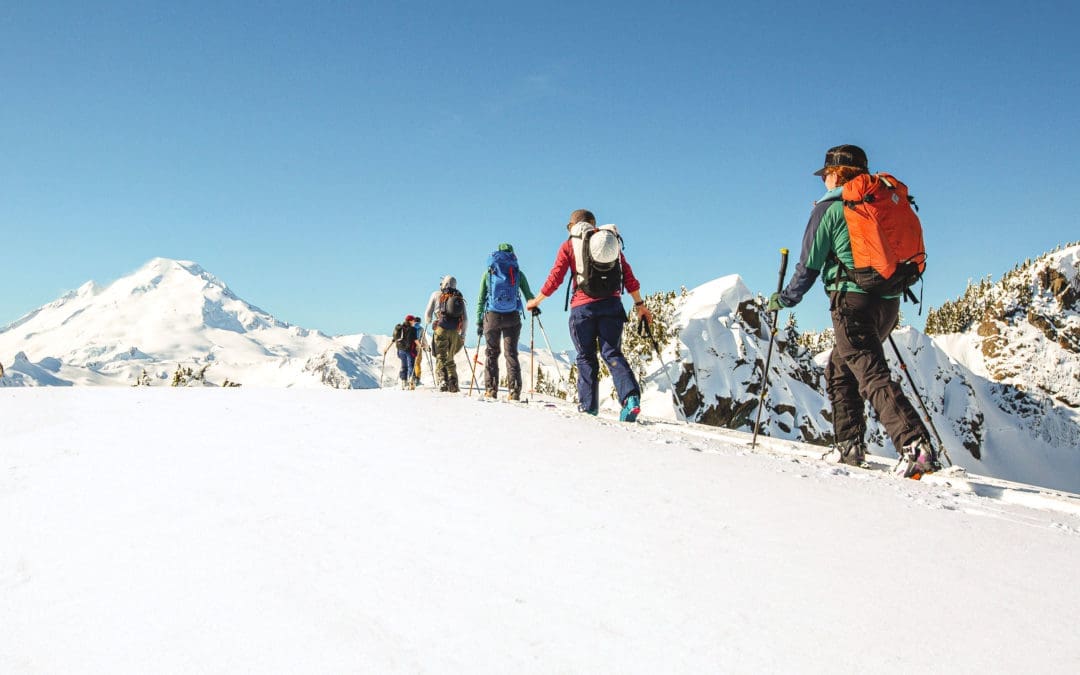
Spacing – How Far Apart?
How far apart you space people depends on the largest crevasses you expect to come across. In general, you only want one person crossing a snow bridge at a time so if it fails, the rest of the team is able to help catch the fall. In the Cascades, that’s typically 30-40’. In larger ranges, like the Himalaya or Alaska, crevasses can be up to 100’ wide and you’ll want more distance between humans.
For actually measuring the spacing, using rough estimates through arm lengths is fine. No need to bust out a ruler or your probe. I’m 6’5”, so I do 5 a little less than full arm lengths between knots here in the Cascades to achieve that 30-40’.
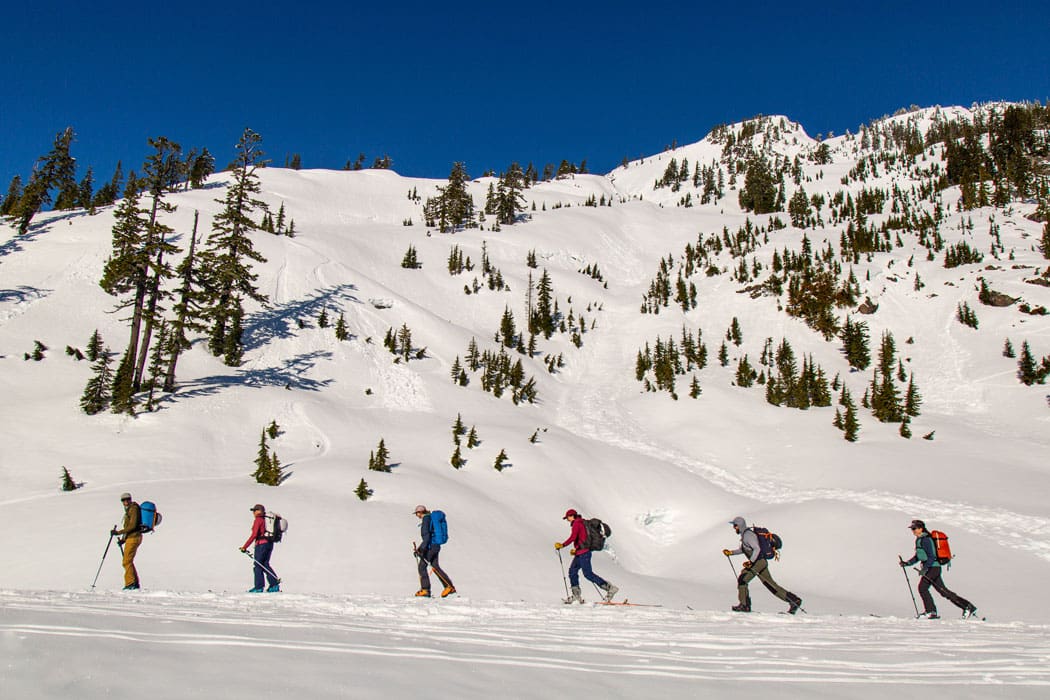
Size of Rope Team
The ideal amount on a rope team is 3-5.
Rope teams of two are more risky because if one person falls in, there’s only one other person who can catch the fall. If the second person doesn’t catch the fall, they too will fall into the crevasse and the game (as they say) is over. This is often why it’s standard for rope teams of two to tie knots between them in the hopes that one of the knots will dig into the lip of the crevasse if someone falls in and help arrest the fall.
More than five people on a rope team leads to folks being clipped in too close together. This leads to more than one person crossing a snow bridge at a time. More people on a bridge = more weight, which makes snow bridges more likely to fail and (with two falling in) tougher to arrest for the rest of the team. It’s also just a pain with communication and travel. Rope team travel can be quite frustrating if folks walk at different speeds. Being roped together, you’ll need to work together to find a good pace and navigate around hazards. More people means more personalities and more complexity when it comes to decision making.
If you have a larger group, travel as separate rope teams. A group of six, for instance, can travel as two groups of three. Communication and travel will be easier in the smaller groups and having a separate rope team available if someone falls in a crack can really speed up rescue times. The rope team of the individual who falls in can just stay in arrest while the other rope team performs the rescue. Check out our resource on crevasse rescue if you want to learn how to do all that.
Who Goes Where?
Deciding who goes where on the rope is an art. No order is the most ideal unless everyone is an expert at everything. In general, you want your most experienced person up front navigating. Remember, your best defense against falling in a crevasse isn’t the rope, it’s good route choice and not falling in one to begin with. The more experienced person will hopefully be the best at choosing a route through glaciated terrain that avoids big crevasses and the best snow bridges.
The downside of this, of course, is that if they do fall in, everyone else will need to know what to do to perform a rescue. So practice up!
The least experienced people are placed in the middle. The first and last person are the most likely to fall into a crevasse, so the middle humans will likely only be responsible for going into arrest position to help hold the team on the mountain. In short, they are hopefully going to be meat anchors to help hold the team on the mountain.
Another consideration besides experience is weight. Larger humans are more likely to punch through a bridge. Traveling uphill, it’s often nice to have the largest person go first. If the biggest person makes it, you’ll probably feel a lot better walking across yourself. Also, if the first person in line falls in on the uphill, gravity is on the rest of the team’s side. On the downhill, it’s then nice to have that larger person be in the back. That way, they act as an anchor if someone up front falls in and, if they do fall in, you’re back to the original scenario where gravity is on the rest of the team’s side.
Attaching to the Rope
The standard knots used to attach folks into the middle of a rope in glaciated terrain are either the overhand on a bite, figure 8 on a bite, or the alpine butterfly. Check out our resource on Essential Knots and Hitches if you don’t know how to tie them. We prefer the alpine butterfly. This knot is made to be weighted from either side without any fear of the knot rolling on itself or becoming untied and still be relatively easy to untie even after getting loaded. It also runs pretty nice over the snow.
To clip into the knot, we like a triple action, non-cross loading carabiner, but a standard D-shaped locker and non-locker with gates opposite and opposed or two lockers (quad action) works too. You just don’t want it to be super easy to come out of the rope. It’s your lifeline after all.
Pre-Rigging
If you’ve read any book or visited another site on how to rig for glacier travel, you’ve likely seen tons of diagrams and text on how to “pre-rig” for glacier travel. This involves attaching prussiks and/or ascenders to the climbing rope and yourself as well as (in some cases) clipping the rope up into chest harnesses or your backpack straps.
Here in the Cascades, we don’t pre-rig very often. The reason for this is simple: there are tons of different situations where a pre-rig can be useful, but no pre-rig is going to handle every situation. Also, some pre-rigs can be downright dangerous under certain circumstances.
Purpose of the Pre-Rig
The purpose of the pre-rig can be to ascend a rope, help execute crevasse rescue, or rope interval management. Spend enough time out using some pre-rig technique and you’ll likely find yourself in a situation that requires a different rig than the one you have set up. Then you’re spending valuable time undoing whatever rope macrame you have going on so you can replace it with what you actually need.
In addition, most pre-rigs are for rope ascension if you fall into a crevasse. It’s best practice to wait until the team on the surface has established an anchor and transferred your weight to the anchor before you ascend though, so there will be plenty of time to put on your ascension system while you wait. Or… more ideally, the squad is really dialed on crevasse rescue and can scoop you out quickly.
Pre-Rigs Can be Dangerous
One pre-rig that can be dangerous that I’ll touch on is the pre-rigged chest harness. This involves a climber having the rope tied into their harness, traveling up through a chest harness and then on to another climber. The whole purpose of rigging the rope up through a chest harness is to help keep your body upright in a crevasse fall. This certainly helps someone in a crevasse if they’re carrying a large backpack stay upright and can be crucial if a victim is hanging in a crevasse for an extended period of time (especially if they’re unconscious). However, let’s think about order of operations and levels of importance.
If someone falls into a crevasse, what’s step one for the rest of the team? If you chose “arrest the fall”, *ding* *ding* *ding* you’re correct! The most important thing in a crevasse fall is for the rest of the team to catch the fall and not get dragged in themselves. Pre-rigged chest harnesses greatly reduce your ability to catch the fall by creating a 2:1 “dis”advantage system that applies more load to rescuers. Again, if you don’t catch the fall, it’s game over and whatever pre-rig you got all cute creating means jack.
Time and Place…
All that said, there’s a time and a place for even the chest harness pre-rig. If you’re in a place where a crevasse fall is likely, you’re carrying humongous packs, and you know the leader is most likely to fall in, then yeah, have the front person pre-rigged with a chest harness. Just think critically about why you’re doing what you’re doing, the potential downsides, and don’t just pre-rig because you think that you’re supposed to all the time. You aren’t.
Rescue Rope
When setting up your rope team, it’s best practice to have some additional rope to be used in a rescue or for increasing the rope interval stashed at the front and end of the rope team. This can be achieved different ways depending on the number of folks on the rope team. For a team of three for instance, just start at the center of the rope and tie your clip in knot for the middle person. Then measure out your desired distance between humans by taking arm lengths of rope from the center knot and tying clip in knots for the first and last human. The rest of the rope on either side can then be coiled up and packed away.
Sometimes it’s nice to have the additional rope readily available so if a snow bridge is a little larger than the interval you have between folks, you can lengthen it. This can be achieved by coiling the rope in a tight coil over your shoulder to around your belly button. This technique is demonstrated at the end of the video below:
Just remember to tie off your coils like Jeff does in the video or you’d get strangled to death if someone fell and weighted you. Not a pretty way to go.
If you don’t plan to have to change the rope interval between you, it’s nice to just stash the extra rope in your backpack. Butterfly coiling the remaining rope from the end towards the clip in knot ensures that it is stacked correctly. Then I like to double it over and finish it with a gasket finish so it’s about the size of a football and easily stowed inside my backpack. Although you won’t look as sexy as the people with the rope coiled around them, you’ll be a heck of a lot more comfortable. Carrying a rope in coils around your neck will hurt after a while.
Take a Course!
Reading, watching videos, and practicing on your own can only take you so far. To really get dialed on crevasse rescue, take a crevasse rescue course!