Backcountry Repair Kits for Skiers and Riders
By: Zack McGill and Charlie Lane
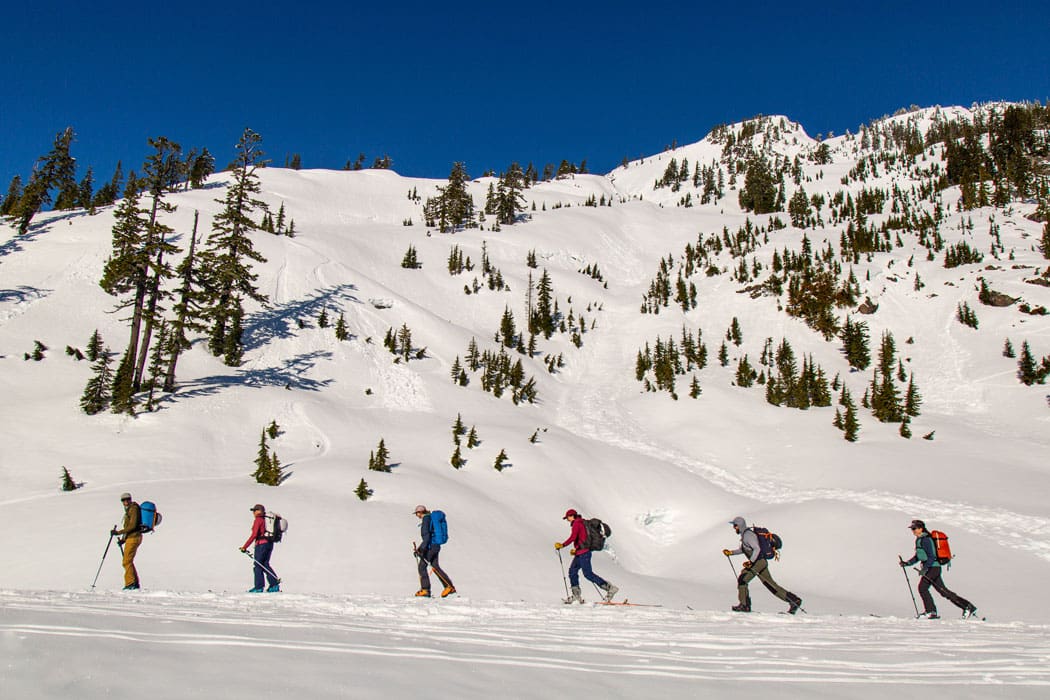
As a community, backcountry skiers and riders tend to focus on avalanche rescue more than anything else when it comes to practice. Yes, you should be well versed in avalanche rescue techniques, but how often are you going to deal with an avalanche rescue versus a gear/equipment malfunction? I hazard to say that on a day to day basis, equipment malfunctions are much more likely, but do you carry an inclusive backcountry skiing repair kit?

If you or someone in your group breaks a ski or board, rips out a binding, has a skin that won’t adhere to the bases anymore, or any number of other problems, can you honestly say that you’re prepared to deal with it in the field?
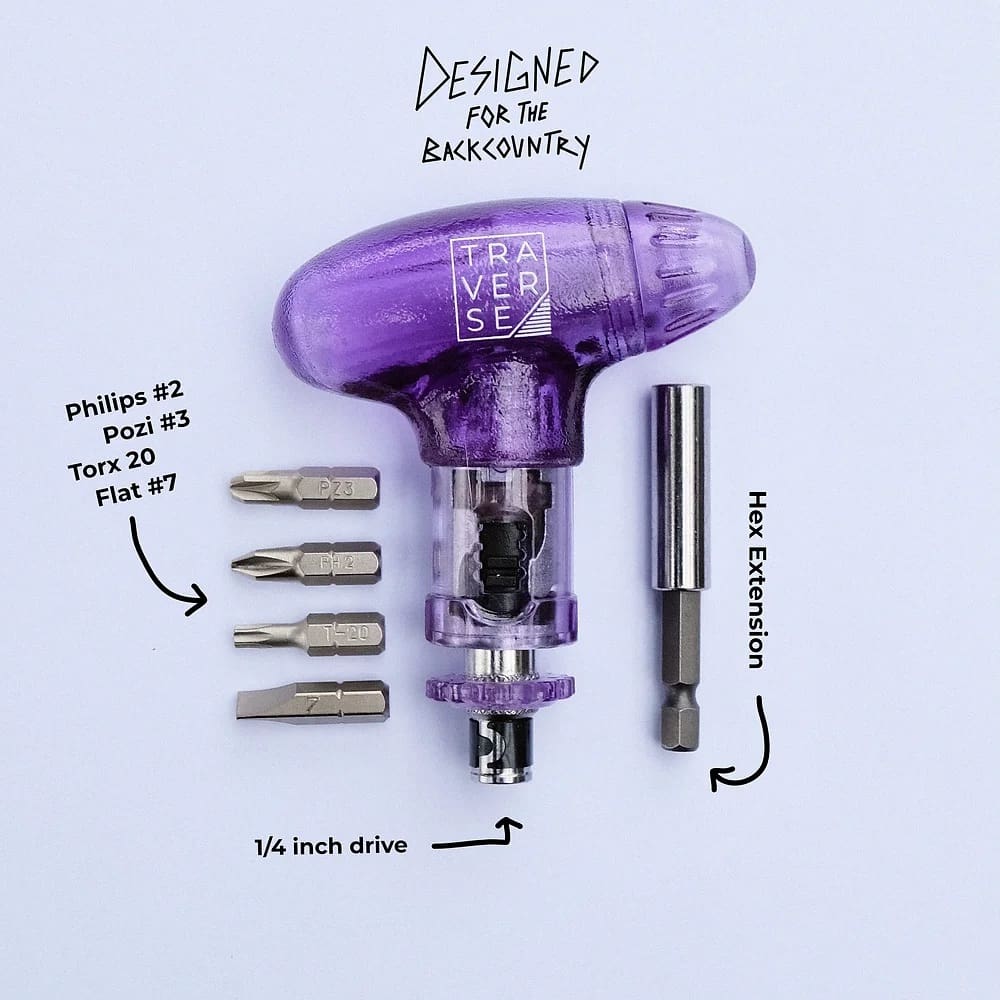
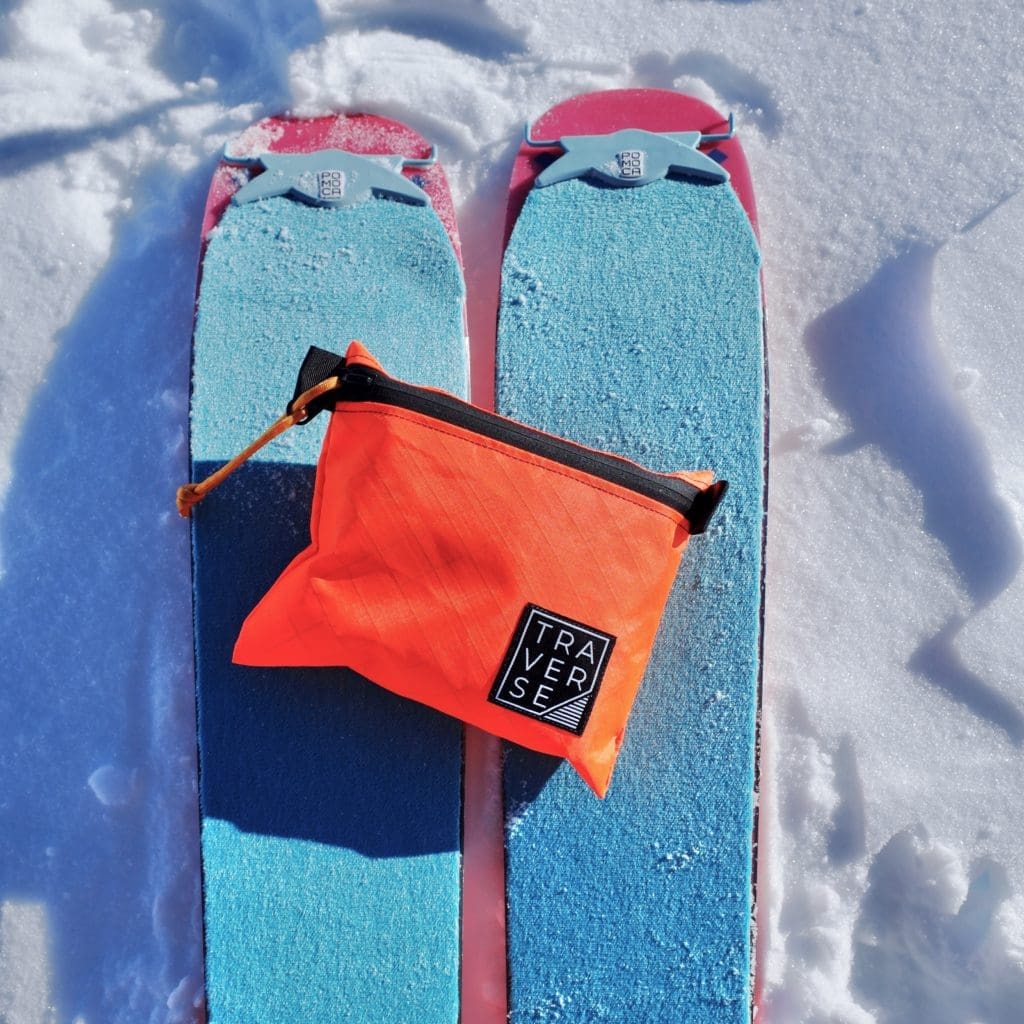
This resource is a living document that seeks to crowdsource the latest and greatest when it comes to what to carry in a backcountry repair kit, and how to fix many of the issues you could come across. Investing in a quality repair kit that can fix most gear/equipment problems is pretty darn easy. Whether you put together your own kit or purchase a pre-fab kit like the one put together by our partner Traverse Equipment , you’ll be surprised how modest a financial investment it is. An overview of that kit is below and referenced heavily in this resource.
This resource details:
Essential Items – Things you should always have with you when you travel in the backcountry to get you back to the car in case of an equipment failure.
Other Items – Things that aren’t essential until they are. Though dealing with more unlikely scenarios like a torn toe piece or broken ski, these specialty items don’t weight that much! So it’s probably a good idea to throw them in eh?
Multi-Day Specific Items – Things that you don’t need to think about carrying unless you’re on a traverse or hut trip lasting multiple days and requiring more gear.
EssentiaL Items
You already carry A LOT of equipment backcountry skiing. At least… you should! Beacon, shovel, probe, first aid kit, layers, skins, food and water for the day… it all adds up. So share the load! It’s nice to break up group gear items like a repair kit amongst the team. Just ensure you know who has what.
Your kit also doesn’t have to be the same for every mission. Depending on how long of a backcountry tour you plan to go on, your repair kit should adapt accordingly. No matter how long your tour, here are some essential items to always have with you or split amongst the squad.
- AAA Batteries (x3)
- Multi-Tool With Pliers, knife, and saw.
- Ratchet Driver (With Bits!)
- Torx 20
- Phillips #2 & #3
- Hex #4
- Flat #7
- Ski Straps (x3-6)
- Small Hose Clamps (Ski Pole Repair)
- Large Hose Clamp (Ripped Binding Repair)
- Extra Screws/Parts (Boot/Binding Specific)
- Powder Basket
- Scraper
- Skin Wax
- Safety Pins
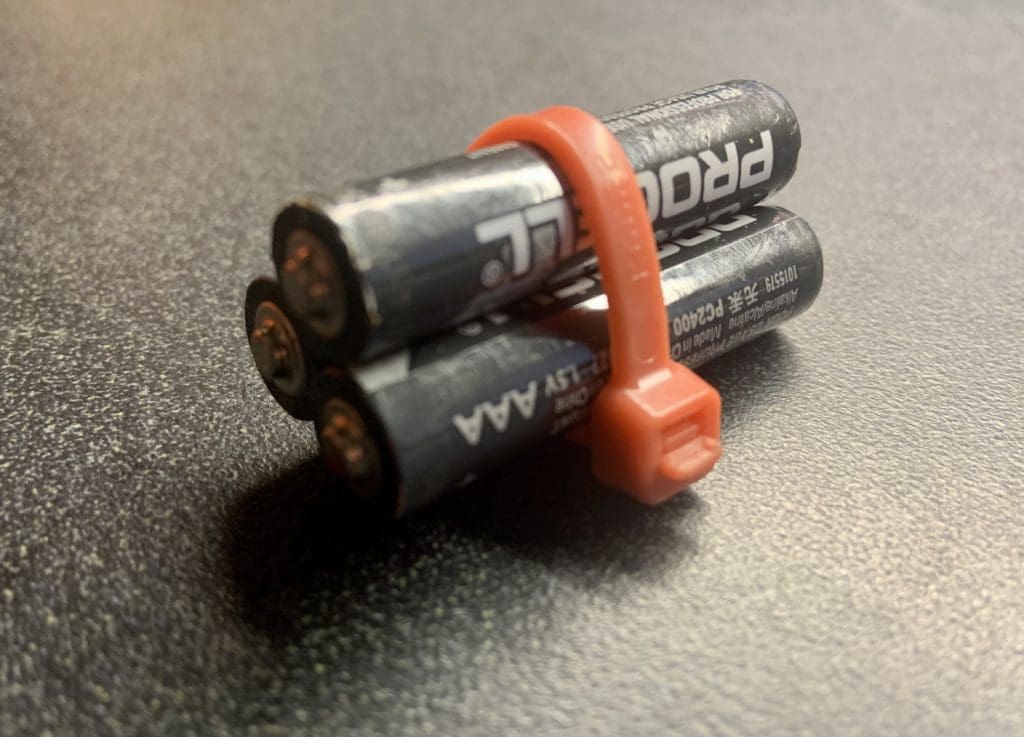
AAA Batteries
Without them, your avalanche beacon and headlamp don’t work anymore. Make sure you have a spare set! Most avalanche beacons and headlamps take Triple A. Bring three of them. I give out so many batteries to people. I don’t want to do that anymore. Bring your own dang batteries!
Pro Tip: Wrap a piece of tape or a zip tie around the three batteries to keep them sintered together so you’re not fishing around for three individual batteries.
Multi-Tool With Pliers
Pliers (needle nose) are essential for grabbing metal parts, which will be quite cold out there in the snow and allow you to be more dextrous even while wearing gloves. A knife is also nice for chipping out ice from bindings, cutting cord, cheese, clothing or other things that need to be cut. It should also have some different bits (Phillips and straight at a minimum) so you can easily tighten loose screws on boots or bindings. Bonus is wire cutting capabilities.
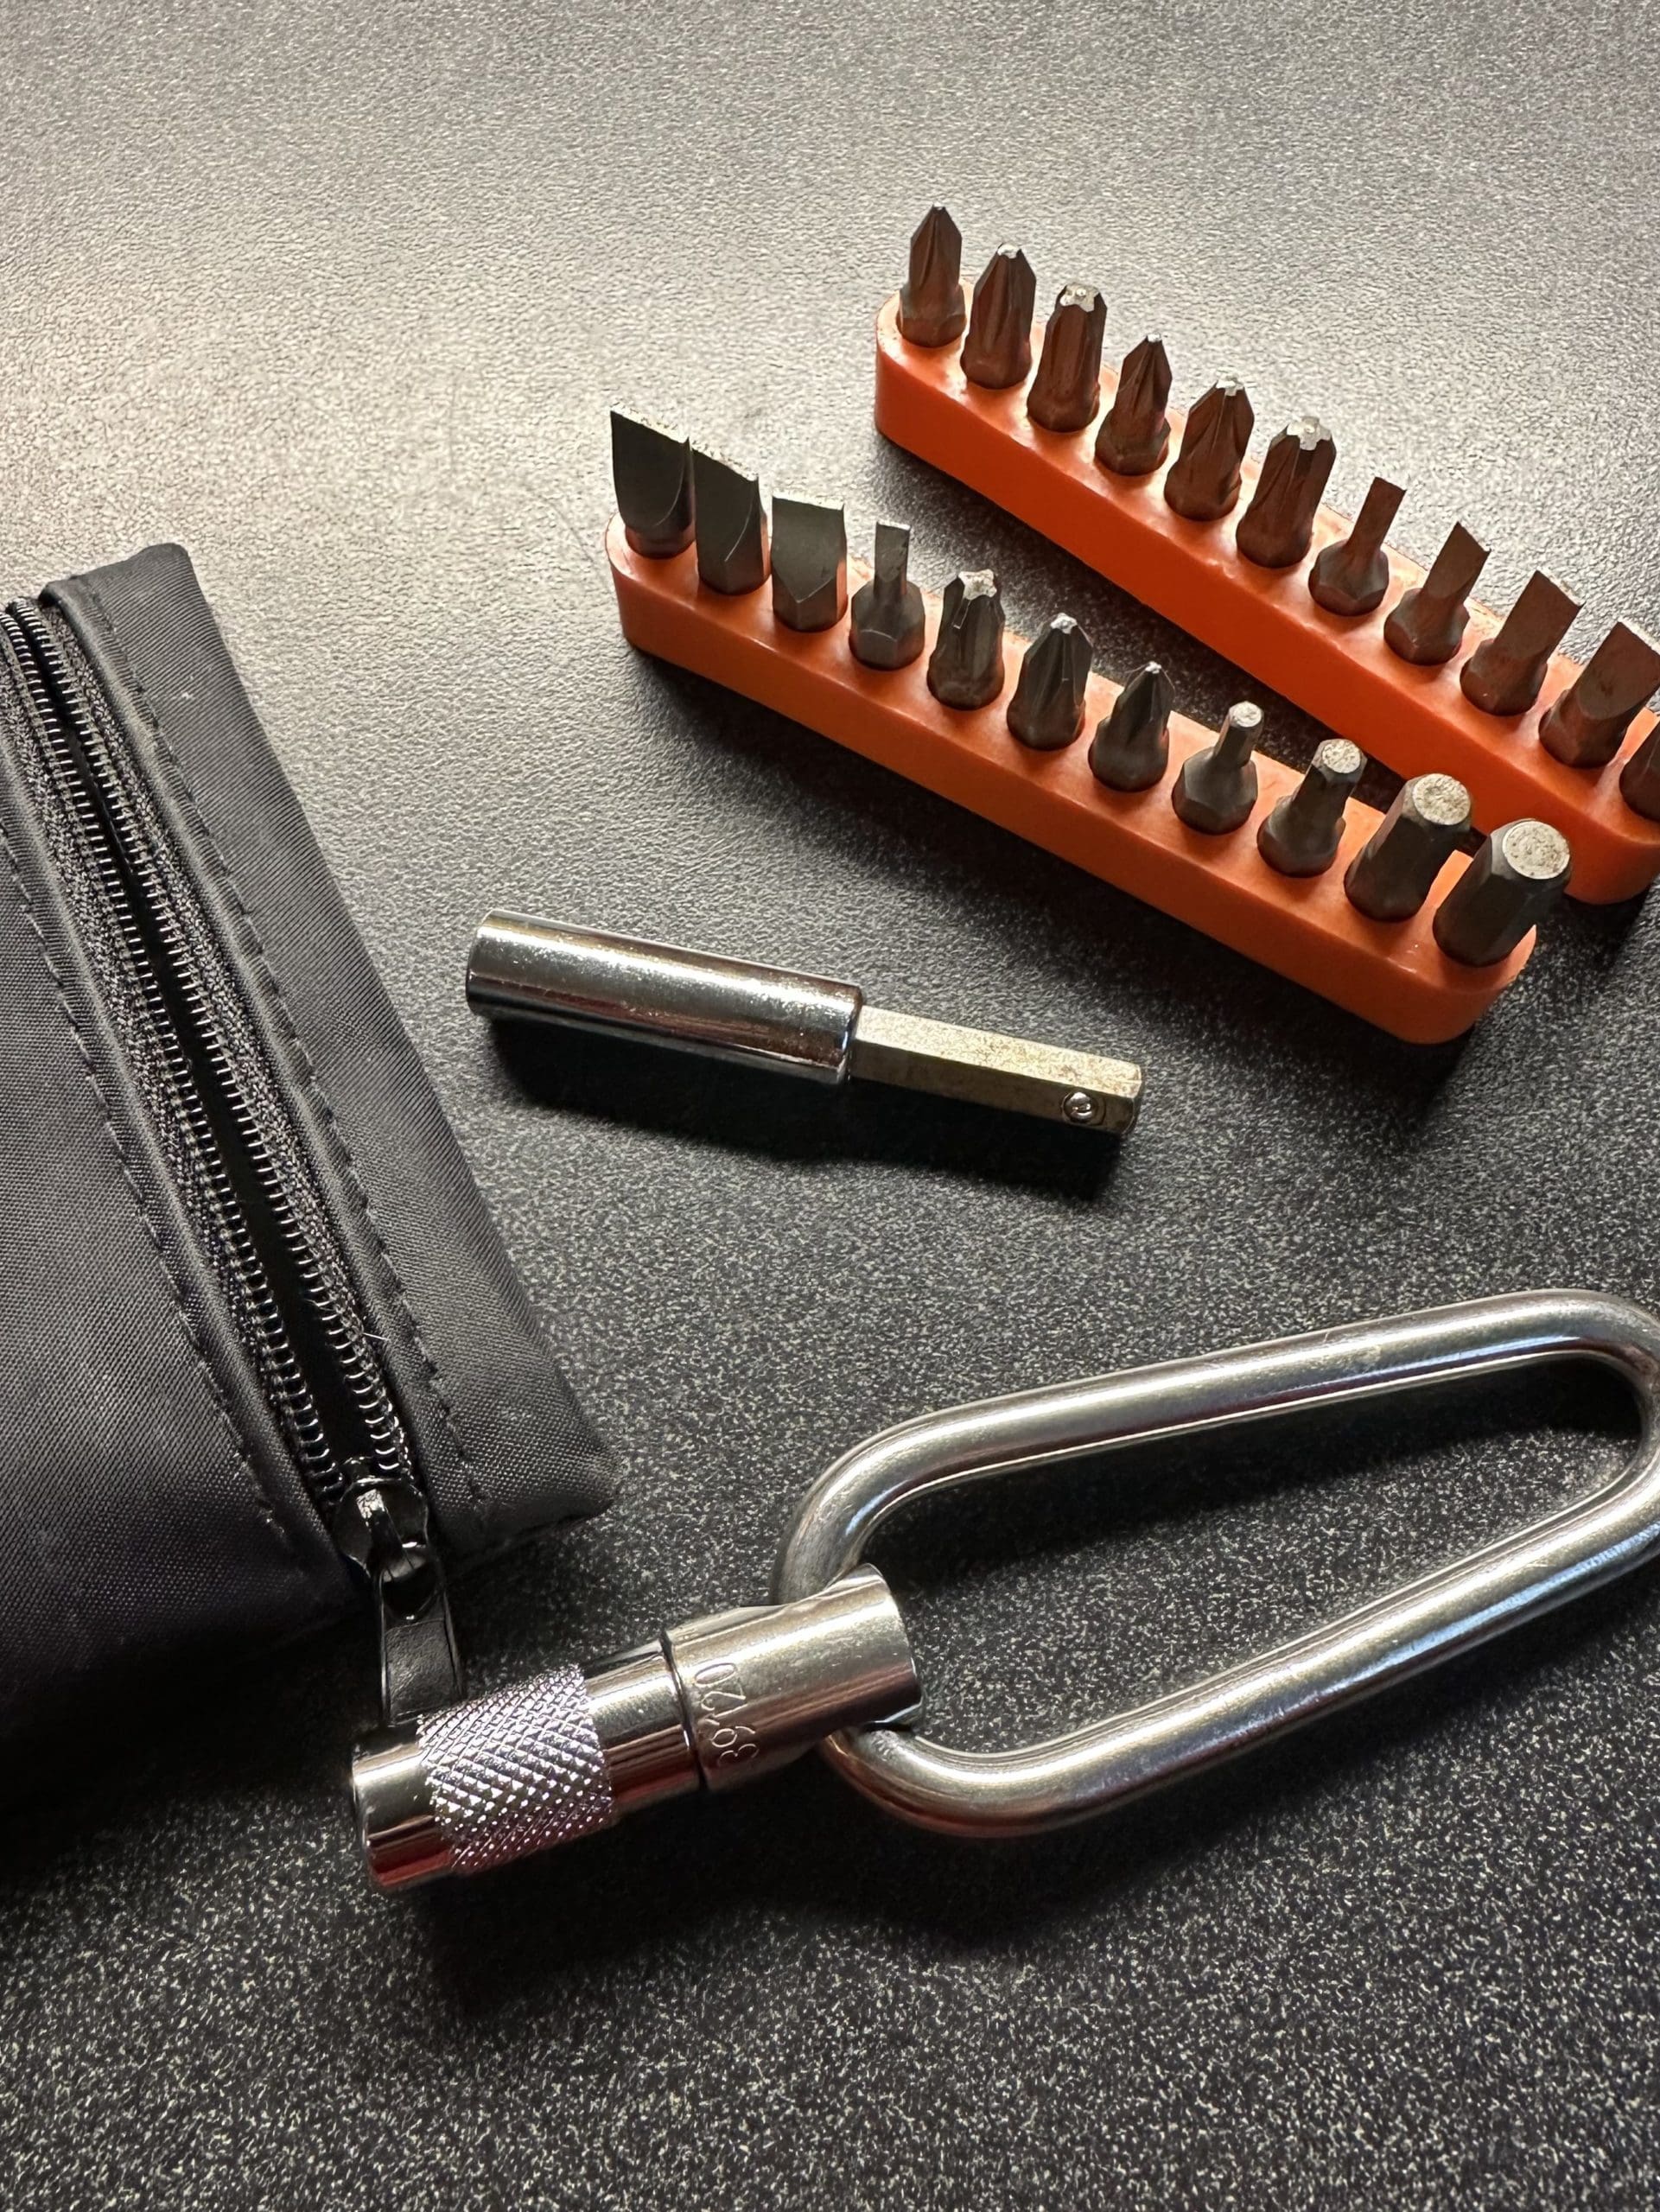
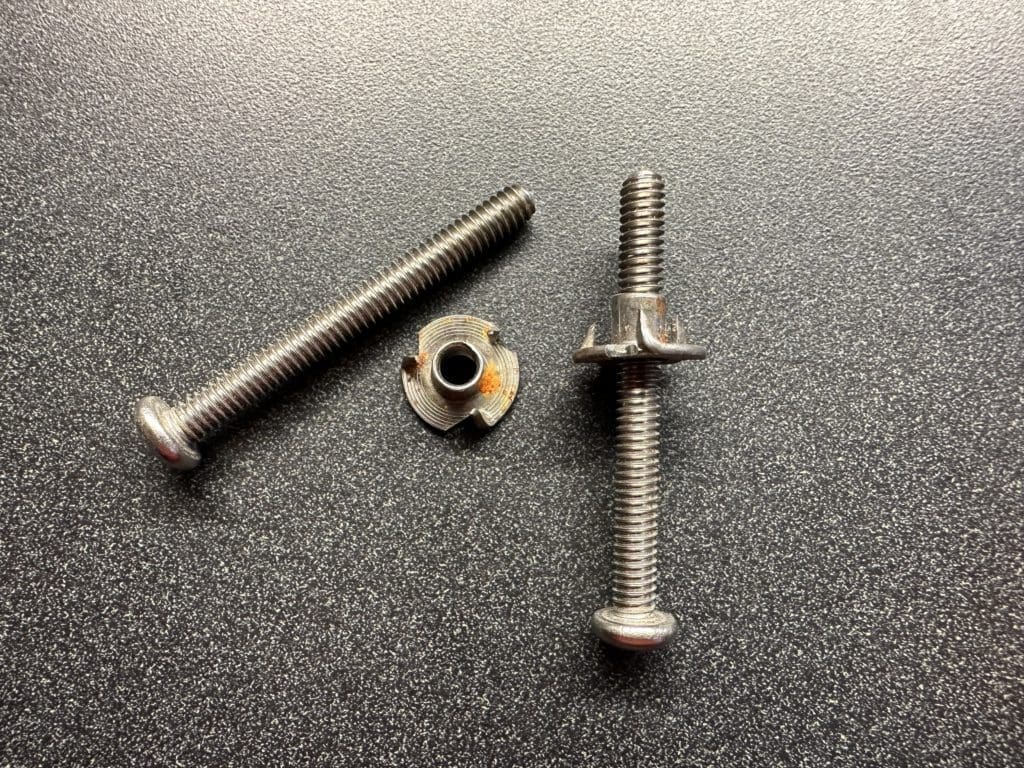
It’s also nice to have the correct bits/driver to deal with a plethora of issues and bindings/boots other than your own. I carry in conjunction with a multi-tool w/pliers, Doc Allen’s VersaTool (pictured below).
Pro Tip: Keep this in a pocket that’s easily accessible (hip belt pockets are awesome but at least top of the pack) rather than in your repair kit. Remember, you don’t always have to have all items of your repair kit inside the same bag. Keep your most likely to use items accessible.
Ratchet Driver
Make sure you always check your screws before a long trip and ensure you have the proper bits for your setup. This means boots AND bindings. Having the Torx 20 (Dynafit) Philips #2 & #3, Hex #4, and Flat #7 will get your through most gear snafus. You should also have one that works with a drill bit so you can go all the way through your ski if need be. Lots of manufacturers sell effective ratchet driver that gets most jobs done.
Ski Straps
Useful for tons of different things. I carry six of various sizes at all times. If you break a buckle or tensioning strap on your boot, have your skins falling off your skis, lose a tail clip, are having binding issues, or any other number of things, ski straps are great!

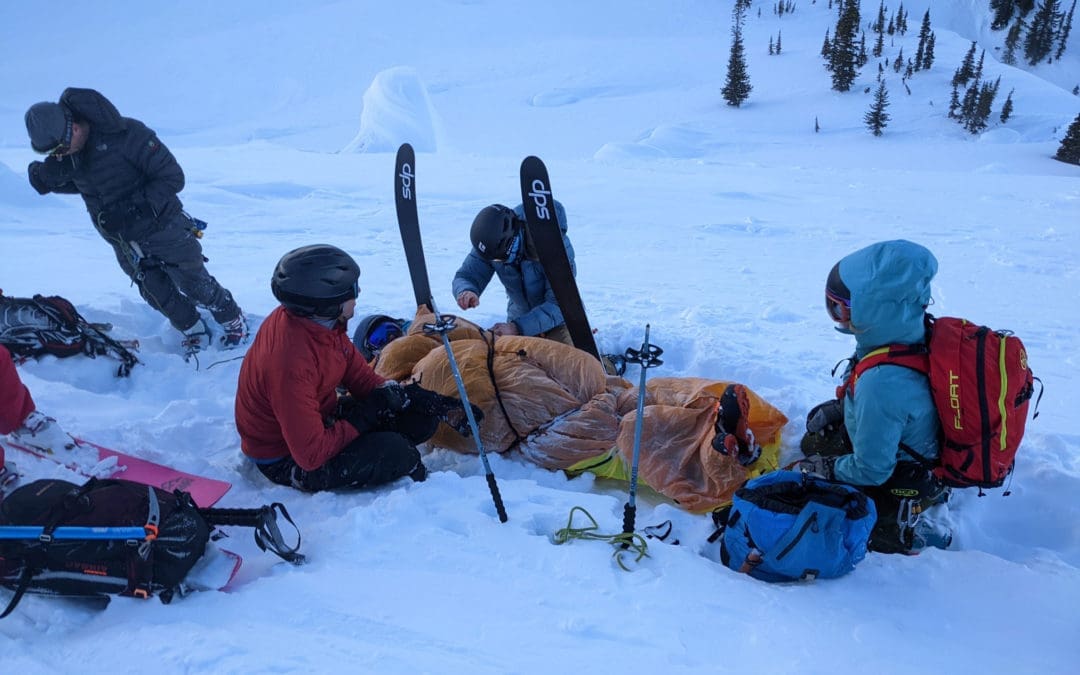
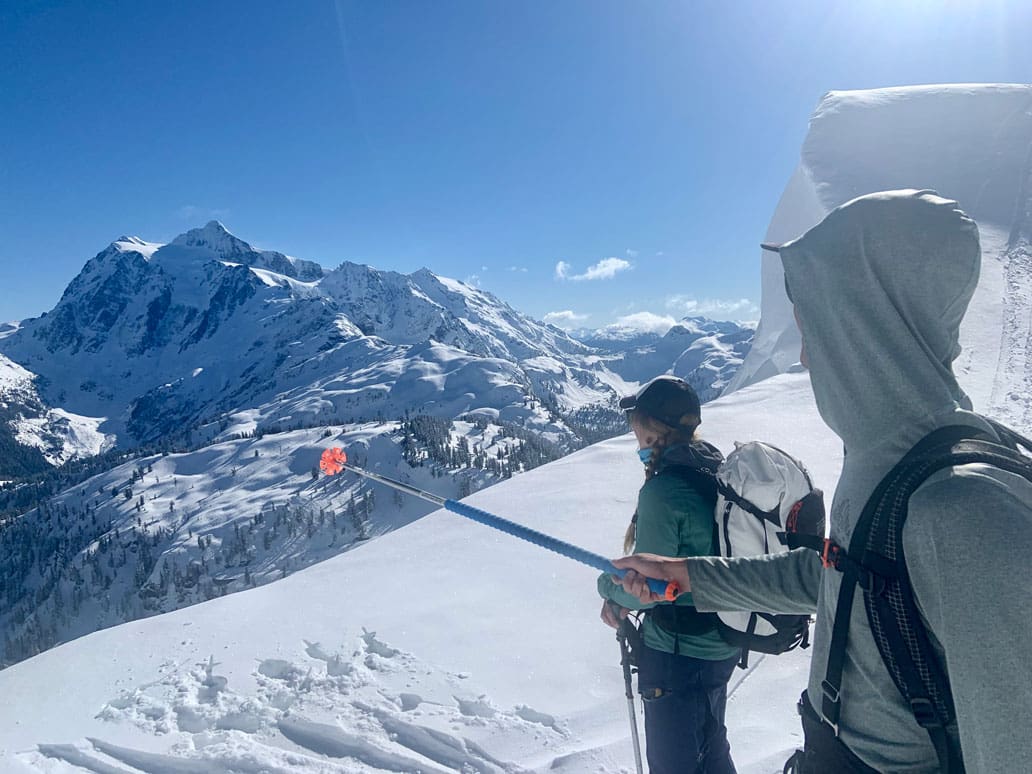
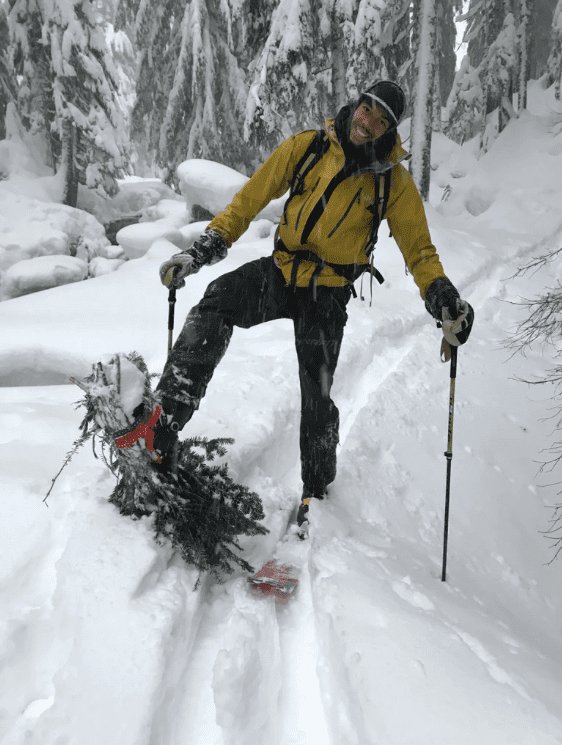
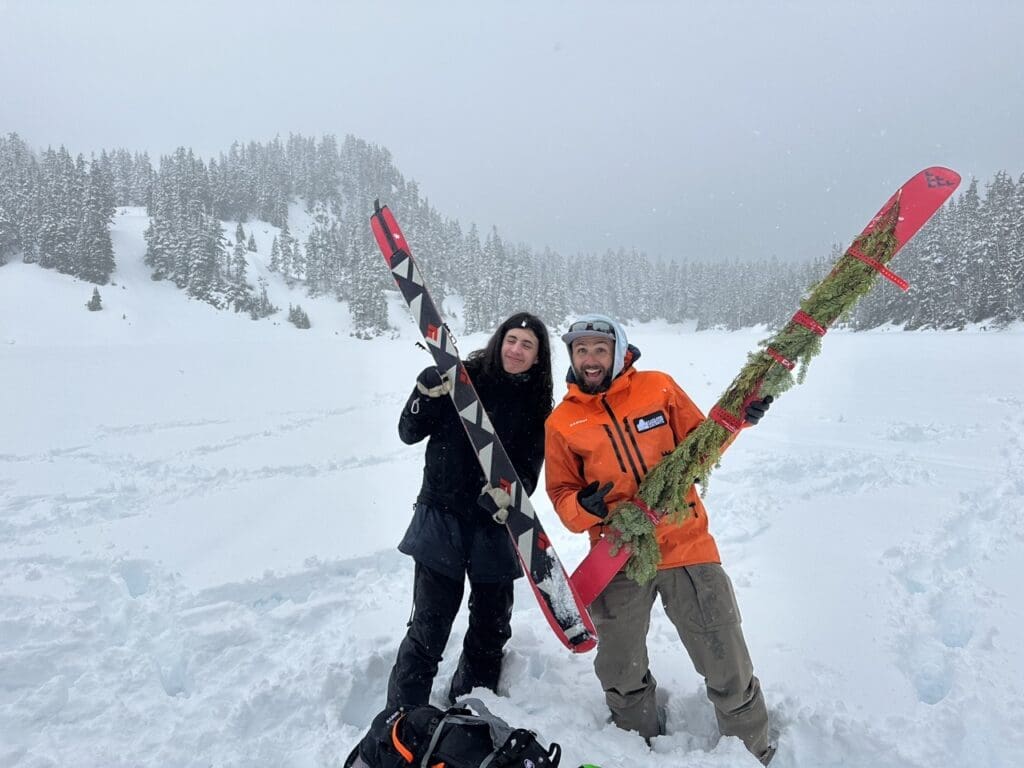
Lose an entire ski in an avalanche like in the photo below? Strap your foot to two shovels with a bunch of ski straps and cordage…
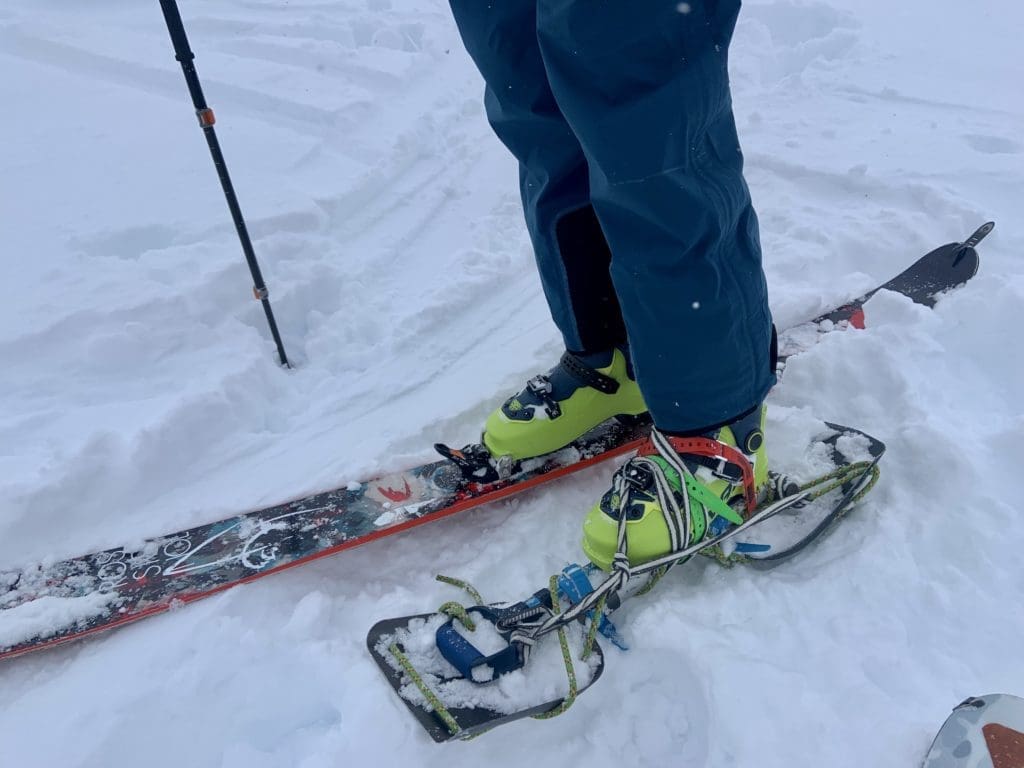
Or, get a couple branches from a tree to make a makeshift snowshoe! As always, get creative with the tools you have!
Pro Tip: Store a few rolled up in your repair kit and keep 1-2 accessible either rolled on your ski pole(s) or in a pocket that is easily accessible.
Small Hose Clamps
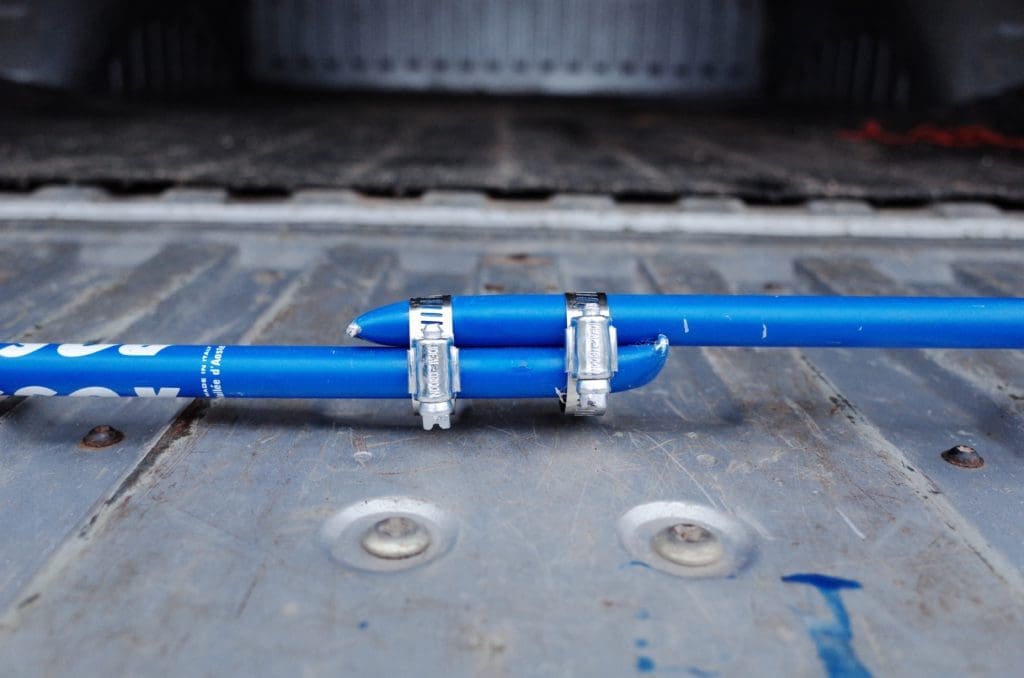
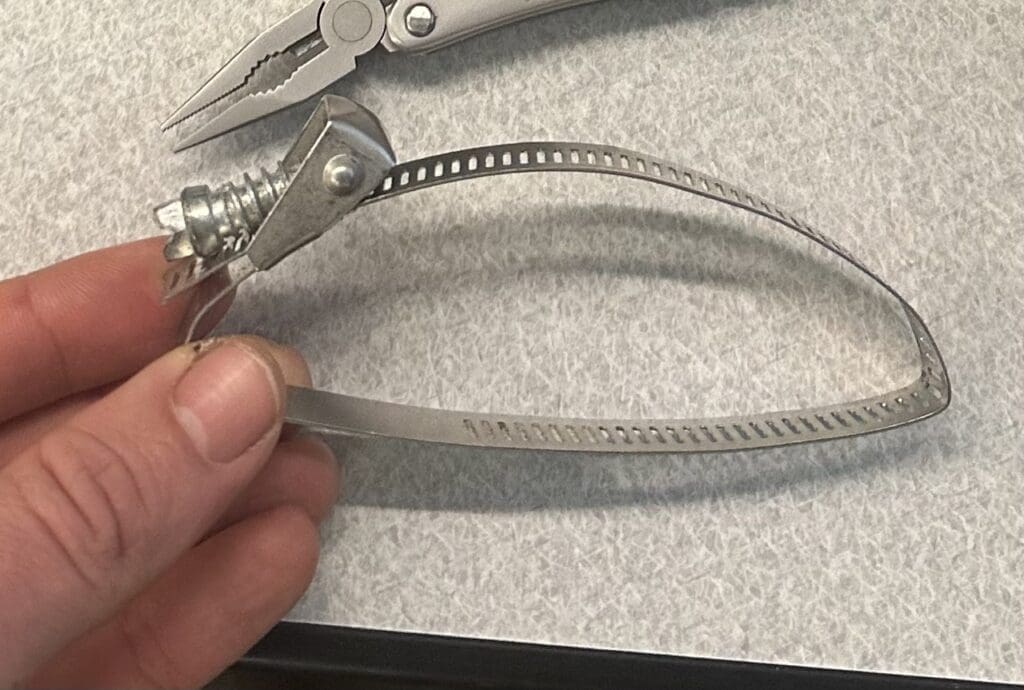
If you snap a ski pole, skinning and riding (for skiers), gets a lot harder! With two small hose clamps you can simply clamp the broken pieces together with a little overlap like in the picture below.
Pro Tip: If you use carbon poles, it’s really easy to over tighten the hose clamps and crush the carbon. Make sure you use a shim (thin piece of metal or other rigid material) through the hose clamp to keep the crushing at bay.
Large Hose Clamp
Carrying a large hose clamp that fits around your ski and your binding can be a temporary fix for a ripped toe or heel piece. It won’t be as bomber as the other methods outlined in our next section on ripped binding repair, but we’ve heard tell of folks skiing on a binding held on with a hose clamp for days.
Pro Tip: Pre-fit the hose clamp to your board/binding and ensure you have the right size hose clamp! Slip it over your board/binding and pre-flatten the underside that sits against the base of your board so it sits flush with the base and snow surface. This will save you time and headache later if you actually need to deploy this option.
Spare Screws/Parts
These are specific to YOUR boots and bindings. Different boot/binding manufacturers use different sized screws and specialty parts. Not much is standardized unfortunately. So figure out what particular things you need and carry them!
Pro Tip: Make sure to tighten the screws on your boot buckles and (if a split boarder) your bindings before going out. Anything that routinely moves tends to get loose over time. If you’re proactive and pre tighten, you’re less likely to need the spare screws/parts! As a split boarder, you may want to tighten several times throughout the day. You can also hit them with Loctite thread locker glue if you absolutely don’t want the screws coming out.
Powder Basket
Poles are pretty darn useless in snow without powder baskets. Just carry a spare in case you lose one. Make sure that the spare fits your pole though! Not all pole baskets fit every pole. REI poles and pole baskets for instance don’t play well with many others out there.
Scraper
It’s common if you’re taking multiple runs for snow to adhere to your climbing skins, binding, or ski bases. A scraper allows you to quickly and efficiently remove this build up without damaging your skins or ski bases.
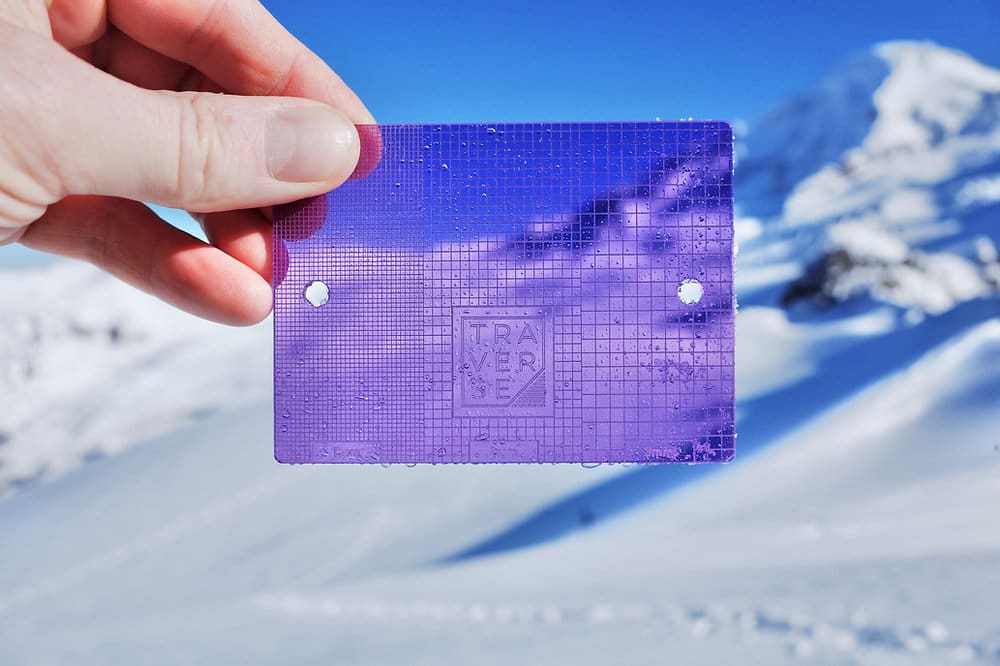
Pro Tip: Traverse Equipment’s ultralight crystal card triples as a scraper, crystal card, and shim.
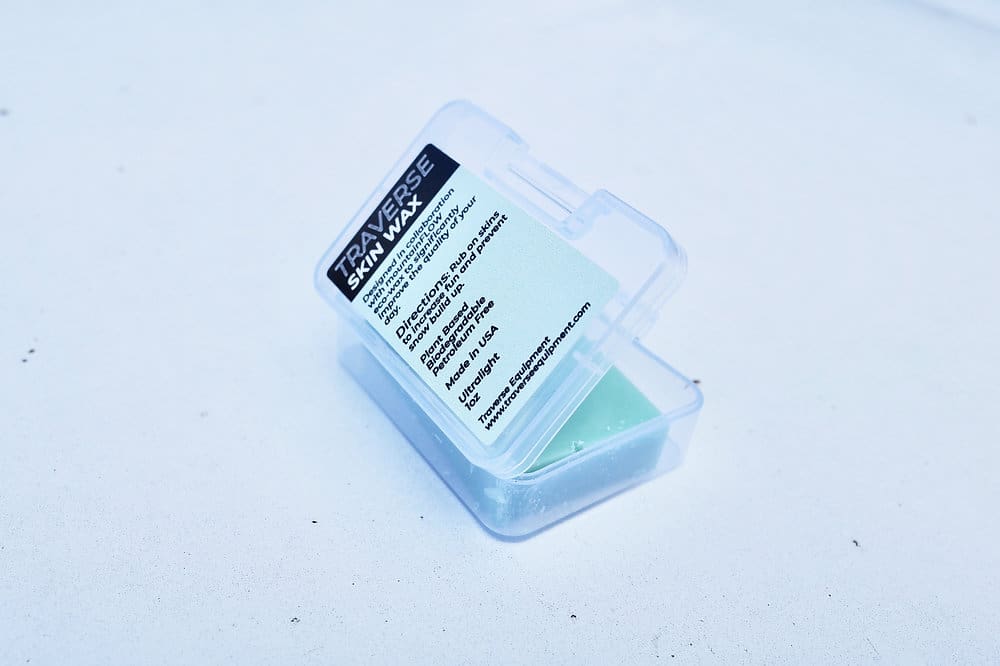
Skin Wax
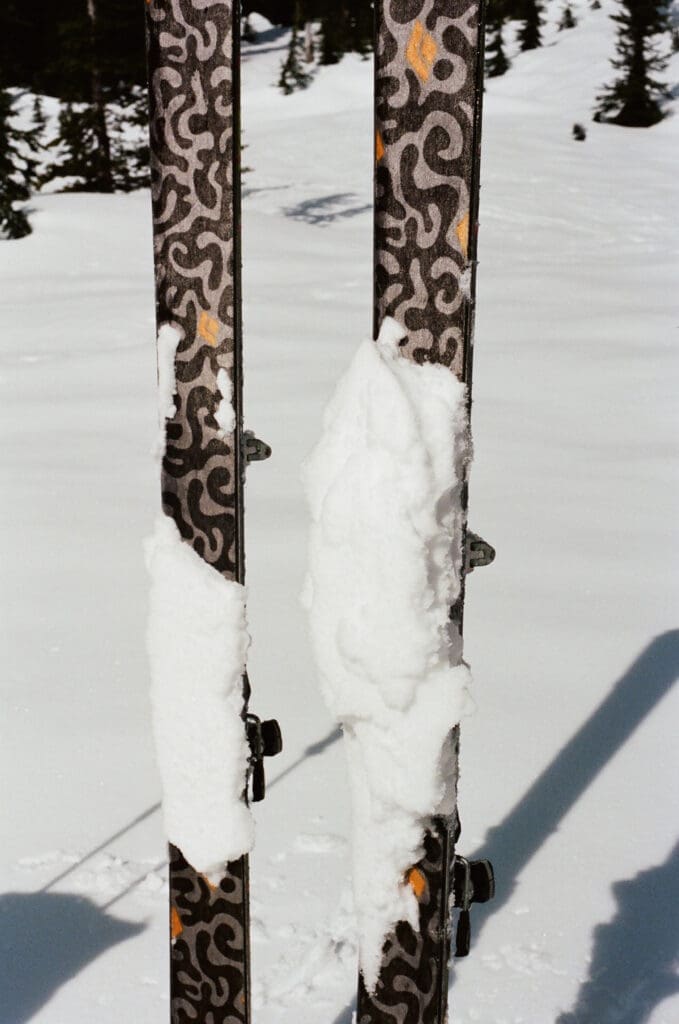
An essential item to carry in the springtime anywhere, but year-round if you ride in a warmer/wetter climate like the Pacific Northwest. Skin Wax keeps snow from adhering to the bottoms of your climbing skins.
If you’ve ever been out after a fresh dump of snow and then had that snow become sticky risers under your feet, you know the humongous pain that is. It can immobilize you.
Pro Tip: Apply it before you need it. Once your skins get wet and already have snow sticking to them, it’s tough to retroactively put on the wax. As always… pay attention to changing conditions and apply skin wax proactively.
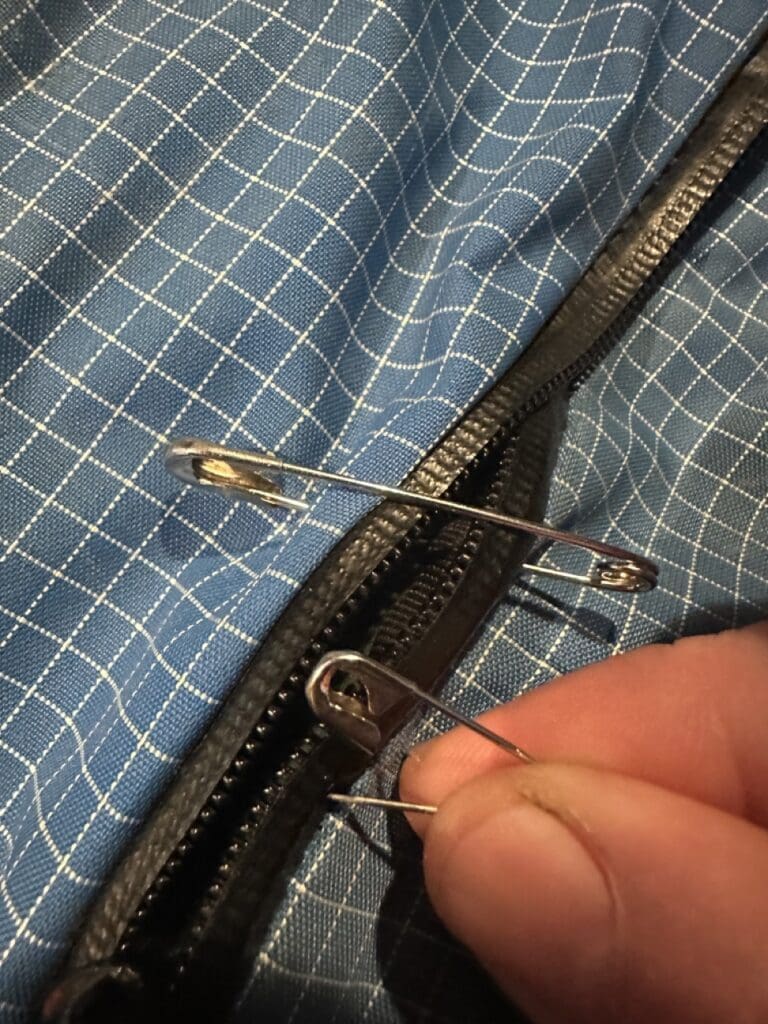
Safety Pins
Ever been out on a nasty day with blowing snow and have a zipper blow out, get stuck, or come off on a jacket, tent, or backpack? Things turn sour really quickly when you can’t keep your layers closed or the content of your bag from spilling out. Carrying safety pins in your kit are a lightweight way to ensure you have a way to close things up when zippers stop doing their job.
Other Items
Again, these aren’t essential items until they are. If you’re out deep in the backcountry and rip out a toe piece, it’s nice to have the things you need to make sure that you can get back to the car in one piece. You can get by with just using a bunch of ski straps a lot of times to just strap your foot to your broken board like a big, dumb, snow shoe, but the equipment and methods below will ensure that you have a much better time on your exit. No need to make a bummer of a situation even worse!
- Skin Tail Clips
- Shim
- Tape
- Spectra Cord
- Bailing Wire
- Lighter
- Hex Drill Bit – 9/64″
- Through Bolts (x2)
- Wing Nuts (x2)
- Washers (x2)
- Small Screws (x2)
- Storage Bag for Kit
Skin Tail Clips
Yes, ski straps work in a pinch to keep your skins on your boards if you lose a tail clip, but they really add a lot of drag to your steps, affect glide, and get scraped off as you walk. ANNOYING! It’s way better to just have a spare clip for your skins to throw on.
Shim
If you get a little too sendy and break your ski tip off (taco your ski), it’s nice to have something to provide some rigidity to help splint the ski. The easiest thing for this is found in the Traverse Equipment Crystal Card.
What you’ll Need:
- Hex Drill Bit – 9/64″
- Ratchet Driver or Socket Wrench
- Through Bolts (2)
- Wing Nuts (2)
- Washer (2)
- Flat Head Bit
- Ultralite Crystal Card
The Process:
- Line up the Ultralight Crystal Card over the break in the ski so that the break is roughly centered in the middle of the card.
- Using the Ratchet Driver and Hex Drill Bit, begin drilling down through the holes of the Crystal Card to mark where you need to drill (create a pilot hole). Once you’ve marked the placement of where you need to drill the holes in the ski, remove the crystal card from the ski.
- Drill down through your pilot holes all the way through the ski.
- Put the two through bolts up through the holes.
- Place the Crystal Card over the bolts.
- Secure the Crystal Card in place with the washers and wing nuts. Use the Flat Head Bit to tighten from the bottom of the ski while you hold the wing nuts in place.
Pro Tip: If you’ve got more than one crystal card, consider adding two or even three to add more rigidity!
Tape
Duct Tape is the classic fix all. I carry a small roll of it. Problem with duct tape is that it leaves behind a sticky residue once removed and doesn’t adhere to all fabric types. Tenacious Tape from Gear Aid is a great thing to include in your kit because it sticks well to clothing, pads, and the lightweight materials most outdoor clothing and shelters are made of. This stuff is strong! Pretty much a permanent fix.
Spectra cord
600lb pull tested Spectra Cord. Multi-Use similar to ski-straps, but smaller, lighter, stronger, and can be cut to any length. Great for using on items that don’t need abrasion resistance (think metal rubbing against things). You wouldn’t want to use para cord like you would use ski straps to keep your skins on for instance because the sharp ski edges would cut it pretty quickly!
Instead, use it for heavy duty sewing line (like if you tear off one of your arm straps for you backpack), for zipper pulls, the walk to ride pull on your boots, or as an extra guideline on your shelter. So many applications.
Pro Tip: cauterize the cut end with a lighter to keep it from unraveling!
Baling Wire
Lightweight multi-use material just like Spectra cord except you don’t need a lighter to cauterize the end and it has the benefit of abrasion resistance (can be used against metal. Fantastic for a makeshift skin tip attachment if your rips off, (just build a little coat hanger to put over your ski tip) but can be used for many other applications where a strong/durable line is necessary.
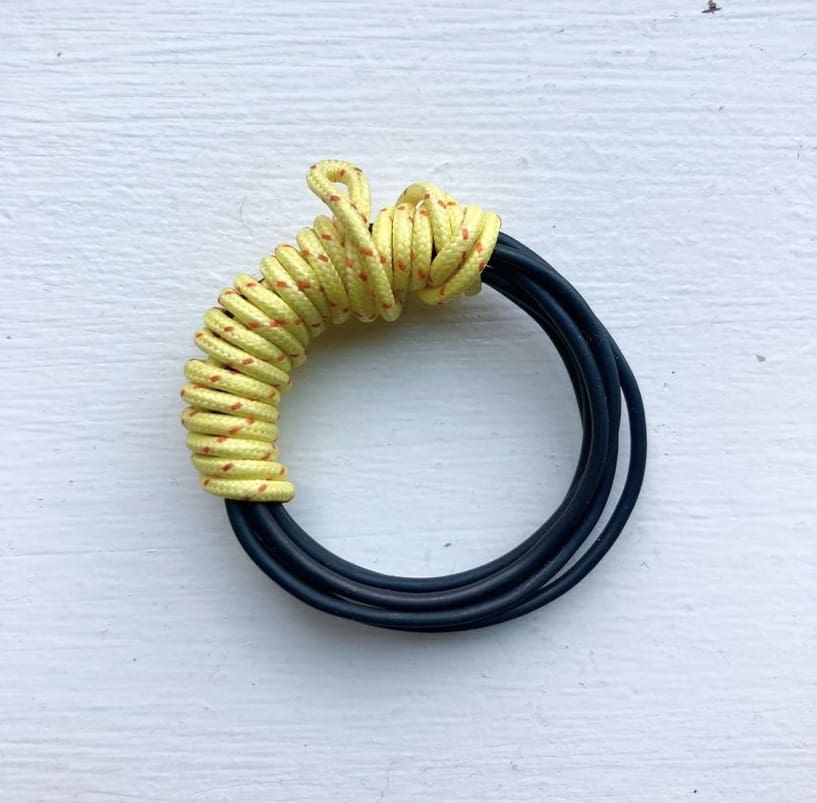
Pro Tip: wrap your spectra cord around your bailing wire to save space and keep your kit organized like the photo above.
Lighter
For cauterizing cut cordage, lighting your stove, singing along to Bon Jovi, or creating that fire in a survival scenario.
Ripped Toe Piece Repair
If you ride long enough, you’ll probably encounter a ripped out toe piece at some point. Whether it’s you, someone in your squad, or a stranger you come across in the backcountry, a ripped toe piece makes your ski pretty much worthless. On longer tours and certainly multi-day tours a long way from home, it’s nice to know that you can secure back on your toe piece if it completely rips out.
Though ski straps, baling wire, and para cord will do in the short term to make your ski into a big, dumb, snow shoe, they fall off and require constant adjustment as you Frankenstein walk your way towards the trailhead. I’ll detail two methods I’ve used to reattach a ripped toe piece and provide pros and cons of both. The first method is the Traverse Equipment Method. Take Note: This will destroy your ski, but it’s probably destroyed anyway.
The Traverse Equipment Method
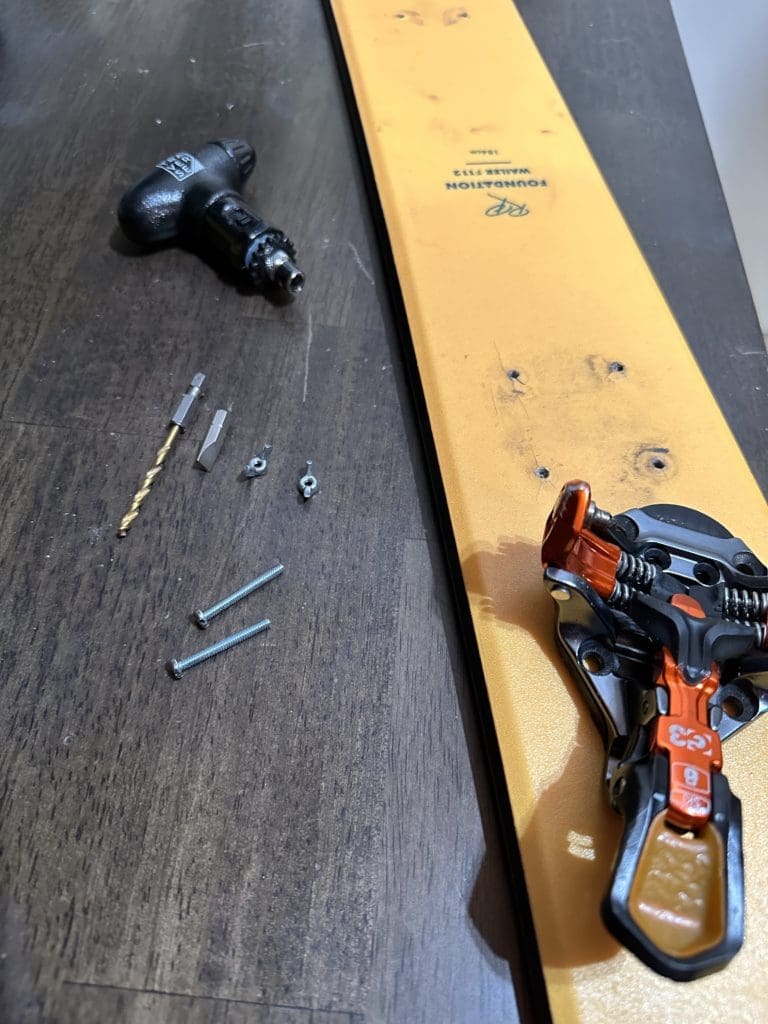
If you purchase the Traverse Equipment Ski Repair Kit, these items are included in that kit. If you’re wanting to build your own kit, you’ll need:
- Hex Drill Bit – 9/64″
- Ratchet Driver or Socket Wrench
- Through Bolts (2)
- Wing Nuts (2)
- Flat Head Bit
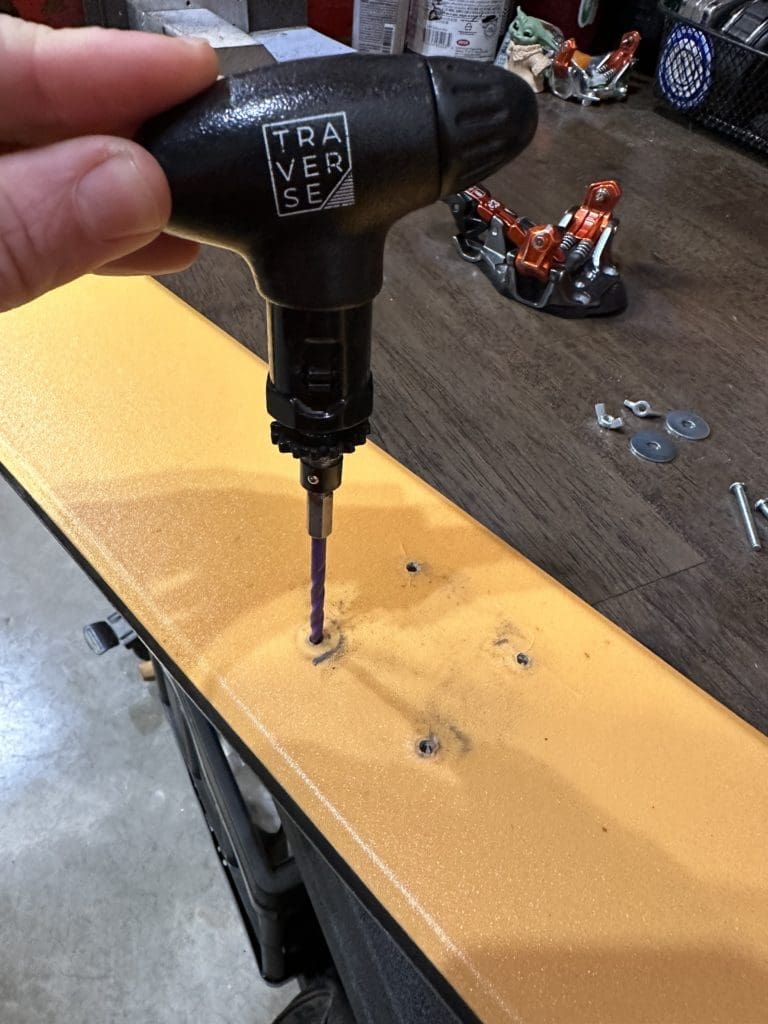
The Process:
- Drill all the way through the ski bases with the drill bit in one of the front holes and one of the back holes (diagonal from the first hole drilled, not directly behind). Two is more than sufficient. You don’t need to carry more!
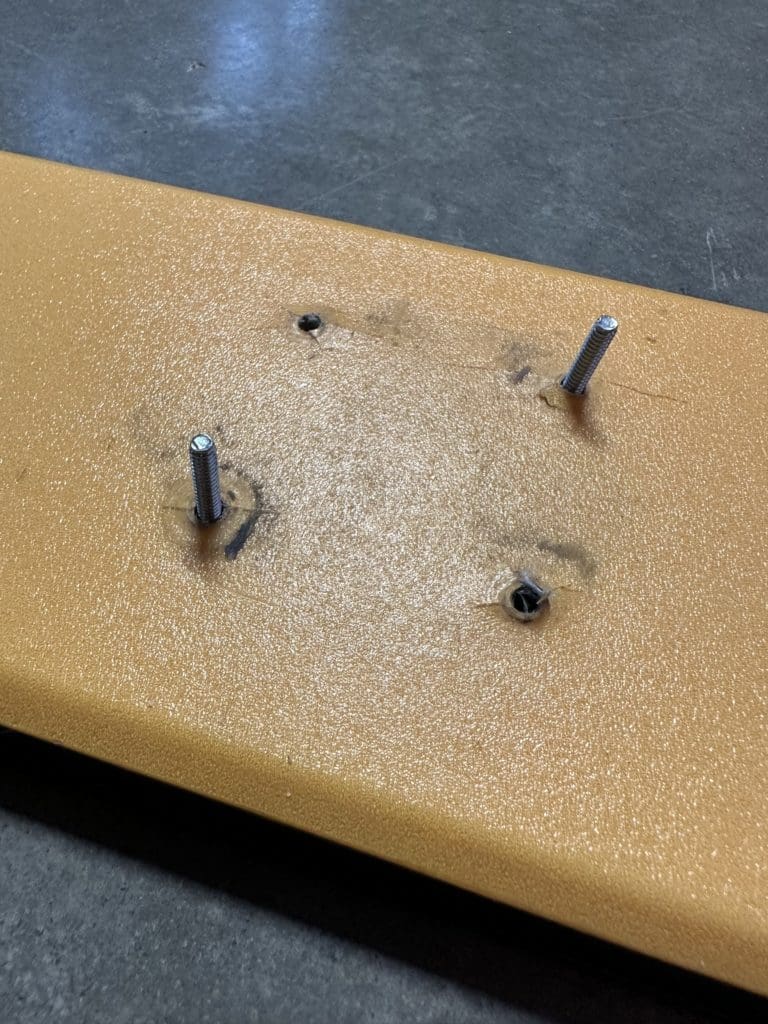
- After the holes are drilled, place your ripped toe piece over the holes, thread the bolts up through the ski bases and into the mounting holes of the toe piece.
- Use the wing nuts to affix the toe piece back to the ski. Start by hand tightening the wing nuts. At some point, they won’t be able to rotate anymore but they’ll still be loose. While holding the wing nut in place, use a flat head bit to tighten from the ski base side until the toe piece is flush and tight to the ski.
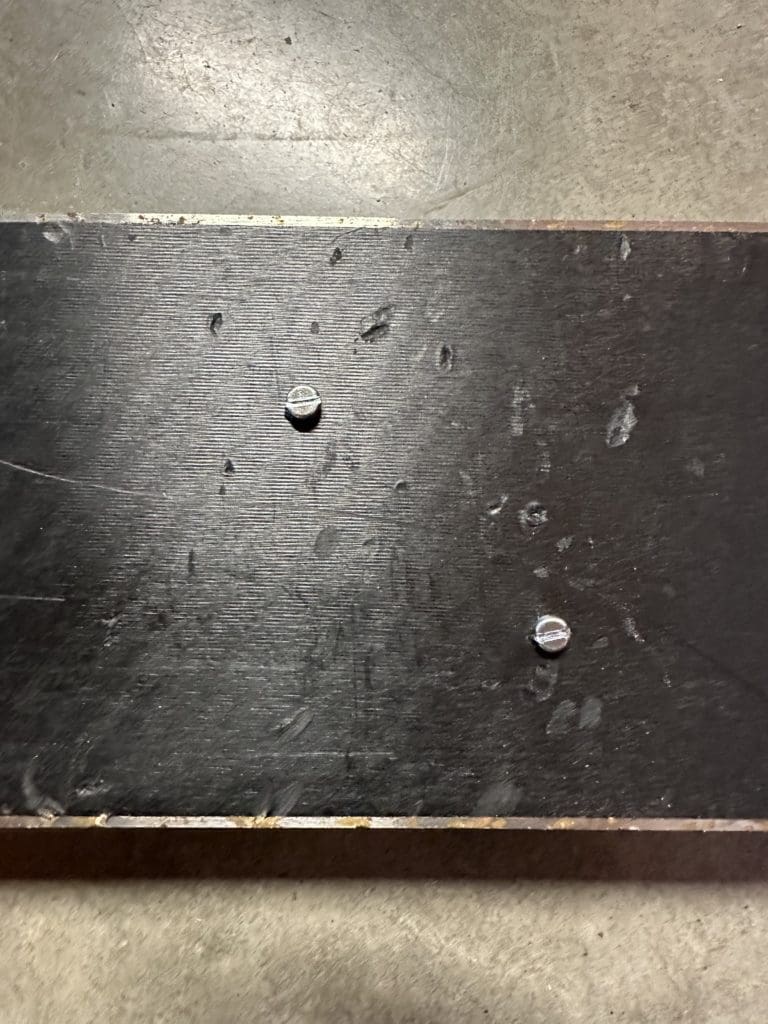
Take Note: You must tighten using the flat head bit from the ski base side while holding the wing nut in a way that the wings of the wing nut don’t hang up on the metal of the toe piece like in the photo on the left below.
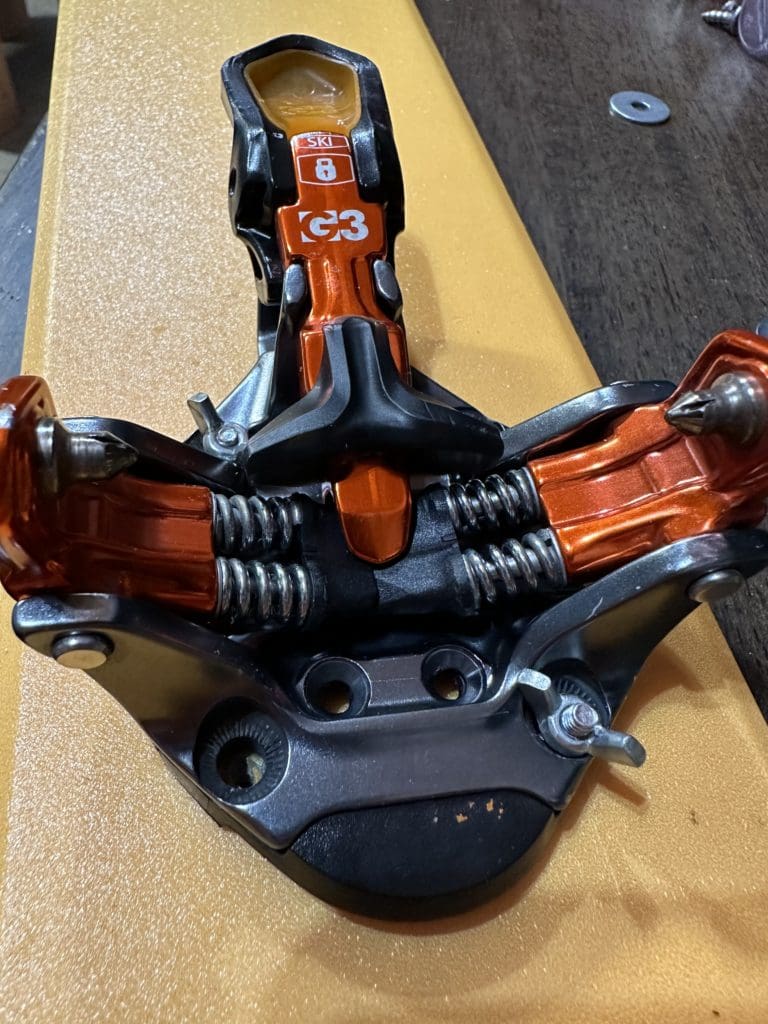
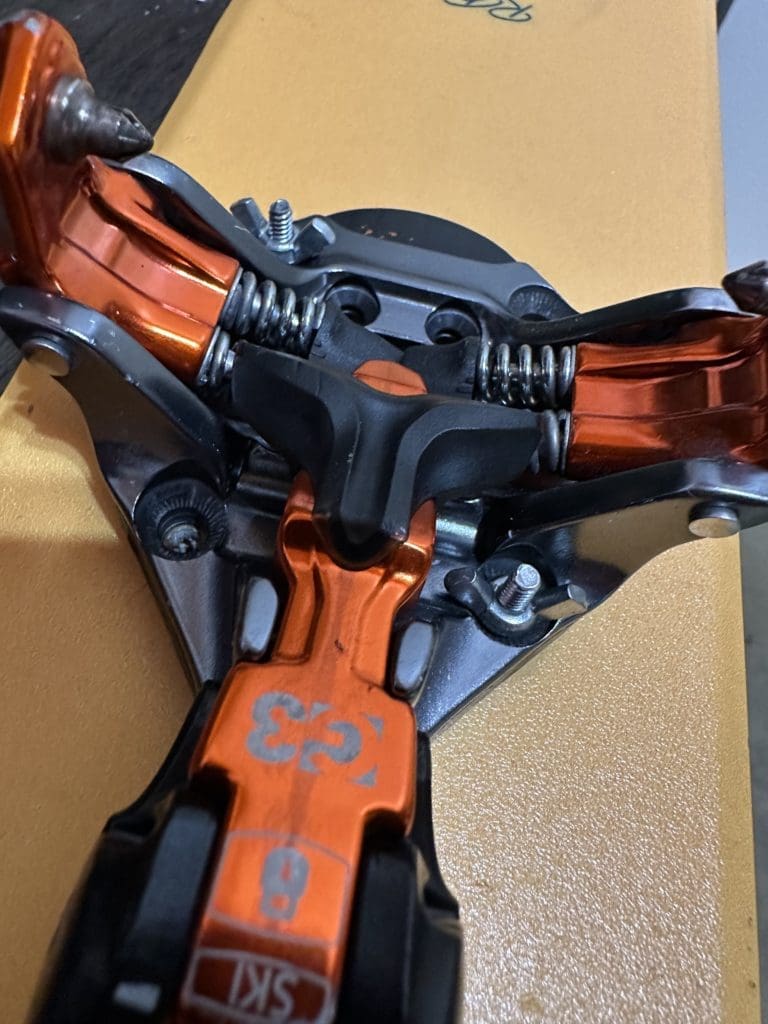
You can see in the photo on the left above where the wing nut is getting hung up. Simply by rotating the wings so they sit sideways, you’ll be able to tighten them all the way… or at least should (photo above on the right).
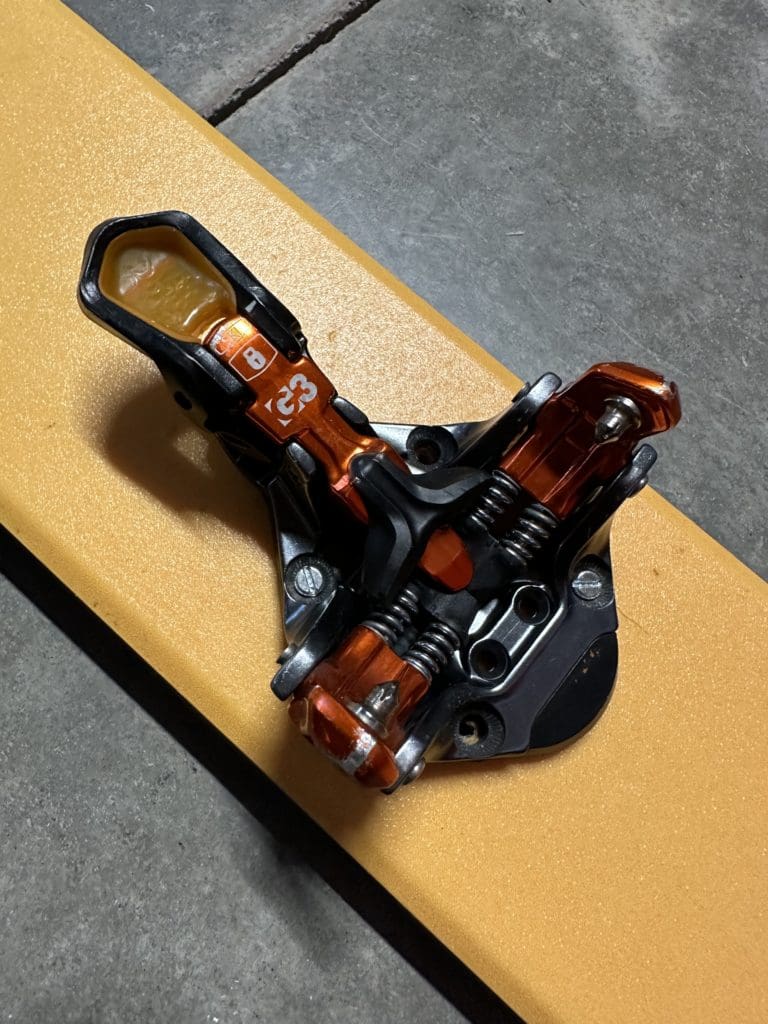
Pros: Simple and fool proof. This method doesn’t take much extra weight or materials to complete.
Cons: Will destroy the ski… but it’s probably dead anyway. Also, if for whatever reason your toe piece won’t get tight enough with this method and is still wobbly, your only recourse is to have to go the opposite way — putting the bolts down through the toe piece and use the wing nuts on the bottom of the ski (obviously not ideal – see picture below).
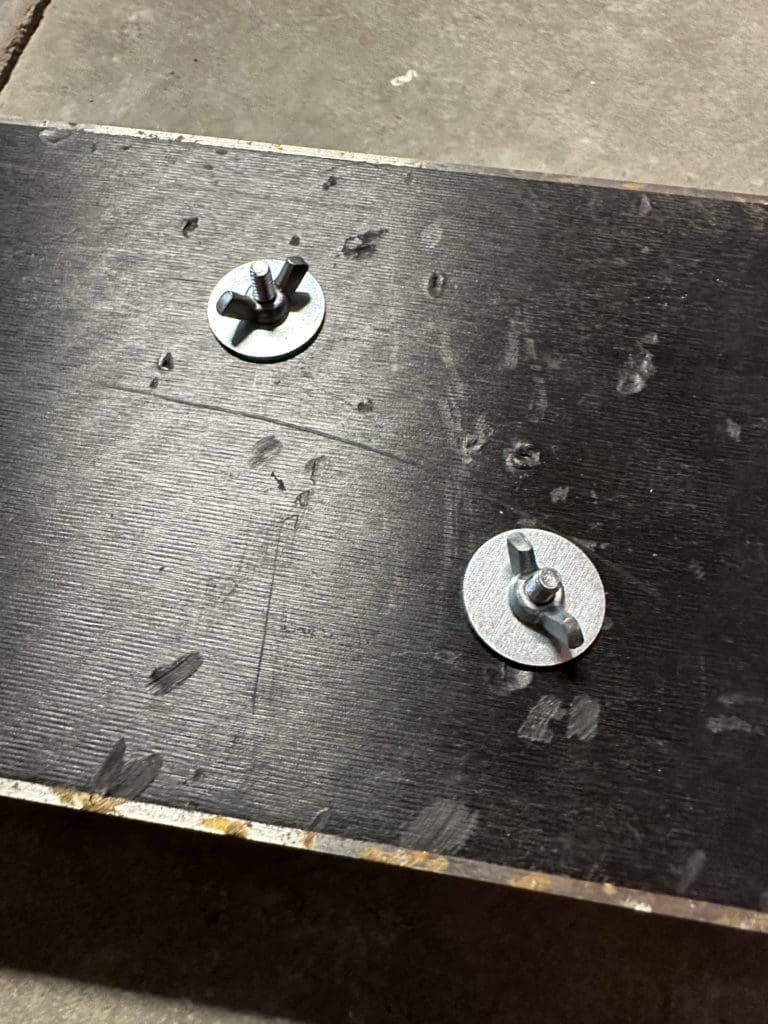
If you did it this way, the bolts and wing nuts sticking out the bottom of your ski will provide additional drag and will certainly destroy your skins if you’re trying to skin out.
The method detailed below is much more involved and definitely not the most simple solution, but provides a different option in case the method above doesn’t work for your particular binding.
The Smiley Method
I watched a video from IFMGA Guide Mark Smiley many moons ago where he detailed this method. You’ll need:
- Hex Drill Bit – 9/64″
- Ratchet Driver or Socket Wrench
- Through Bolts (2)
- Lock Nuts (2)
- Saw and/or pliers
The Process:
- Exactly the same as the Traverse Method above, use the socket wrench or ratchet driver and drill bit to drill completely through the ski using the holes where your binding toe piece ripped out. Widen the holes if necessary in order to accommodate your bolts.
- Next, you’ll need to pound the lock nuts into the bottom of your ski. Since you won’t have a hammer on you (just an assumption) you’ll have to utilize your multi-tool, snow saw, ski boot, or whatever else you can think of to accomplish this step.
- Once the lock nuts are in, screw the bolts through the toe piece and into the lock nuts on the other side of the ski. Just like in the other method, you’ll only need to do this twice for it to be perfectly strong. They won’t be coming out.
- Last step, cut off or repeatedly bend the excess bolts with pliers in order to break them off flush with the bottom of your ski.
The major pro of this method is that once you break or saw the bolts off flush with your ski bases, you’ll no longer have the drag or skin destroyer issue like the Traverse Method if the wing nuts won’t fit and you don’t have standard nuts. The trade off and major con of that is that you have the added complexity of hammering in the lock nuts without a hammer and need to bend/break/saw off the bolts, which is easier said than actually done in the backcountry.
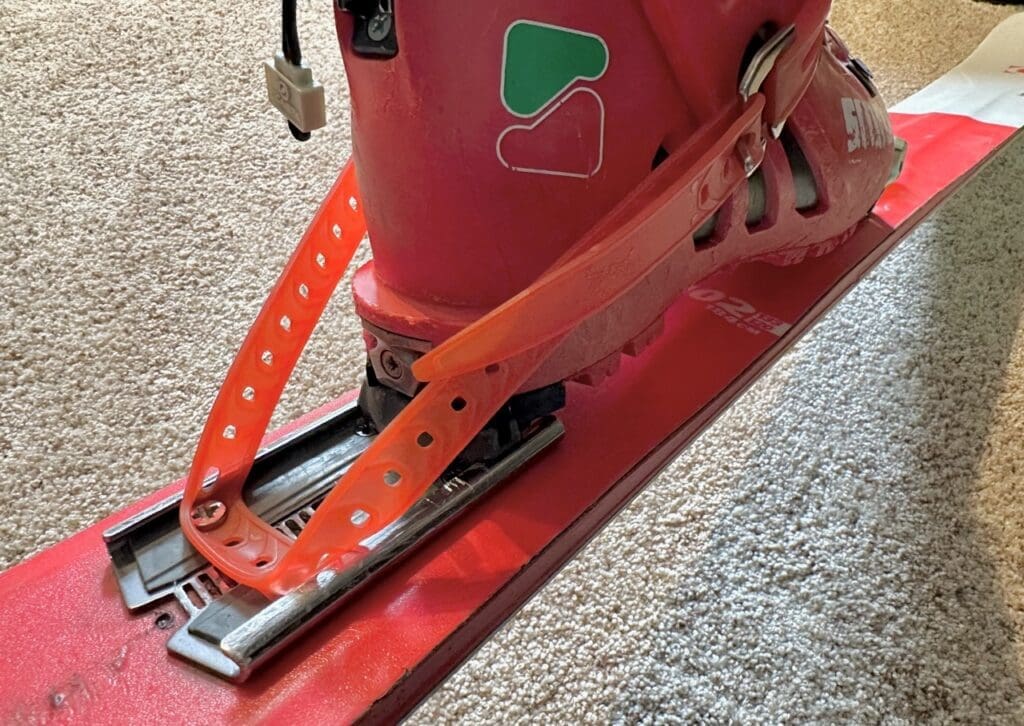
Ripped or Broken Heel Turret
Besides ripping out a toe piece or breaking your ski, a ripped heel turret that doesn’t allow you to click your heel in is also not awesome. Below is the Traverse method for being able to limp out of the backcountry with heel attached to the ski (actually allowing you to ski… tenderly. Take note, this method won’t work if your ski has a metal mounting plate, but don’t worry… we’ve got a solve for that at the end of this section.
What You’ll Need:
- Ratchet Driver or Socket Wrench
- Small Screw – binding screw works best (1)
- Phillips Head Bit
- Washer (1)
- Large Ski Strap (1)

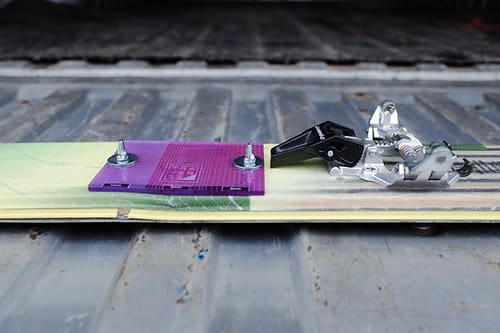
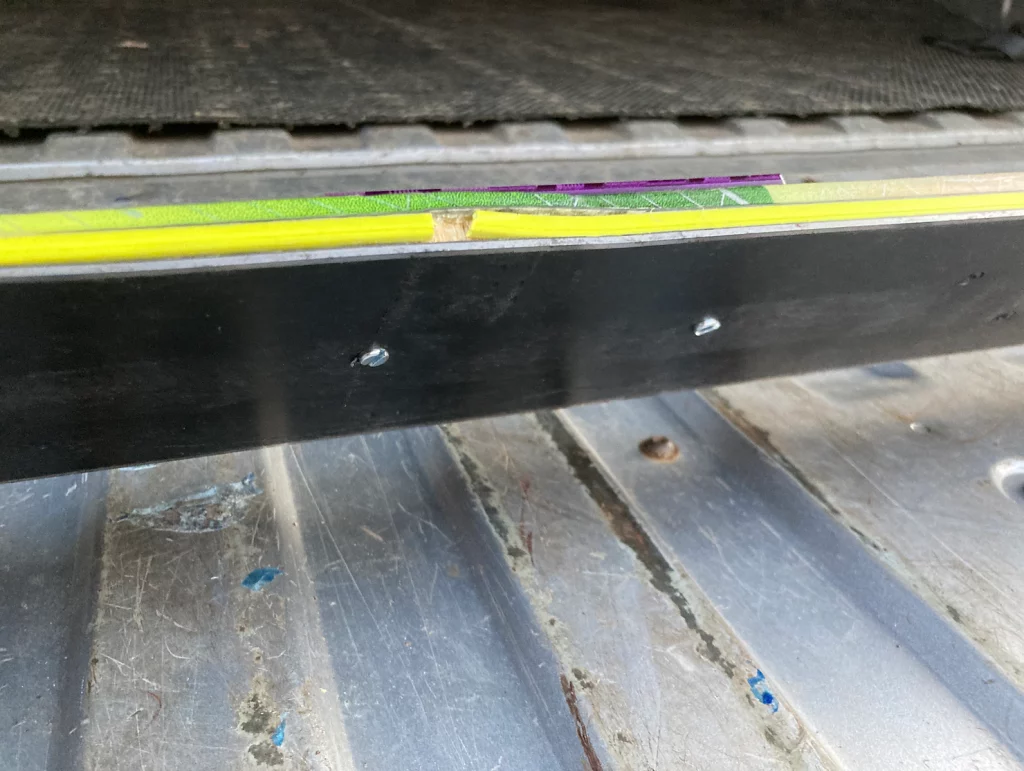
The Process:
- Place the large ski strap immediately behind where the heel turret/base plate sits so that one of the holes in the ski strap (about half way down the strap) is centered in the ski.
- Using the ratchet driver, Philips bit, washer, and small screw, drill down through the ski to secure the ski strap in place (see photo below).

- After securing the strap to the ski, simply put the ski strap around your boot, tighten it down, and you’re good to go! You won’t be able to carve turns with this fix, but you’ll at least be able to ski.

As I mentioned above, if your ski has a metal mountain plate in it, the above process won’t work unless you bring along a different kind of screw that can tap into metal. A simpler solve is to remove the back two screws from your baseplate, place your large ski strap over the holes, and then carefully re-thread the screws back into place.
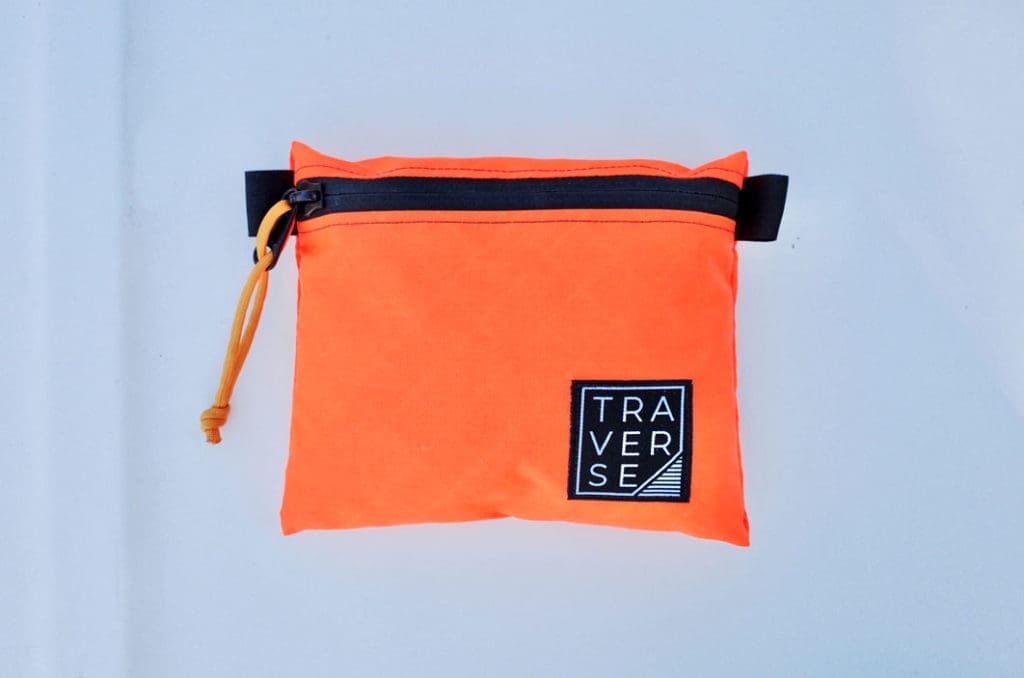
Storage Bag for Kit
Use a small, compact bag that’s just big enough to accommodate your repair kit items. Make sure that the bag you use is water poof or at least water resistant to keep your repair kit items from getting wet and rusting. The bags sewn by High Above for the Traverse Equipment kits are awesome. Though not completely water proof, they get the job done in all but pouring rain conditions.
Pro Tip: Pull out and dry out any items that get wet in your repair kit. It will protect from rusting!
Multi-Day Specific
Stove Parts
If you’re going out for a multi-day trip, you’ll likely need to carry a stove unless you’re headed to a hut that has one for you. Make sure you have all the spare parts specific to your type of stove such as “O” rings that wear out over time. If you use a canister stove, it’s also nice to carry a tool to consolidate partial canisters such as the Camping Moon Gas Canister Refiller detailed in the video below.
Spare Headlamp
Having a headlamp give up the ghost can really shut down your aspirations for that awesome line you hiked so far into the backcountry to ride. It’s also one of those emergency items that you should always have on you in case your day is way longer than you expected.
Sewing Kit
Consider bringing a sewing kit to be able to more permanently repair gear rather than the slap and play of tape if you’re going to be out for longer than three days.
Zipper Repair Kit
Blowing a zipper on a key piece of clothing or, if you’re using a tent, your shelter door is a huge bummer. Rather than poking holes in your items with safety pins to keep them shut, consider bringing a zipper repair kit to fix the issue.
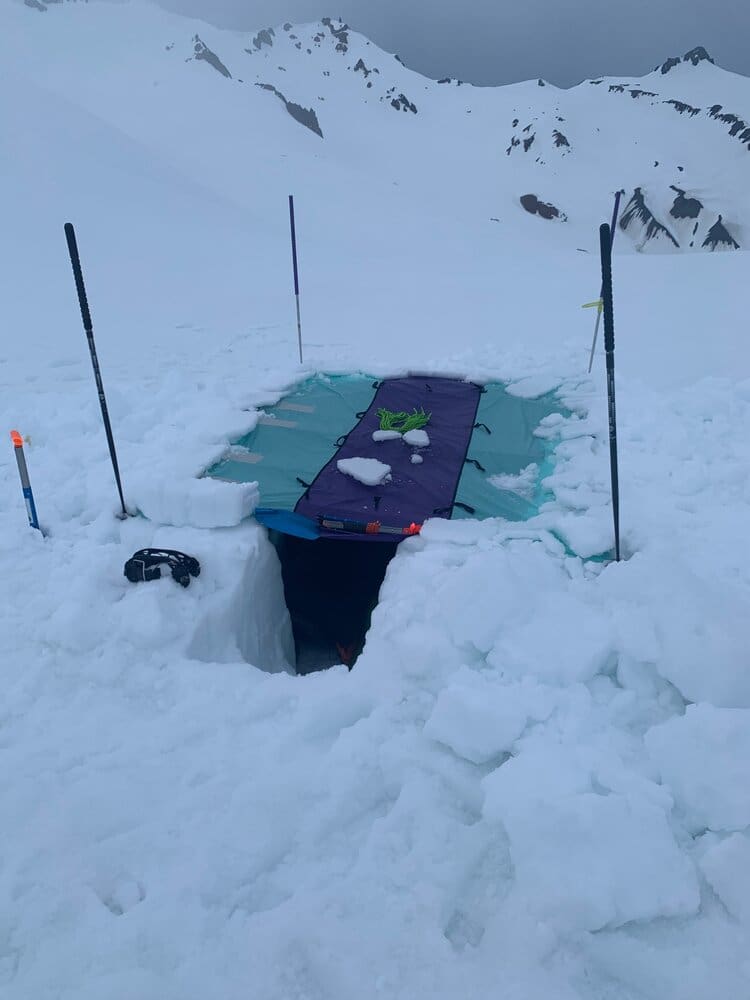
Emergency Shelters
Lightweight rescue tarps are growing in popularity because of their versatility and packability. Weighing in around 1 pound 12 ounces, these tarps can be rescue sleds, bivy sacks, and shelters to get out of the elements. Pictured below is the rescue sled by SEW ALPINE.

Final Thoughts
Repair kits are not optional. They are an essential part of every backcountry tourer’s kit where self reliance is necessary for survival. What you choose to carry in your repair kit should be specific for you and your team, but should contain at the very least the essentials outlined above. Remember that not everyone in your team needs a full repair kit if you coordinate well, but it needs to include items for everyone in the team. Having what you need to repair just your gear isn’t enough. If someone in your group is dealing with a gear malfunction, you’re in the epic with them. So make it a part of the group gear you always bring. Shred safe friends!
Like what you learned here? Check out our The Backcountry Skiing Guide to get more quality educational content.