Single Burial Avalanche Rescue
By: Zack McGill
First off, the best way to avoid a rescue is to avoid the avalanche all together. Take an Avalanche Course to be proactive and avoid being caught in an avalanche all together. That said, even the most trained professionals can still make mistakes, so everyone traveling in the backcountry should understand how to perform a single burial avalanche rescue at a minimum. At the least, you could help save someone else’s life. Below are the steps to follow if ever you need to perform an avalanche rescue of a single victim.
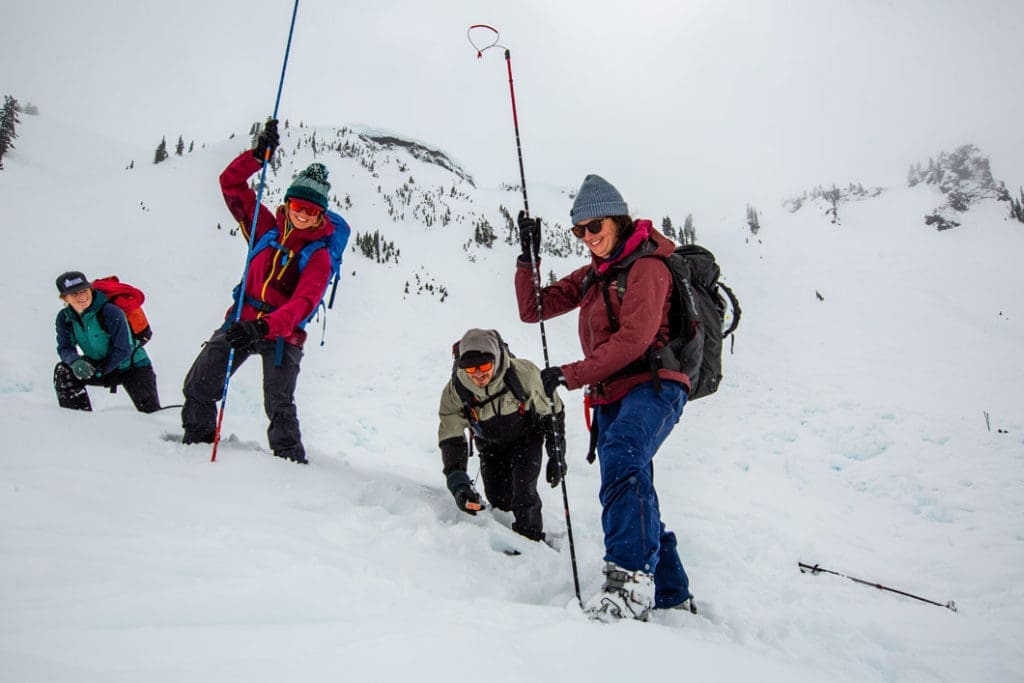
Avalanche Rescue Checklist
Step 1. (You’re number one). STOP! ASSESS SAFETY! ENSURE NO FURTHER HAZARD
-Risk of second avalanche?
-Hangfire?
-Move to defined safe location
Anyone who’s taken any medical course is taught to do a scene size up to look for other hazards before entering a scenario. You can’t help anyone if you also get injured or killed! So take the extra few seconds to look around. Is there risk of setting off another slide? Sometimes there’s a secondary or tertiary avalanche path just waiting to come down, and, if it did, the debris would overlap and compound the existing debris.
Hangfire, for those that don’t know the term, is a part of the slope that could still go or started to slide and then arrested.
Step 2. CHOOSE A LEADER
-Delegate Tasks
You don’t want there to be too many cooks in the kitchen! Hopefully before an incident has occurred, you’ve talked about and know who will take lead in the case of an emergency. That leader is then the one in charge of organizing the kittens to ensure the rescue happens smoothly.
Step 3. HEAD COUNT
-How many missing?
You don’t always know this information (if it was another party that set off the avalanche or a mass casualty event), but it’s helpful to know how many you’re looking for and name that amount.
Step 4. CALL FOR HELP
-Others nearby who can help?
-(911) Location, nature of emergency, name, # in group, # missing
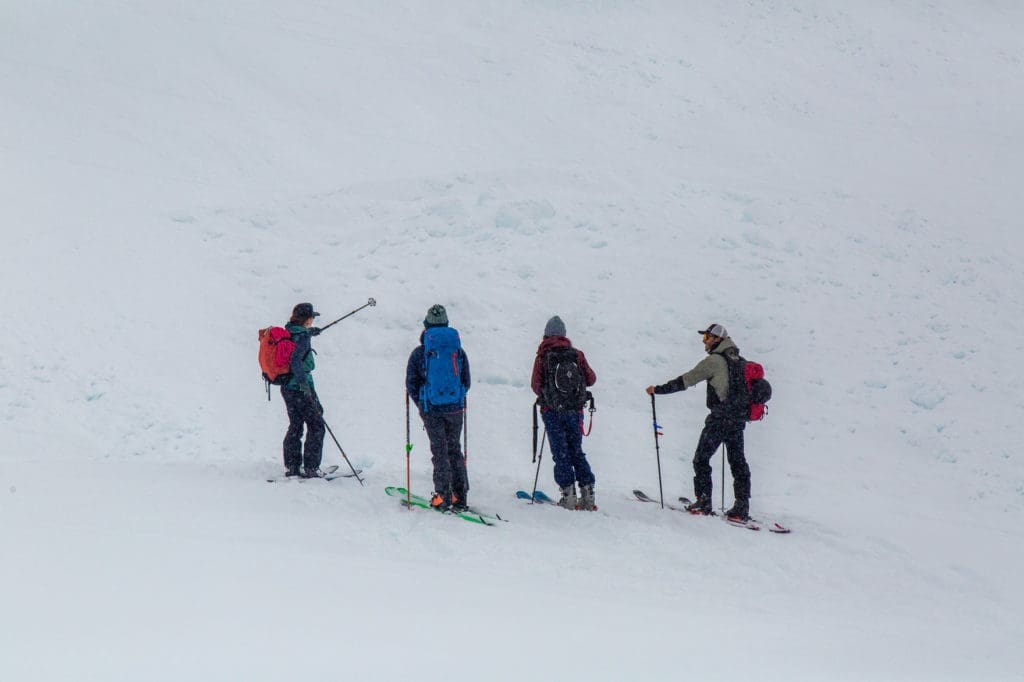
A call for help doesn’t need to be to 911! If there are other parties in the area, yell to them! Do you have a radio? Call for help to the people closest to you. Remember, you’ve got only a short time to get them out of the snow. This on scene are really the only hope folks have. SAR is going to arrive tomorrow… maybe and their mission will be a body recovery.
If you do have the people to spare and can get a call out on your InReach or phone, make sure to deliver the above information in that order.
Step 5. SWITCH ALL TRANCEIVERS TO SEARCH MODE
-Check that no tranceivers are transmitting
The quickest way to derail a rescue is to skip this step. All it takes is for someone to accidentally still be in transmit to throw everyone off. MAKE SURE EVERYONE IS IN SEARCH!
Step 6. DETERMINE WHERE TO SEARCH
-Below point last seen
-In line with visual clues
-Areas of debris, especially terrain traps
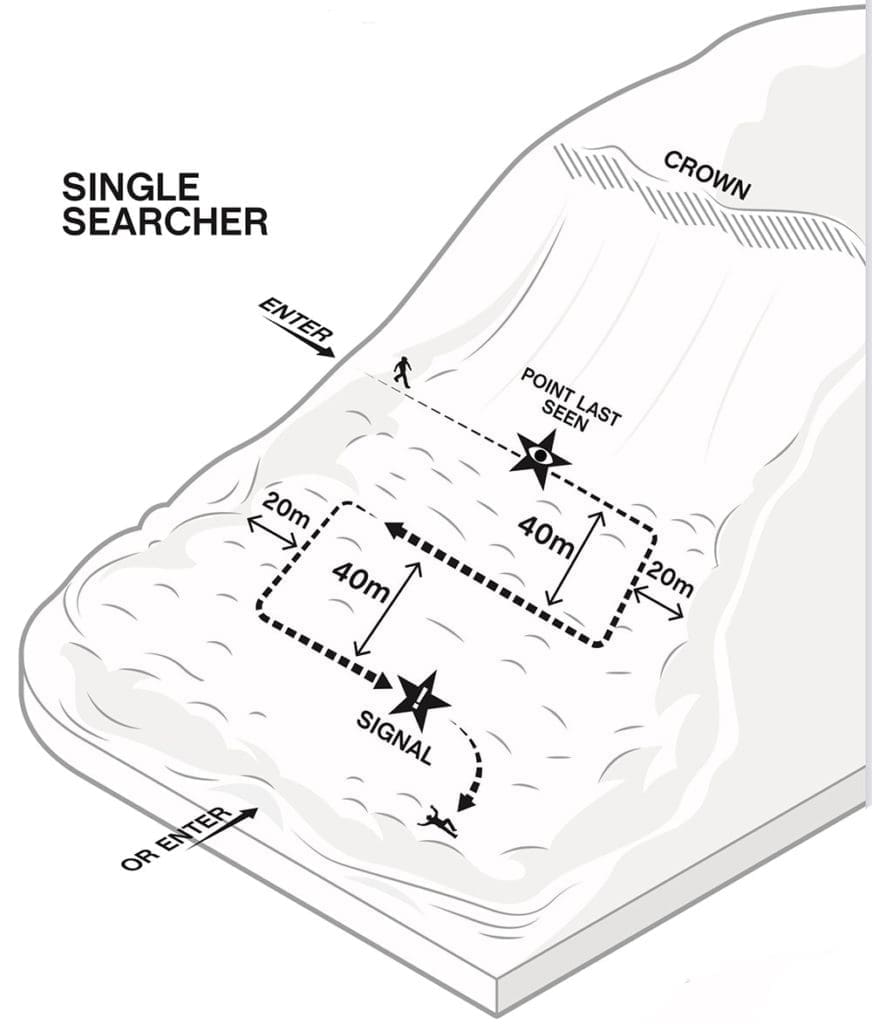
You don’t need to search above the point last scene because gravity. The victim will flow downhill with debris, so start from the point last seen above the snow!
Step 7. SEARCH FOR VISUAL CLUES
-Enter debris from side or toe of path
-Search strips 40m apart (About 40 strides)
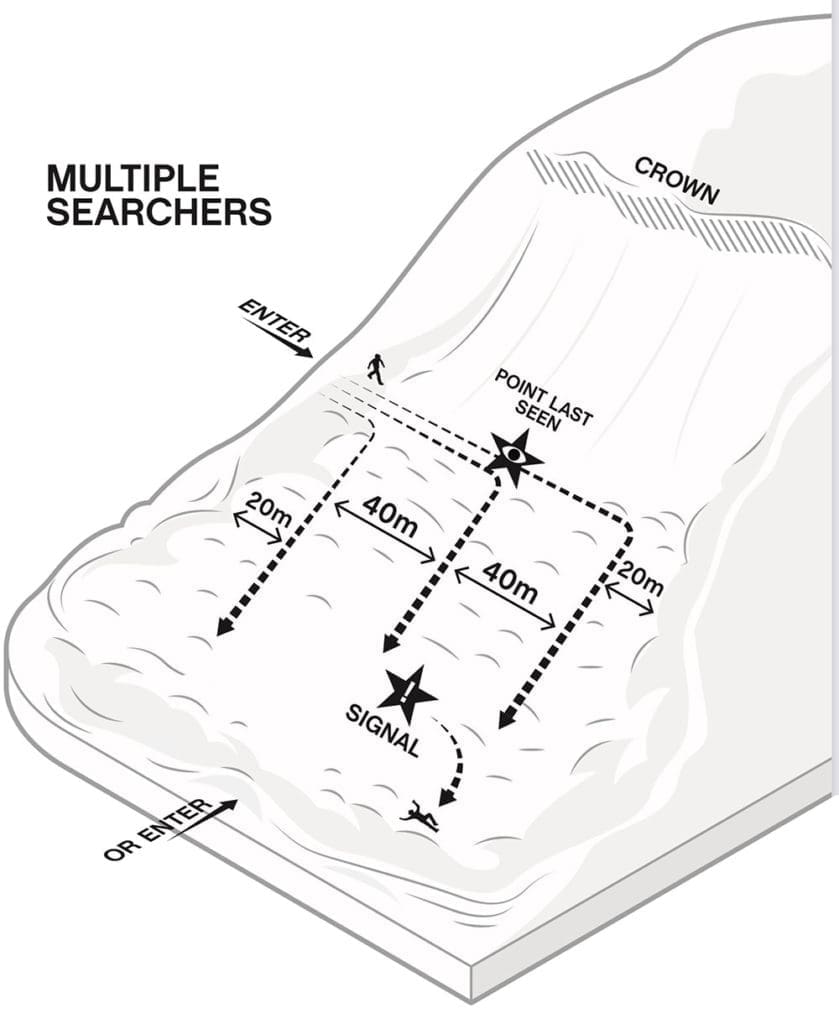
Keep an eye out for visual clues. Do you see a glove? Is there a hand in that glove? You can really cut down on your search time by keeping your eyes up and looking around rather than staring at your silent beacon.
Step 8. YELL TO OTHERS WHEN YOU FIND A CLUE OR RECEIVE A SIGNAL
-Pull clue out of snow and leave on snow surface
-Put marker in the snow where you begin to follow signal
-Call to other searchers not following signal to assemble probe and shovel
It only takes one person to do the fine search! Everyone else should converge on the site and begin assembling probes/shovels at the leader’s direction. That way, once the lowest point is found, a probe is already assembled and ready to probe and shovels are ready to dig.
Step 9. FOLLOW SIGNAL TO BURIAL AREA
-Slow and precise as you approach 10m
-Keep tranceivers near the snow surface during final approach (Crawling at 3m)
-Around 5m, place a marker on the snow that points along the approach trajectory
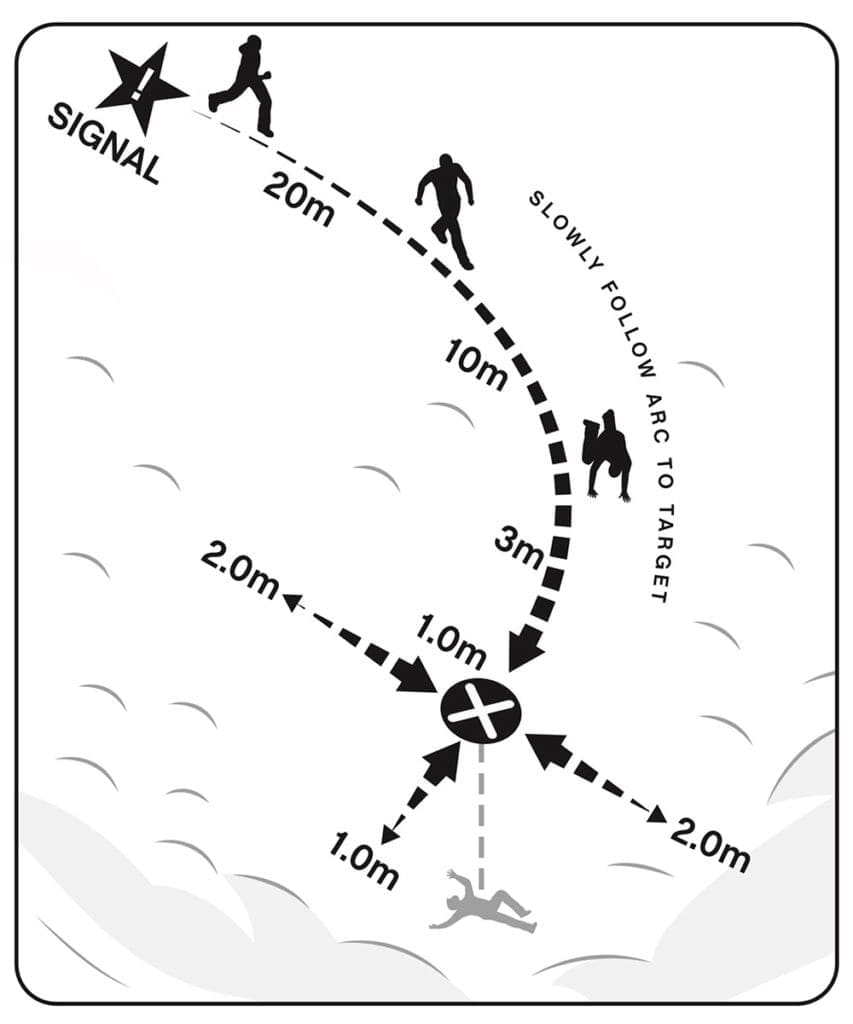
Step 10. LOCATE BURIAL WITH TRANCEIVER AND PROBE
-If possible, 2nd searcher PROBES LIKELY BURIAL AREA in front of tranciever searcher’s trajectory until closest signal located
-Locate the closest transceiver signal by bracketing ahead/behind and to the sides, maintaining consistent transceiver orientation
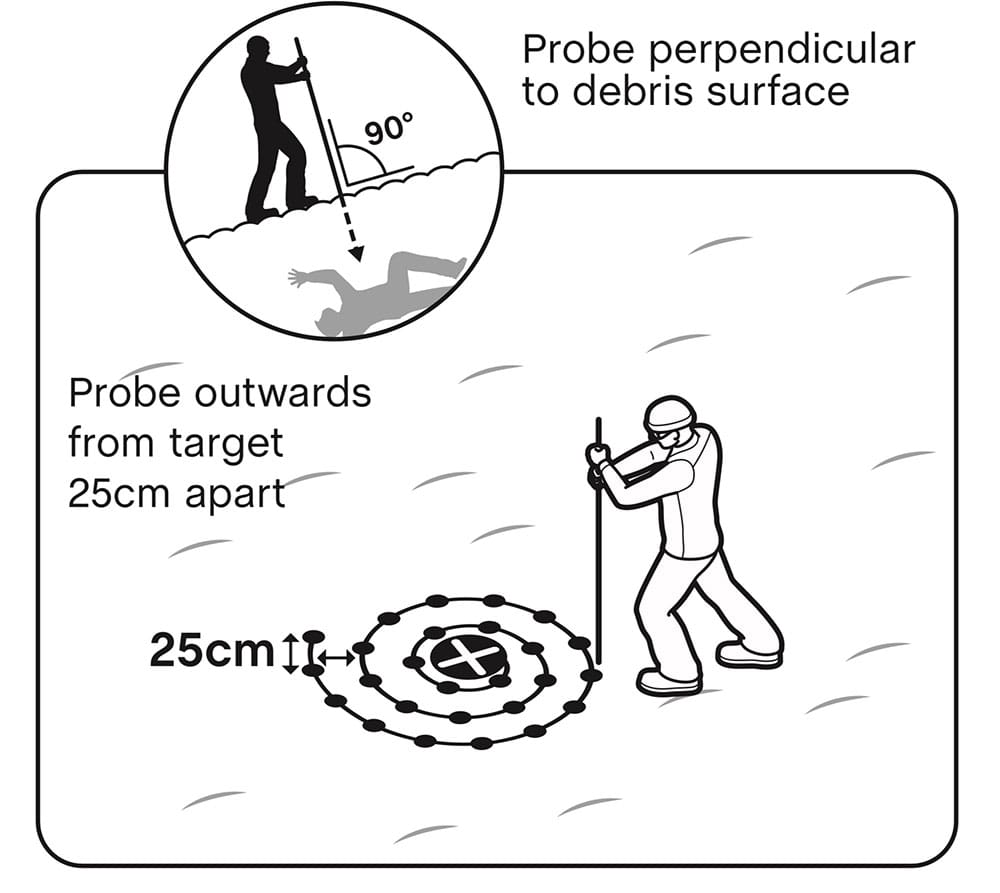
-Pinpoint using the probe, from the center of the closest signal outwards in a circular pattern
-Probe strike = victim location. LEAVE PROBE IN PLACE!
Step 11. SHOVEL FAST AND EFFECTIVELY
-Start with a large step downhill and away from the probe, 2 or more steps if deep burial
-Dig towards the probe; throw snow far away
-CHANGE SHOVELERS OFTEN (if other available)
-Careful shoveling as you reach your buried companion
-Expose face immediately in order to get airway
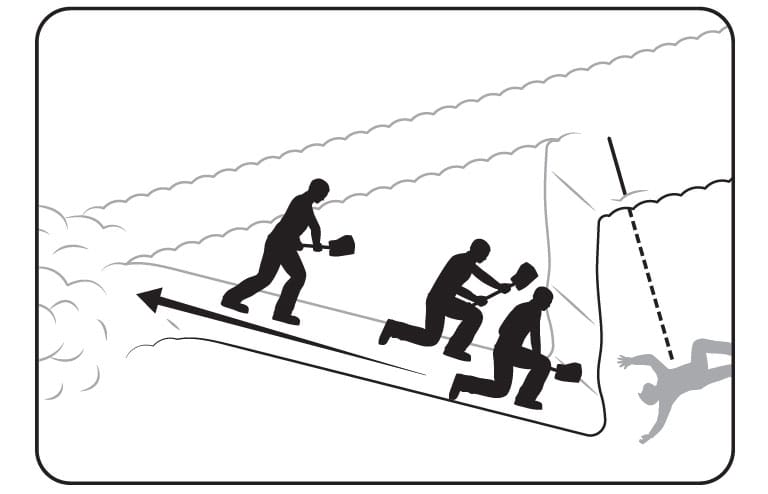
Learn more about Strategic Shoveling Techniques.
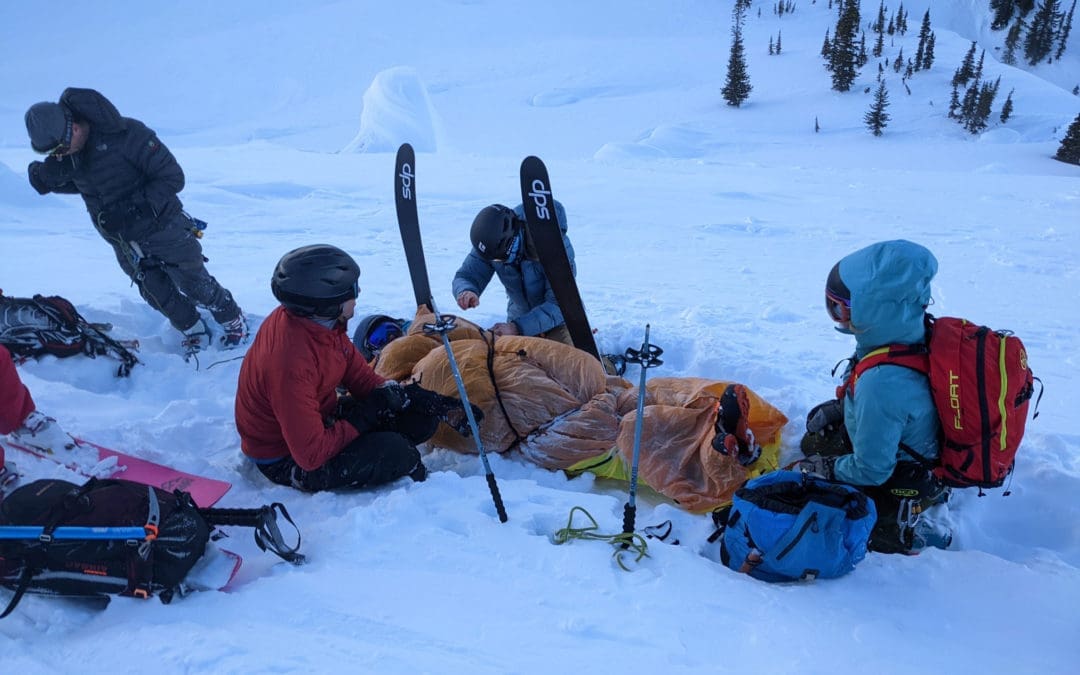
Step 12. PATIENT CARE
-Clear airway
-Provide First Aid or CPR as required
-Move to safe terrain
-Plan evacuation and follow up on call for help
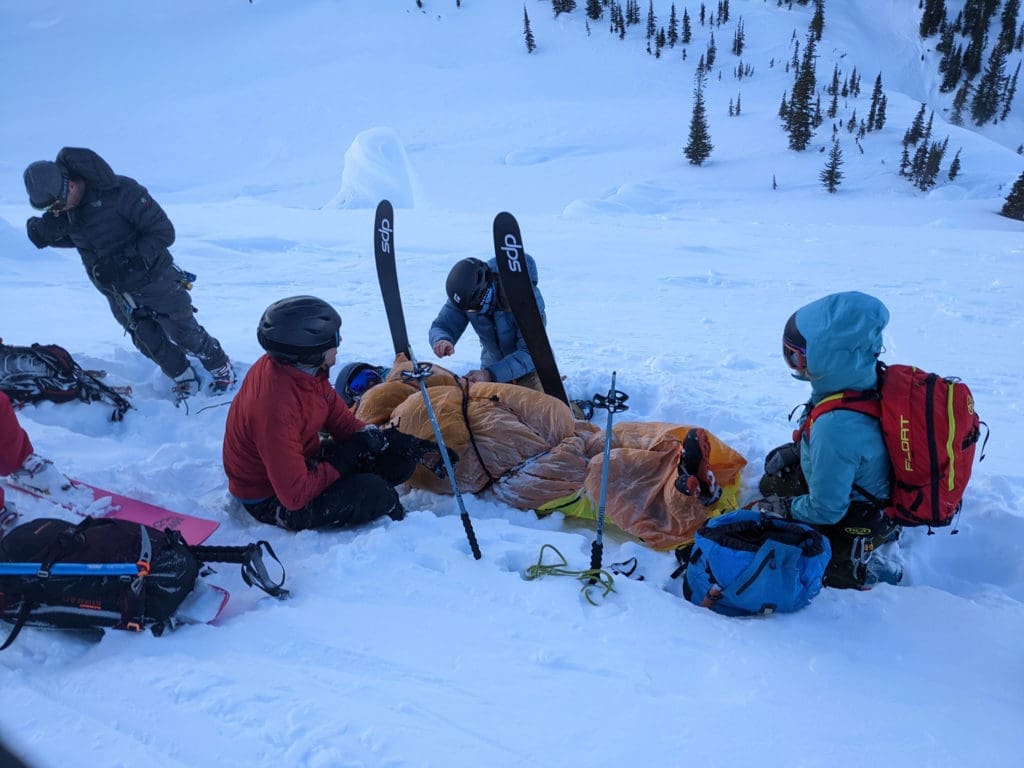
Consider taking a Wilderness First Aid or Wilderness First Responder Course.
IF HELICOPTER COMES TO YOUR AID
-Secure loose items so they do not blow away
-When heli lands, wait for rescuer to come to you
Do not approach any helicopter from the rear, always from the downhill side. Also do not approach unless directed to do so by the pilot.
Summary
Again, let me reiterate that doing a real rescue sucks. It’s likely someone that you know well (a romantic partner, a friend, a family member). It takes a lot of practice to get good at rescue and, even once mastered, is a perishable skill. The more you can practice, the more the steps outlined above will be muscle memory. Hopefully you’ll never need to use your rescue skills, but it’s still best to be fresh on the most up to date practices and advances in the industry by taking an Avalanche Rescue Course at least every other year.
Below is a great video put out by BCA that summarizes beacon searching well. Skip to 2:34 to get the most useful info.
Learn more in The Backcountry Skiing Guide. Shred safe friends!

